Dynamics 365 Business Central overview
Connect Microsoft Dynamics 365 Business Central connection flow and available support
This page covers Microsoft Dynamics 365 Business Central — Microsoft's accounting and ERP product for small and mid-sized businesses, with a quick connection flow.
It does not cover Microsoft Dynamics 365 Finance & Operations (F&O), the separate enterprise-grade ERP for large organisations. If your business runs F&O, follow Dynamics 365 F&O overview instead.
Your financial institution has requested to view, create or modify your business's financial data via your Microsoft Dynamics 365 Business Central account. This is needed to deliver financial services to you. You will follow a secure connection flow to establish a digital link to your Dynamics 365 Business Central account.
Check your software plan or version
If you need to check the plan or version of the accounting software you are using, follow the steps below in Dynamics 365 Business Central.
- Web browser
- Desktop app
- Log in to Dynamics 365 Business Central.
- Click on the Cog (
⚙) button on the top right to view the Settings menu. - Select Help & Support.
- Scroll down to About Business Central for the version information.
- Open the Business Central app and log in.
- Click on the Question mark button (
?) on the top right to view the Help menu. - Select Help & Support.
- Scroll down to Troubleshooting for the version information.
Dynamics Business Central on-premise is not supported.
Prerequisites
To connect, your Business Central user must have the right permissions and license.
Follow these steps to check if your user ID has full administrator access:
-
Open the Users page
- In Business Central, use the search bar (🔎) to look for Users.
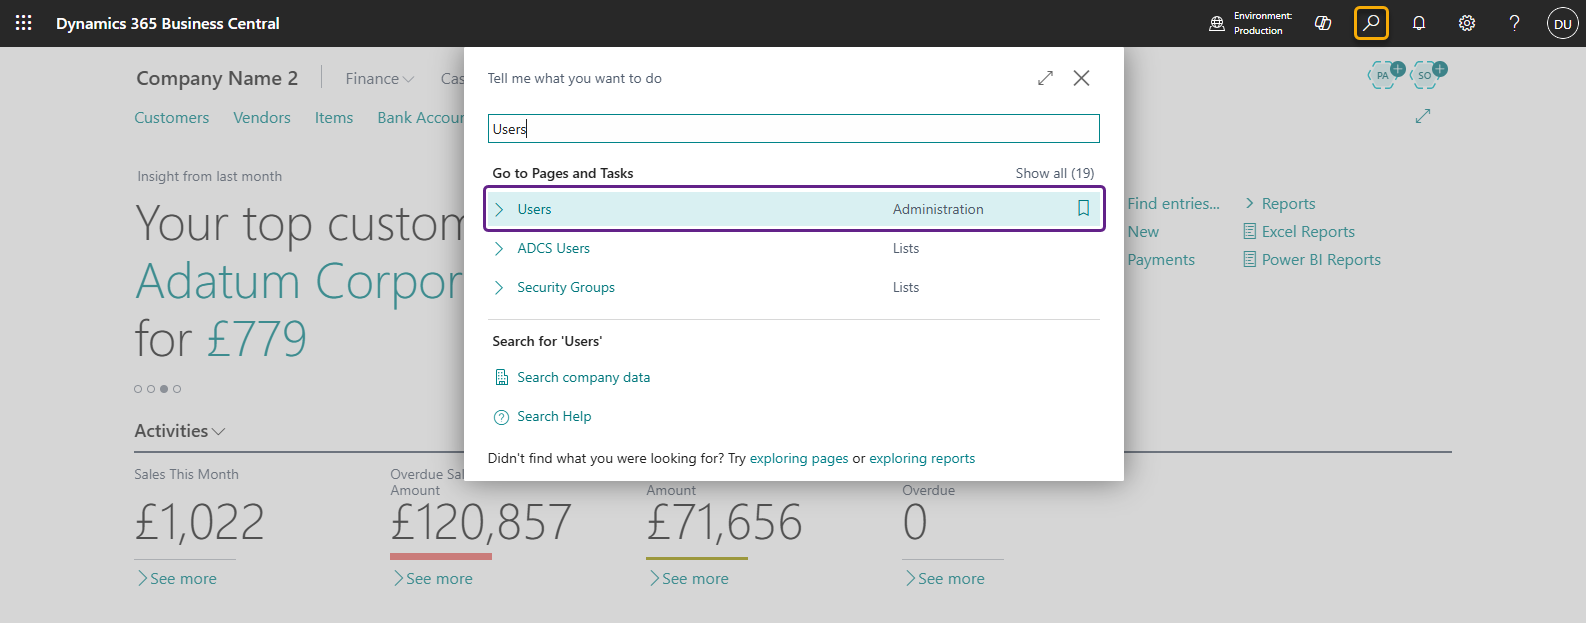
- If you can’t access this page, you don’t have the right privileges. In that case, a colleague with administrator access will need to complete the setup.
-
Check your user record
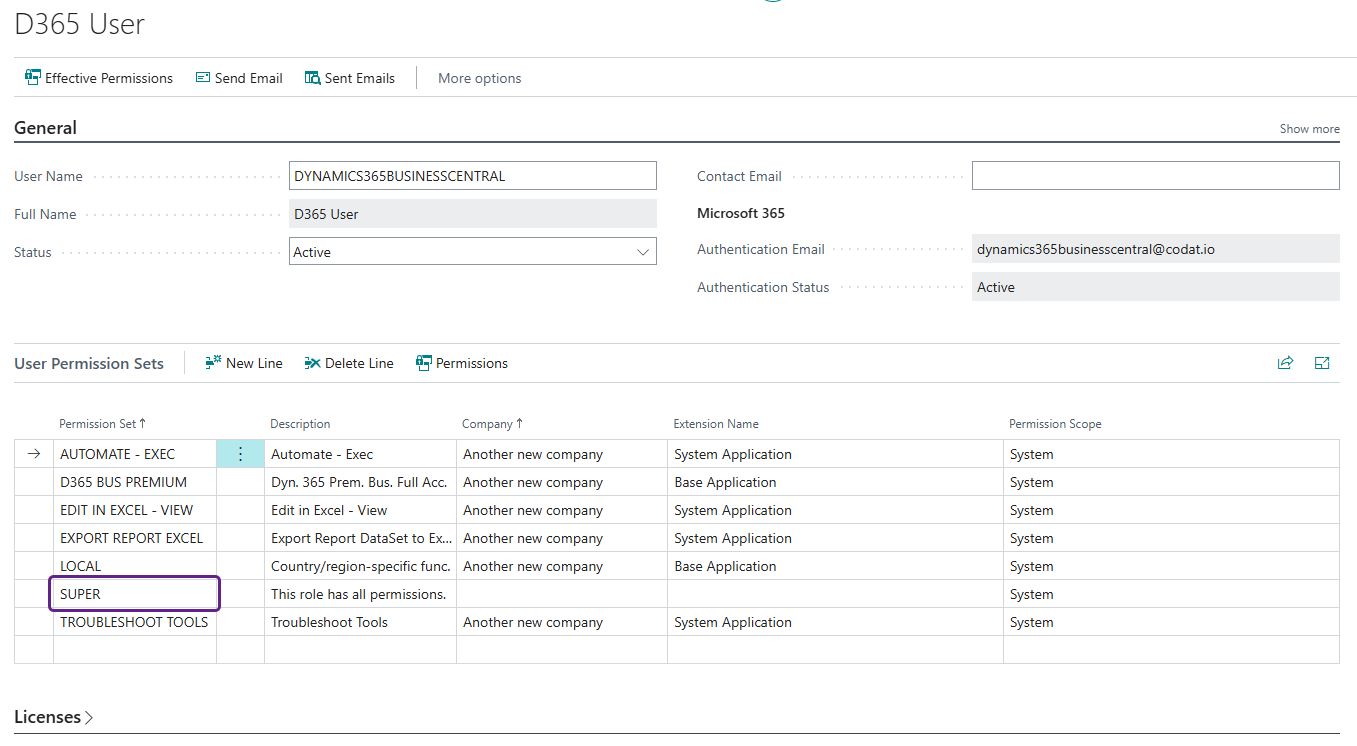
- On the Users page, find and select your own user ID.
- In the user view:
- Permission Set: Confirm that your account has the SUPER permission set. If it doesn’t, you’ll need a colleague with this level of access to complete the connection.
- Licenses: Under the Licenses tab, confirm you have one of the following:
- Dynamics 365 Business Central Premium
- Dynamics 365 Business Central Essentials
- Dynamics 365 Business Central for IWs
 If you don’t have one of these, you’ll need a colleague with the correct license to complete the connection.
- Permission Set: Confirm that your account has the SUPER permission set. If it doesn’t, you’ll need a colleague with this level of access to complete the connection.