Create Entra App in Azure
Get help if you have questions or experience issues when creating an Entra App in Microsoft Azure
To establish a digital connection with Dynamics 365 F&O, you need to create a dedicated Entra App in Microsoft Azure first. It's an access management application that will allow us to securely interact with your Dynamics 365 F&O application and its data.
You need login credentials for a user with Azure administrator privileges to create an Entra App.
Create Entra App
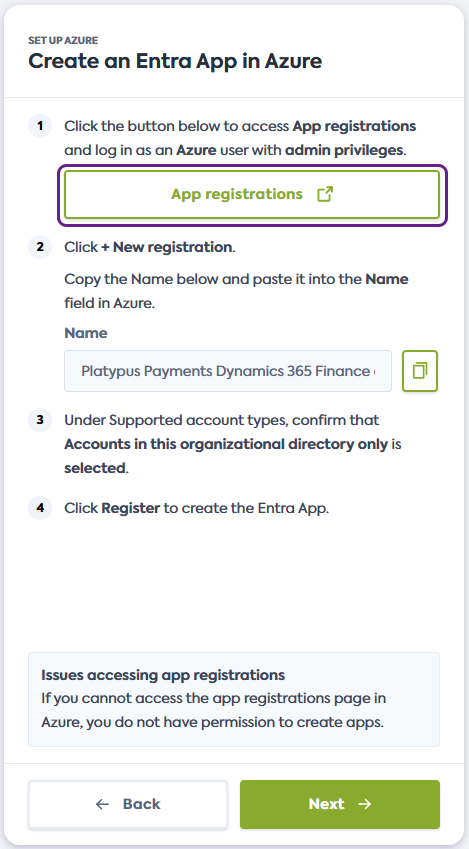
To create an Entra App, complete the following steps in Microsoft Azure:
-
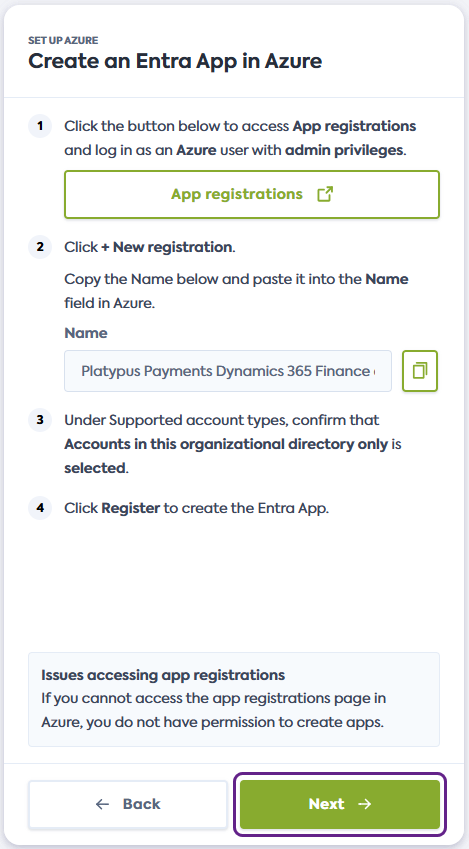
Click the link provided in the flow and log in to Azure as a user with administrator privileges. The link will open the Azure App registrations pagein a new window.
Alternatively, open your Azure instance, log in as a user with administrator privileges, and manually navigate to App registrations.
Issues accessing app registrations?If you are unable to access the App registrations page in Azure, it's likely that your Azure user doesn't have the required permissions. Log out and try again using the credentials of an Azure user with administrator privileges.
-
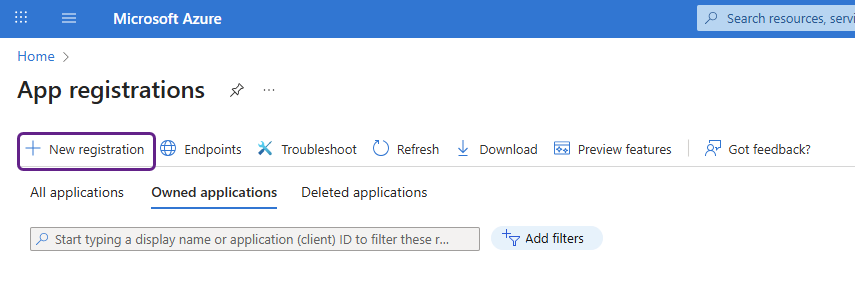
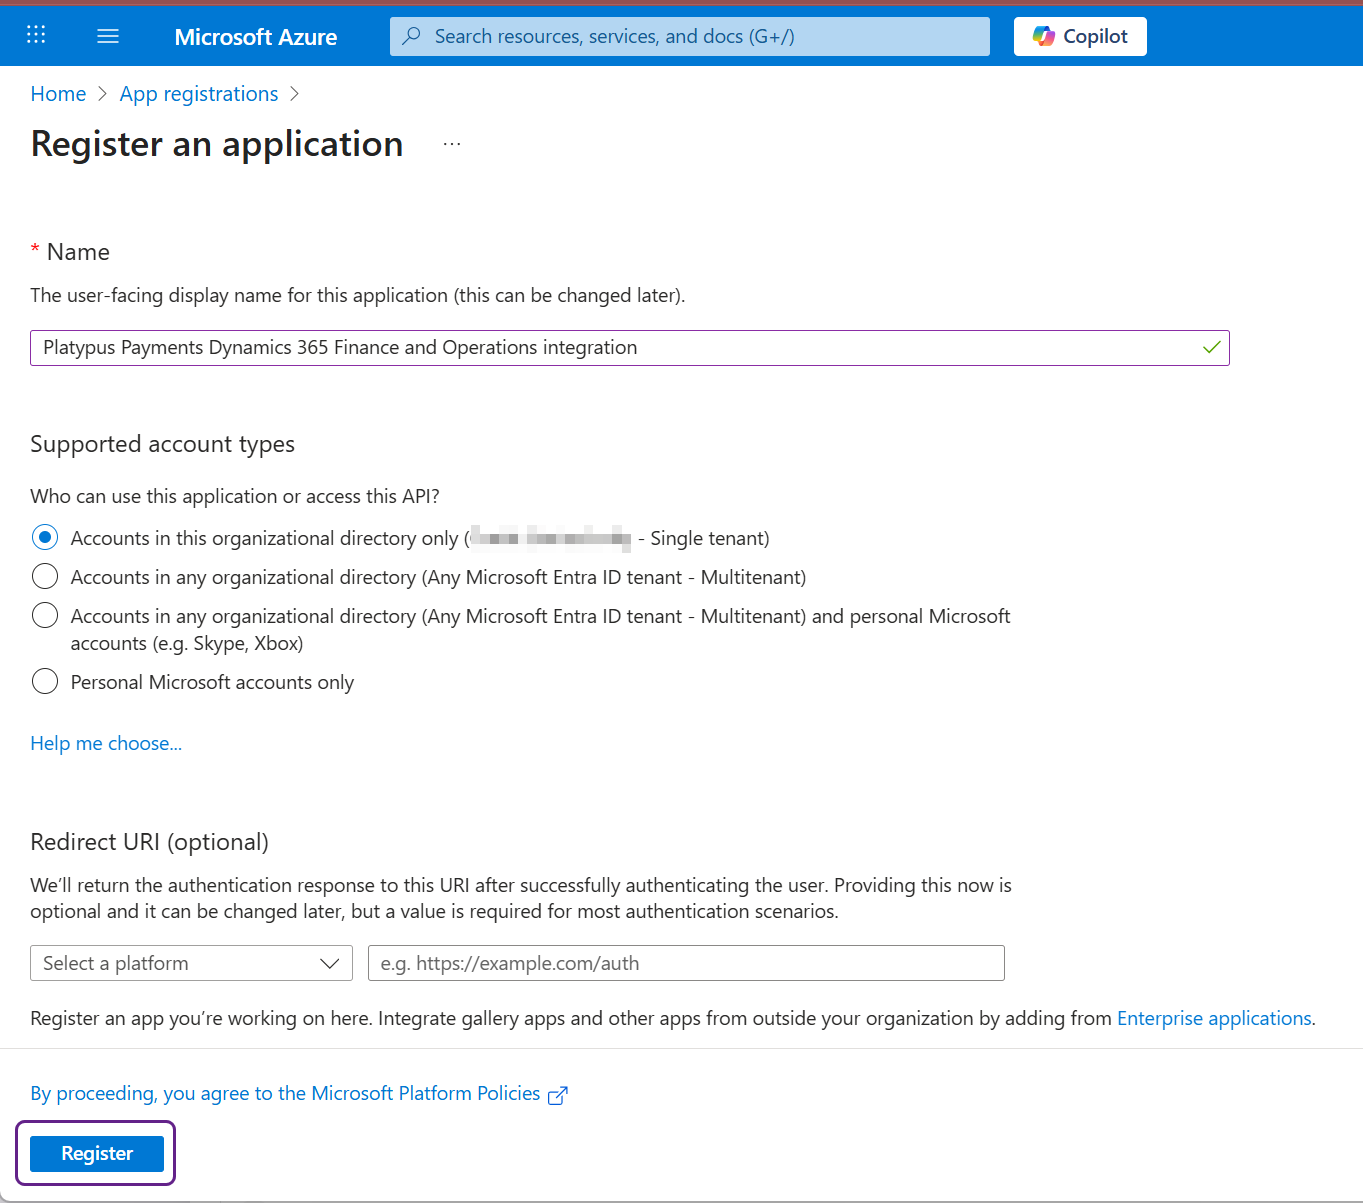
On the App registration page in Azure, click + New registration to start the creation of a new app.
-
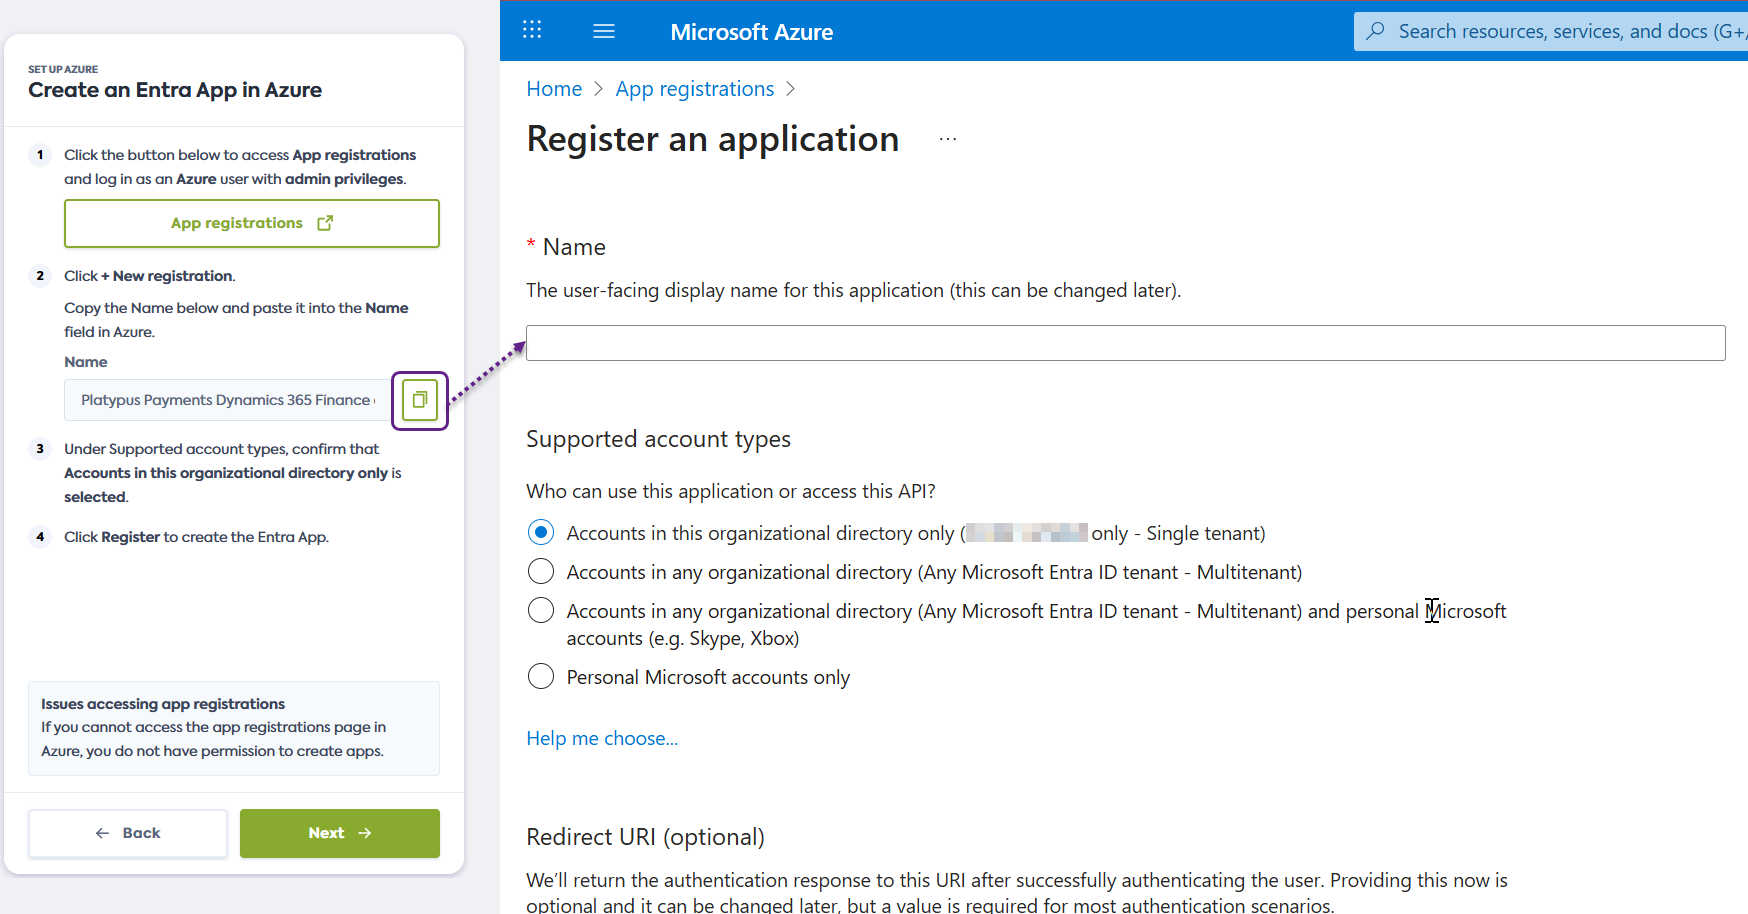
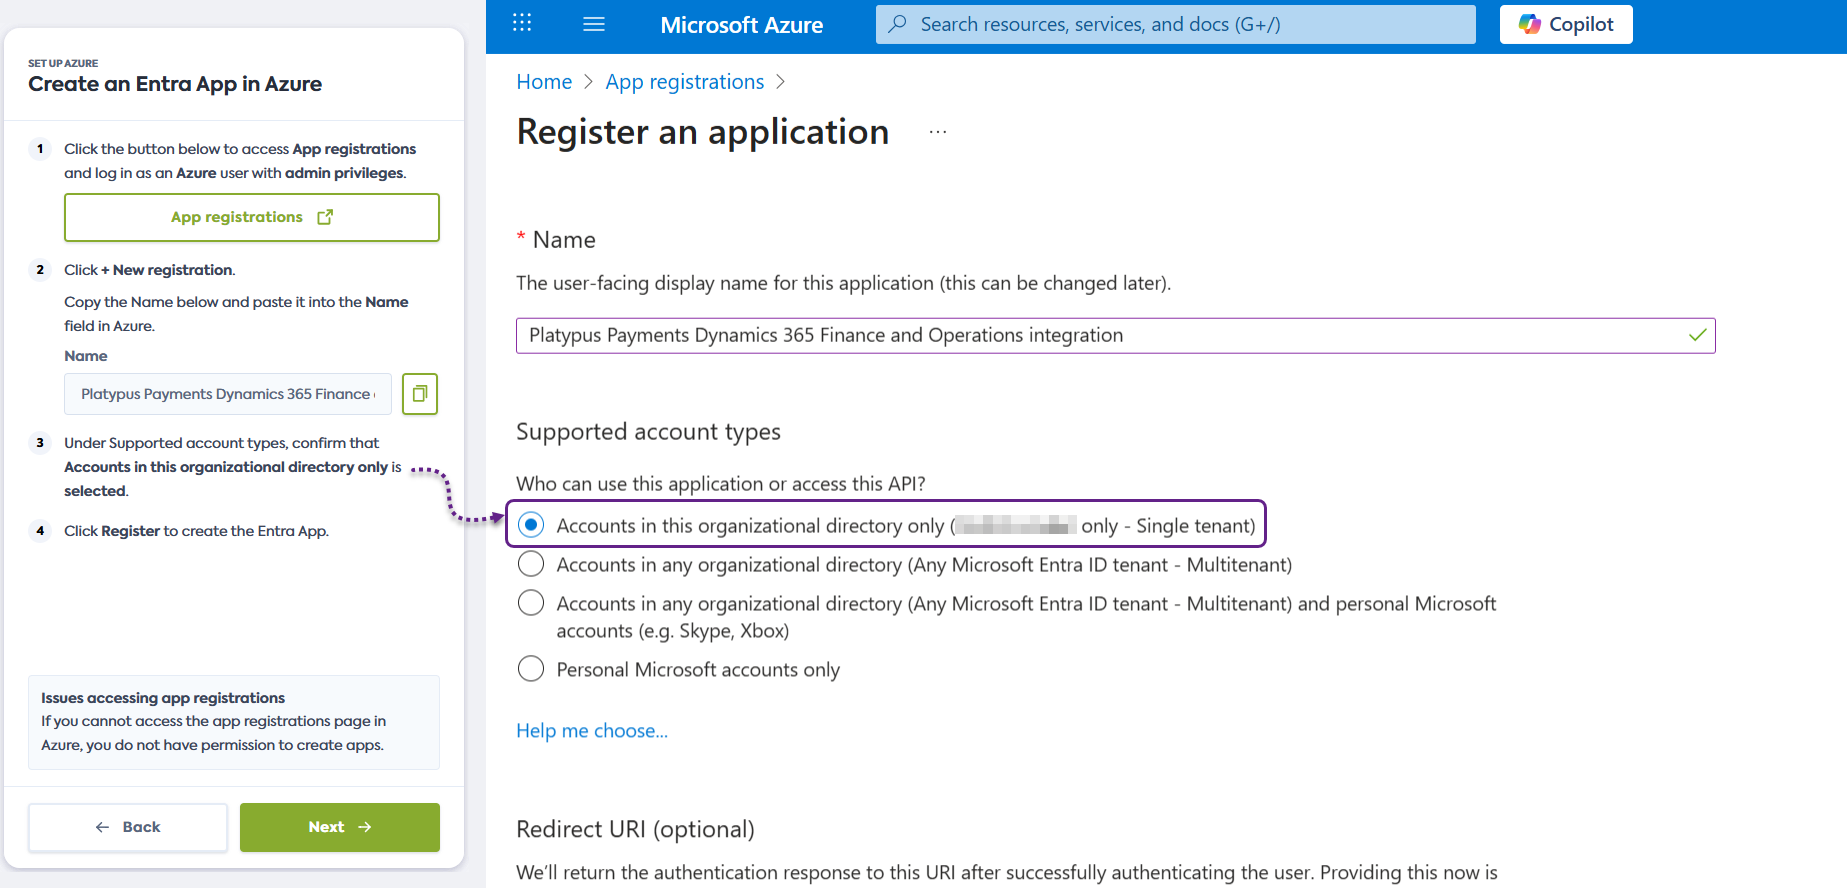
Copy the app name provided in the connection flow and paste it into the Name field in Azure.
-
In the Supported account types section, check that Accounts in this organizational directory only is selected.
-
Click Register to create the Entra App and keep the resulting screen open.
-
Click Next in the connection flow. Next, you will share the Entra App details with us.
Share Entra App details
To share the Entra App details, complete the following steps starting in Microsoft Azure:
-
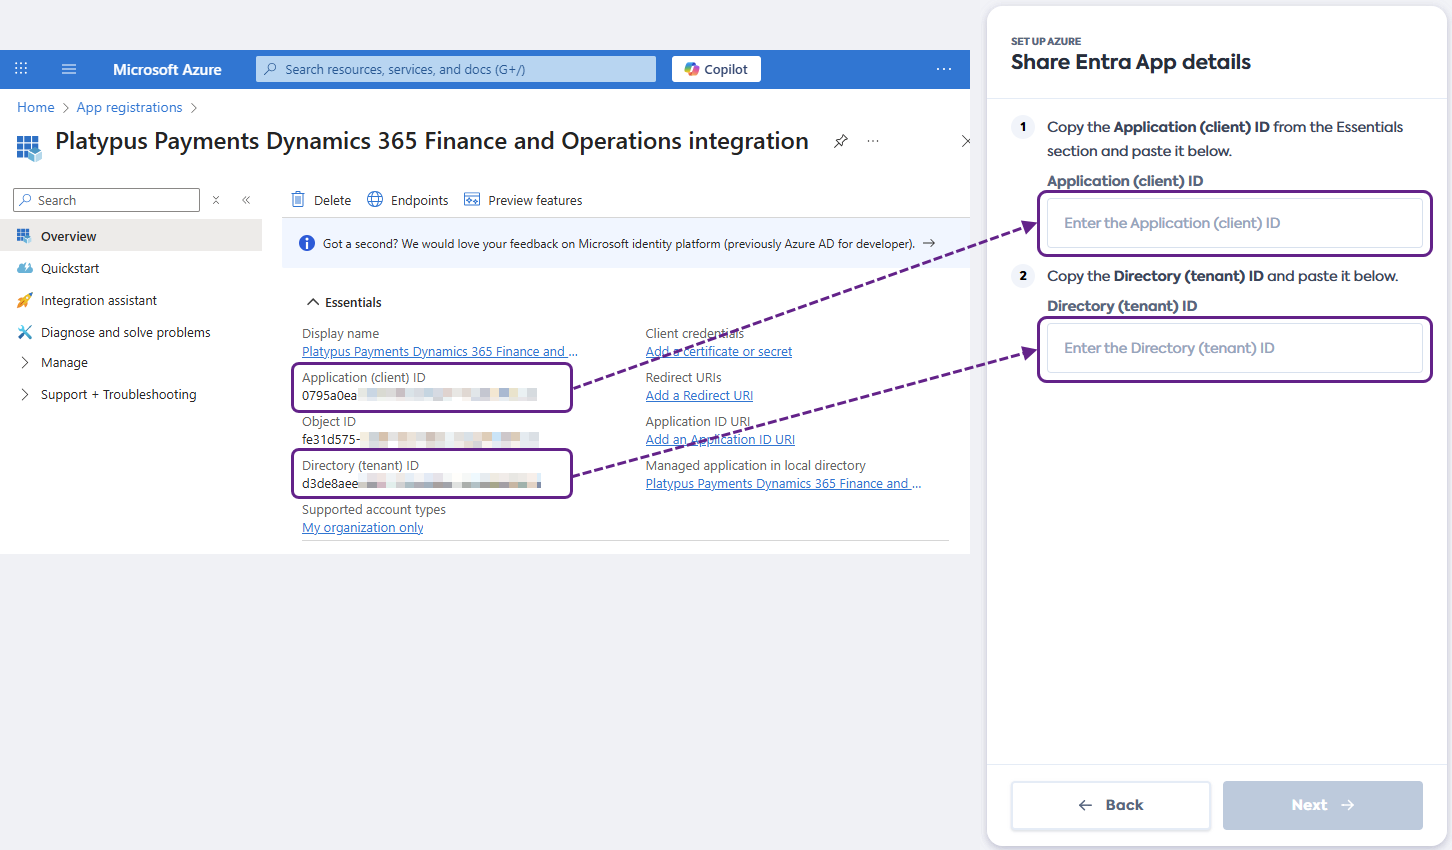
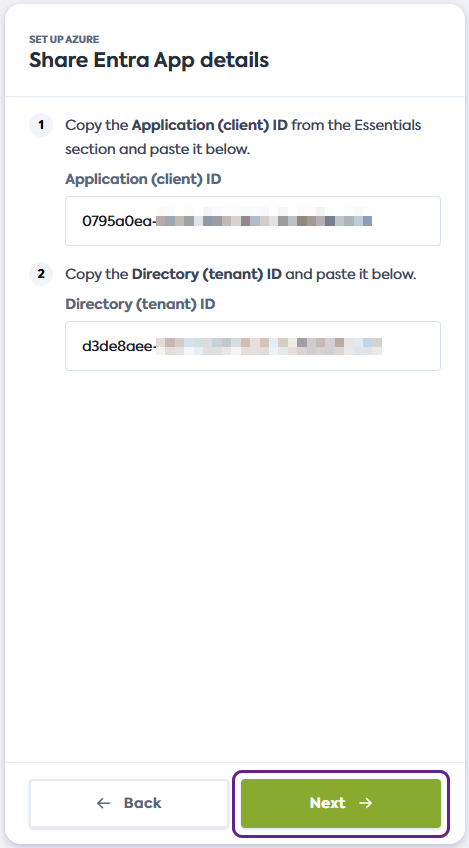
In the Essentials section of the Entra App details, copy the Application (client) ID and paste it in the corresponding field of the connection flow.
Next, copy the Directory (tenant) ID and paste it in the corresponding field.
-
Click Next in the connection flow. You will now create a client secret for your app.
Create client secret
To create a client secret for your Entra App, complete the following steps starting in Microsoft Azure:
-
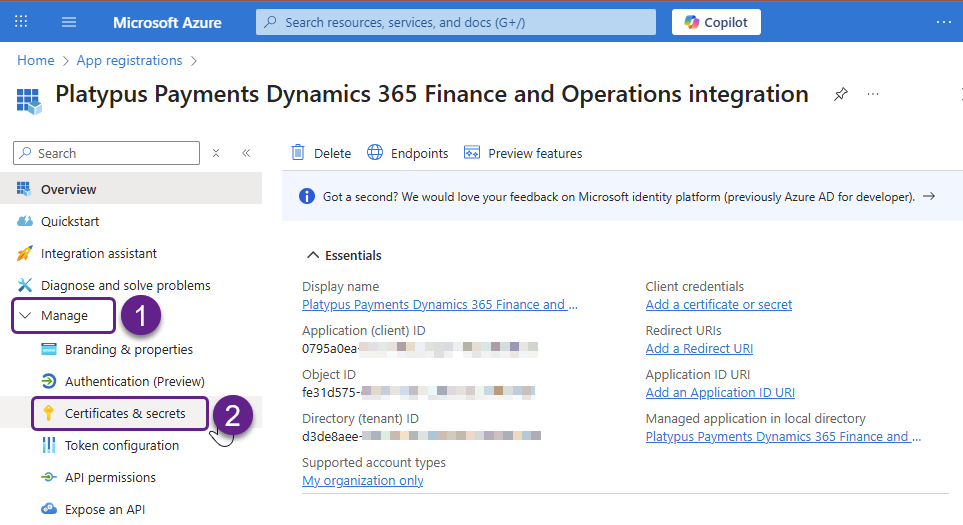
In the Entra App details screen, use the left-hand menu to navigate to Manage > Certificates & secrets.
-
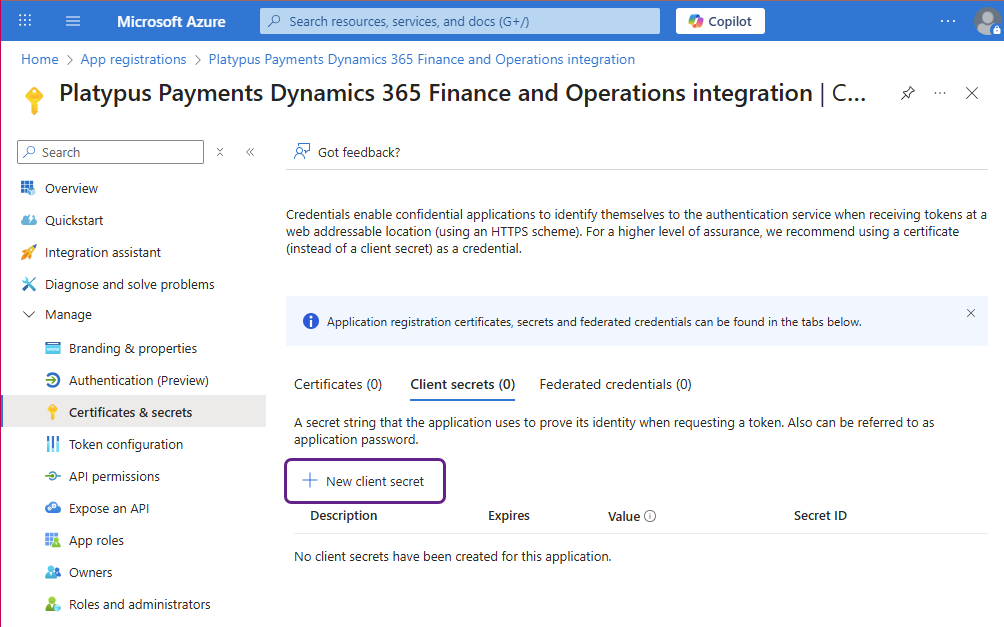
In the Client secrets tab, click + New client secret to create a new secret.
-
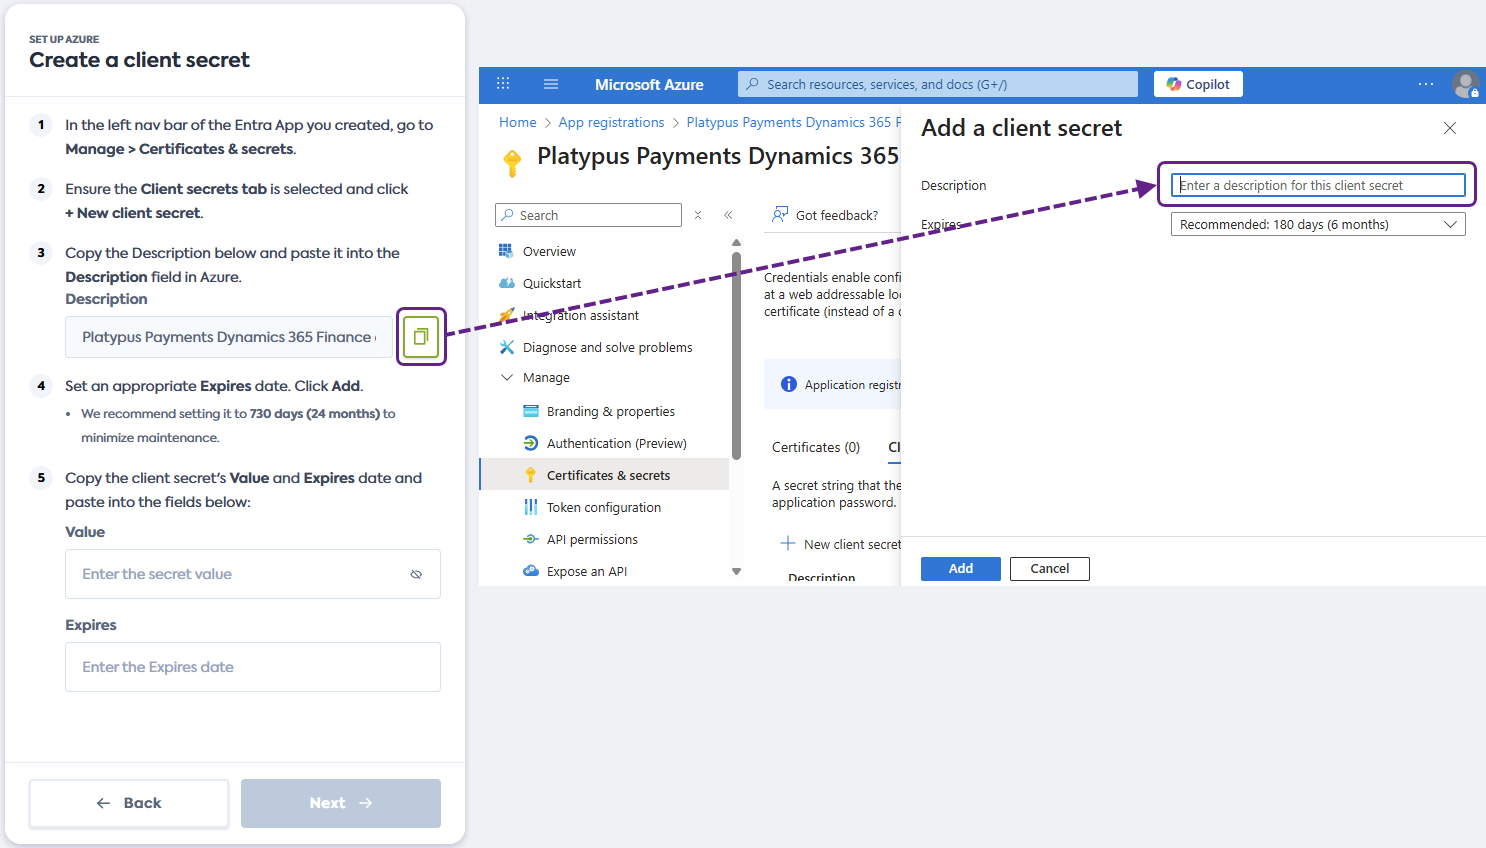
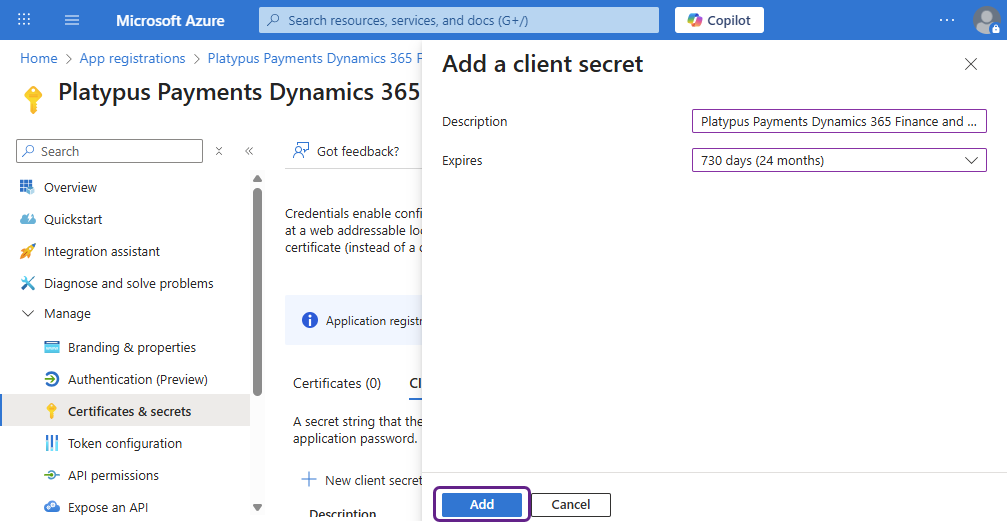
Copy the description provided in the connection flow and paste it in the Description field in Azure.
-
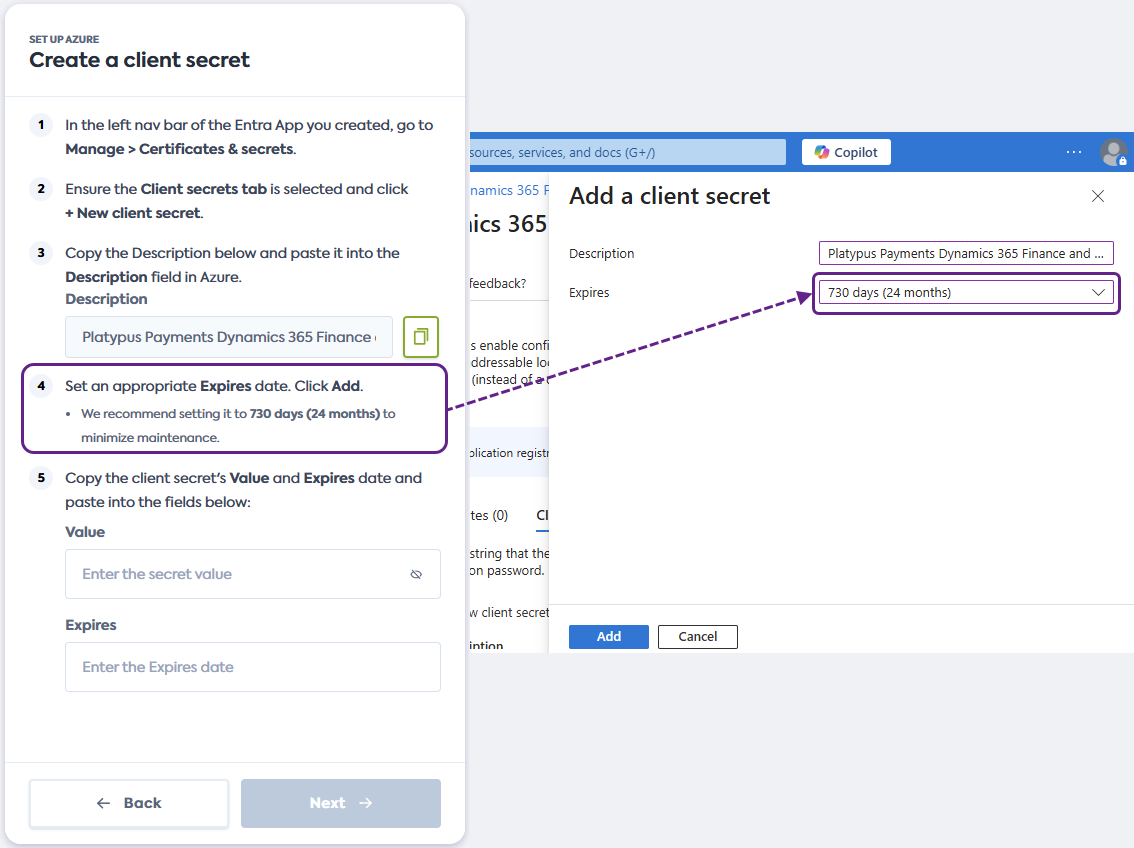
Set an Expires date for your secret. We recommend setting it to 730 days (24 months) so that you don't need to change it often.
-
Click Add to add the new client secret.
-
Copy the client secret's Value and Expires date from Azure and paste them into the corresponding fields in the flow. The Expires date must be entered in the
YYYY-MM-DDformat.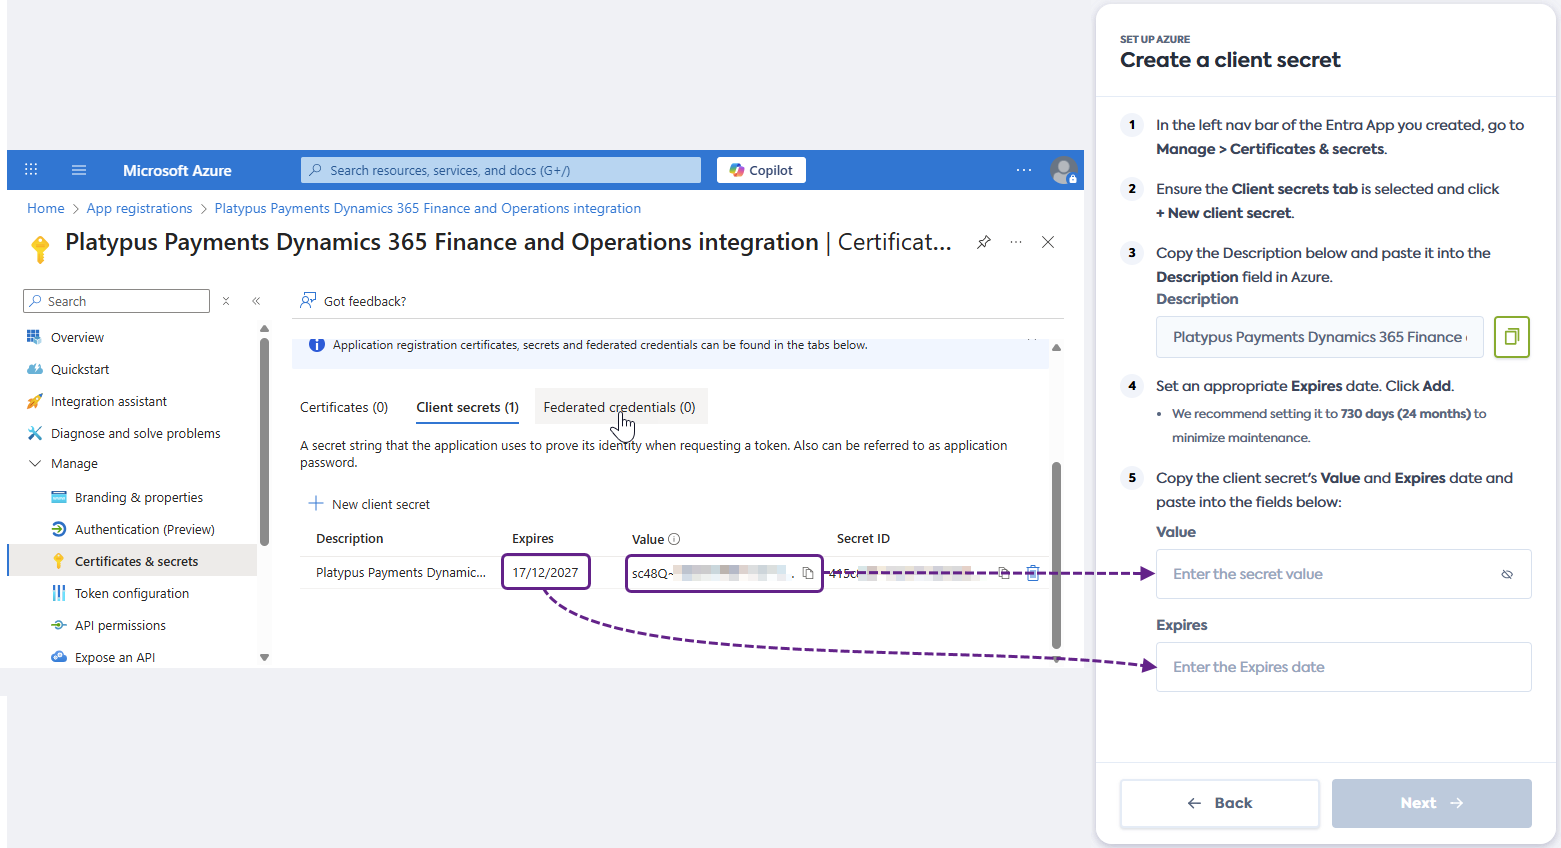
-
Click Next in the connection flow and proceed to the Create new role in Dynamics 365 F&O guide.
Resolve errors
Unable to validate client credentials
You may encounter the Unable to validate client credentials error when sharing the details of your Entra App. This error occurs when the app's credentials are incorrectly copied from Azure.
Check the following, then try again:
- Ensure you are copying the details of the correct Entra App.
- Verify that you copied and pasted the Application (client) ID, Directory (tenant) ID, client secret Value, and Expires date into the correct fields of the flow.
- Check that you entered the Expires date in the
YYYY-MM-DDformat.
If the issue persists, contact your financial institution for additional support and walkthrough.