Create new role in Dynamics 365 F&O
Get help if you have questions or experience issues when creating a new role in Microsoft Dynamics 365 Finance & Operations
Next, you need to create a new role in Dynamics 365 F&O and assign it a set of permissions. This will ensure that the digital connection to Dynamics 365 F&O has all the required access to successfully fetch your financial data.
You need login credentials for a Dynamics 365 F&O user with administrator privileges to create a new role in F&O.
Create new role
To create a new role, complete the following steps starting in Microsoft Dynamics 365 F&O:
-
Log in to Dynamics 365 F&O as a user with administrator privileges. Copy and paste the base URL of your F&O instance into the connection flow and click Next.
Make sure that the URL you have pasted contains the
https://prefix.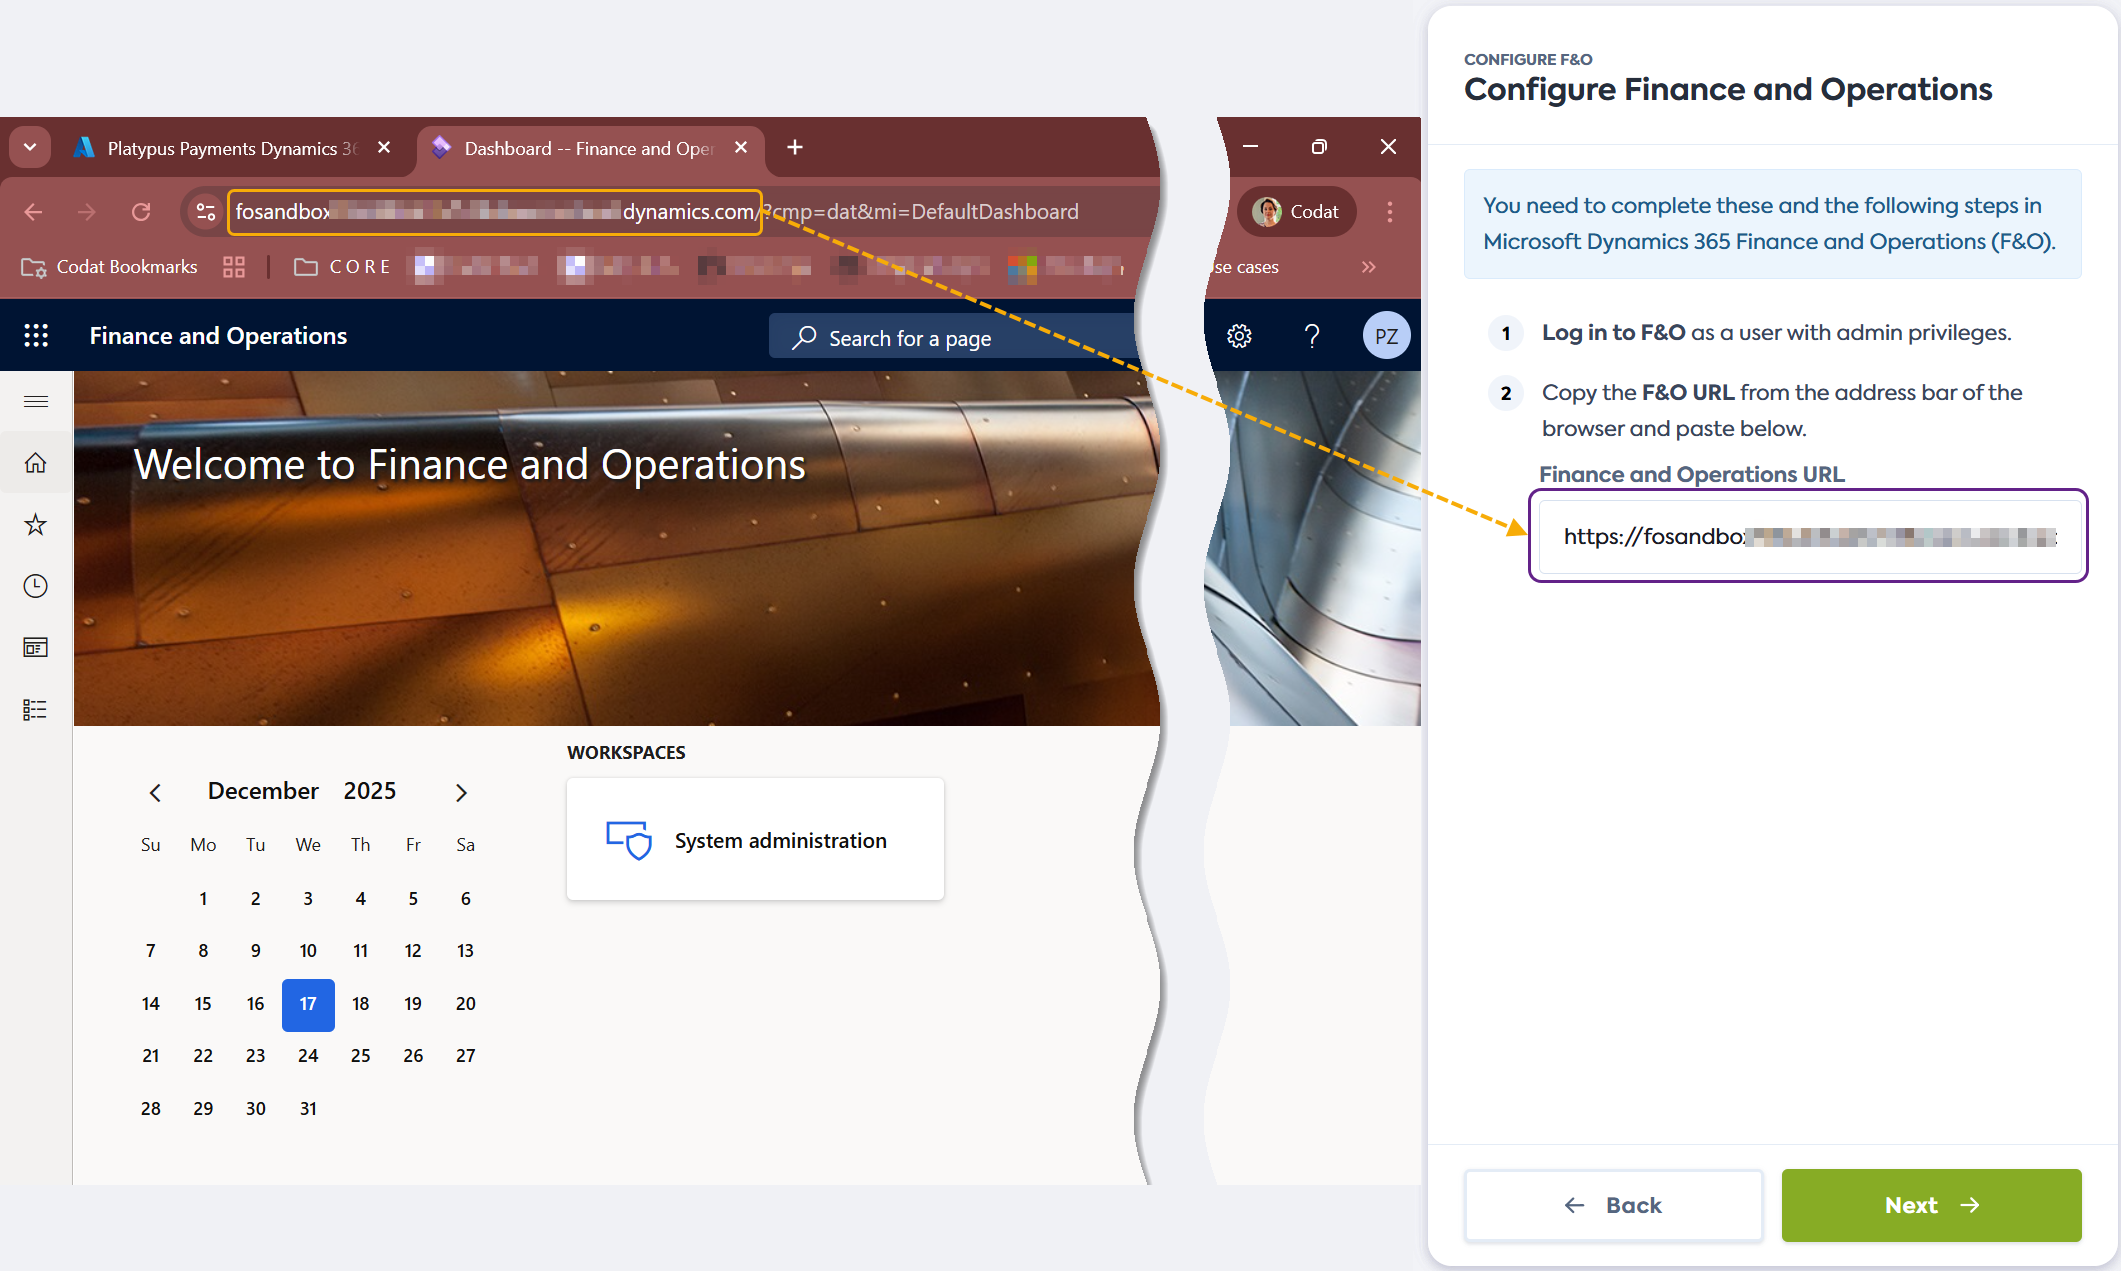
-
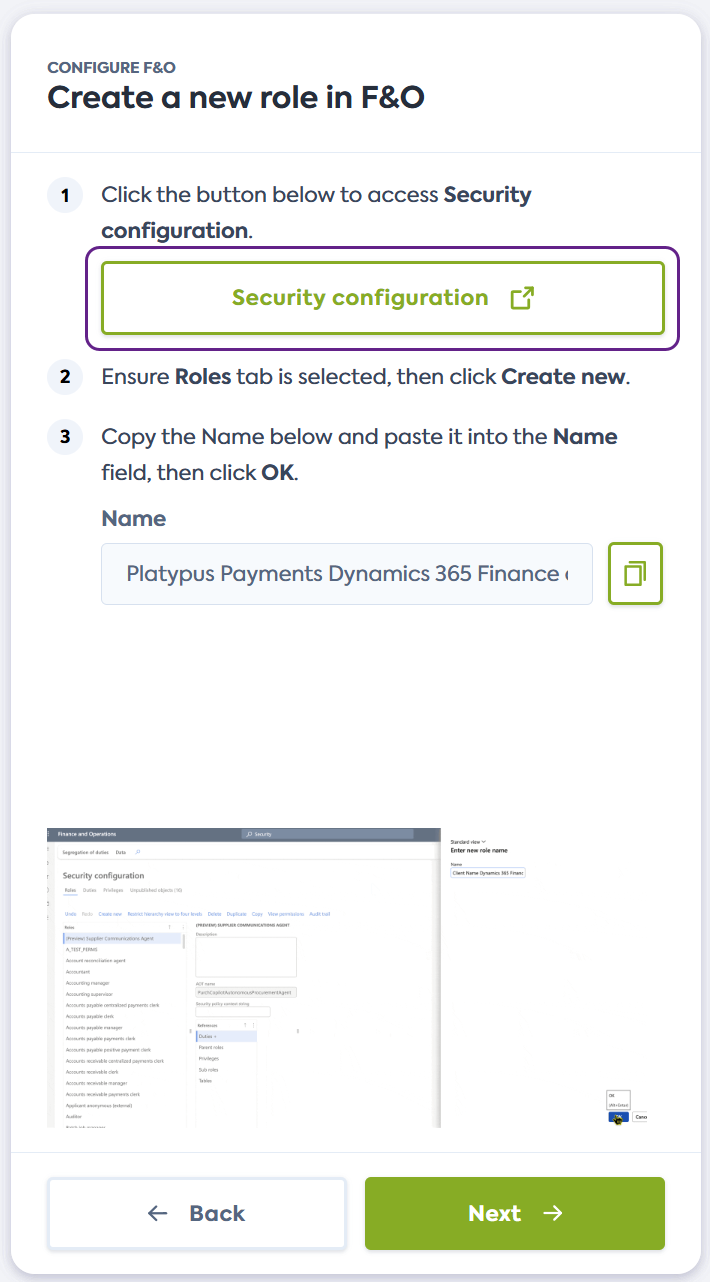
On the Create a new role in F&O screen of the connection flow, click the link provided. It will open the Security configuration page of Dynamics F&O in a new window.
Alternatively, manually navigate to Security configuration in your F&O instance.
-
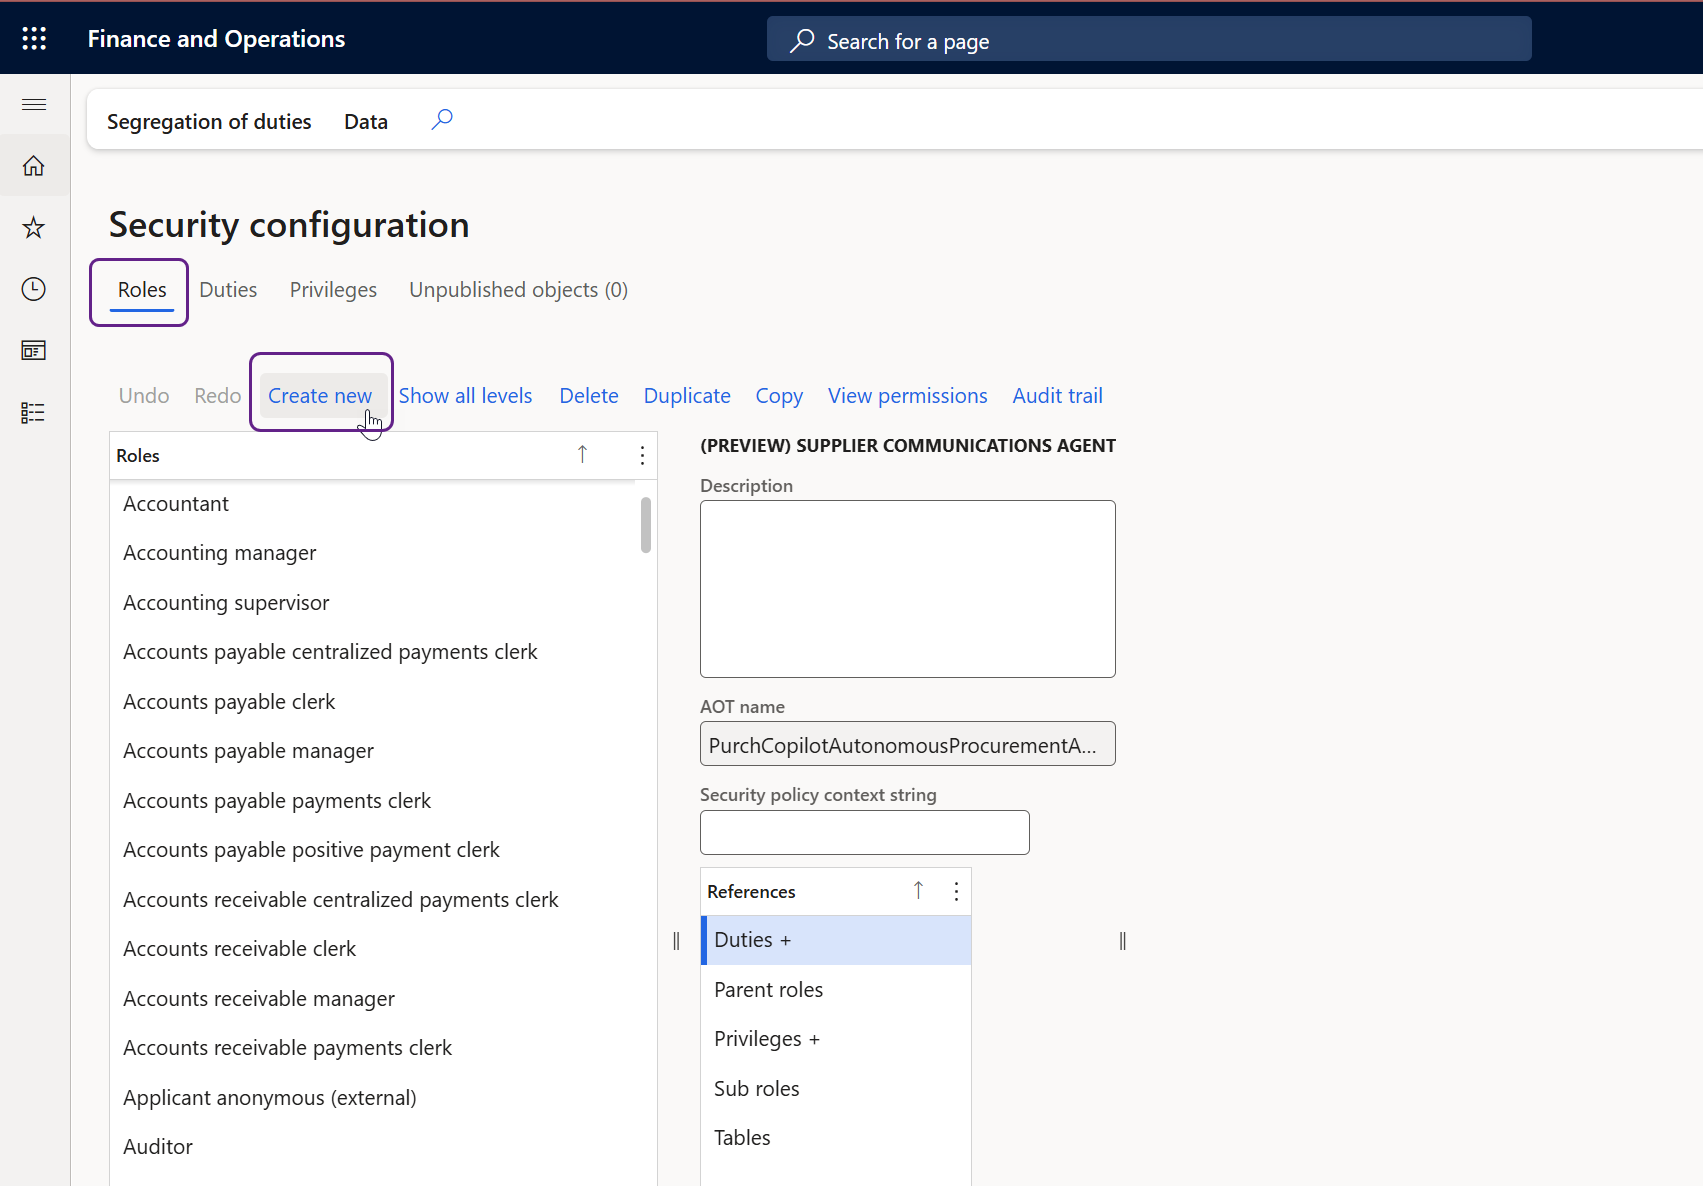
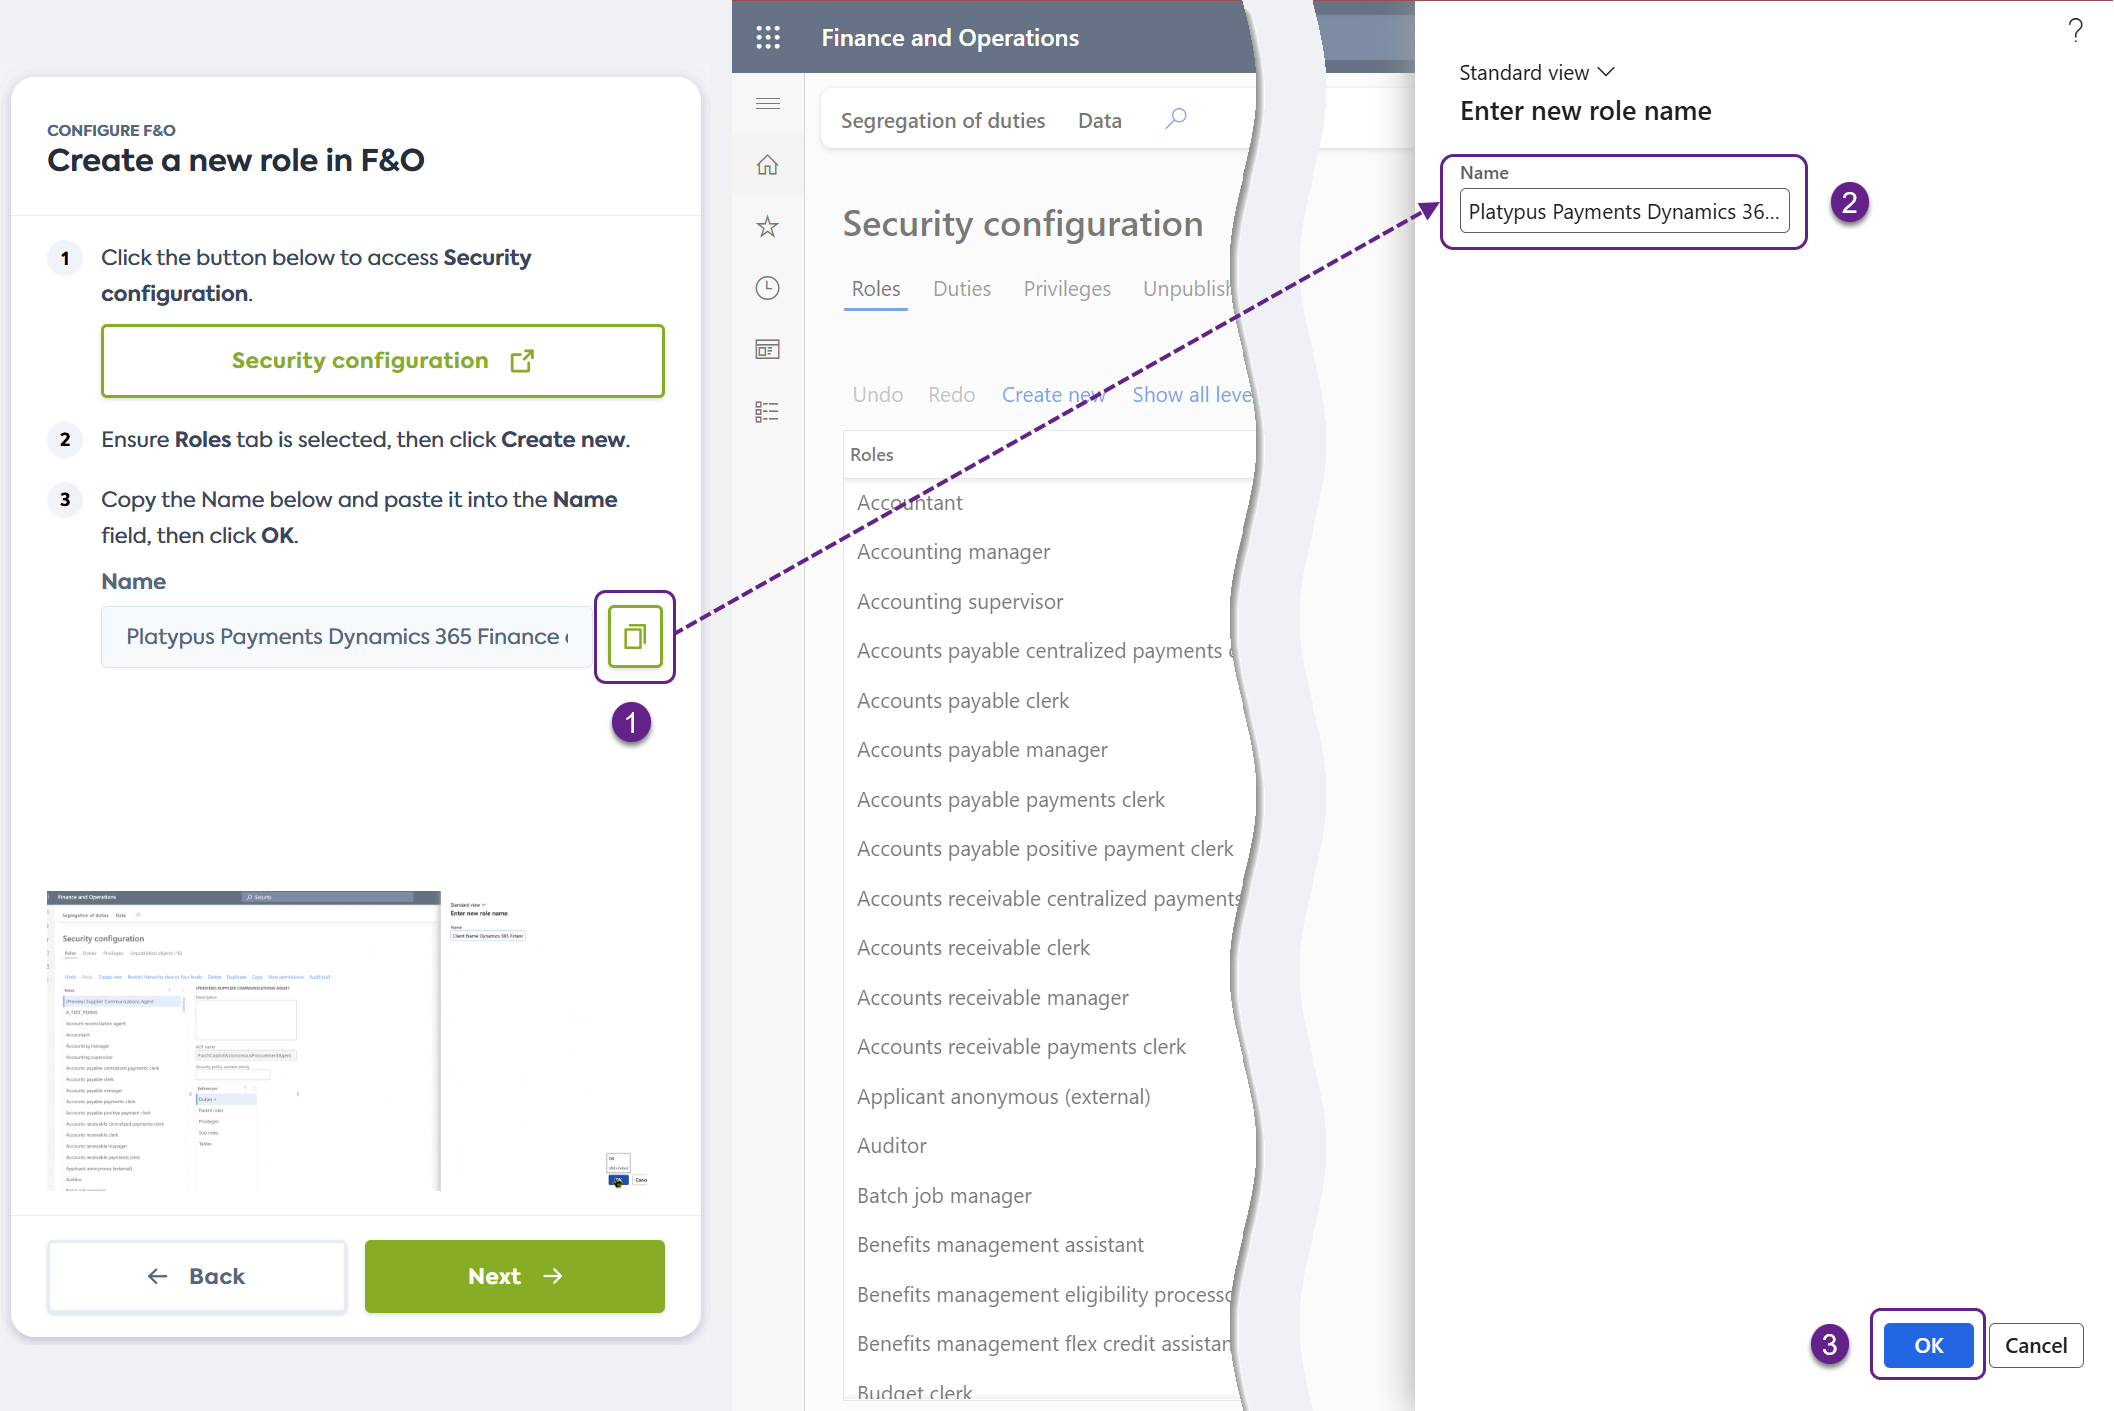
In the Roles tab, click Create new to start the creation of a new role.
-
Copy the role name provided in the connection flow and paste it into the Name field of the Security configuration screen, then click OK to create the role.
-
Click Next in the connection flow to advance to the next phase and create security configuration for the new role.
Create security configuration
To create security configuration for the role you just created, complete the following steps starting in Microsoft Dynamics 365 F&O:
-
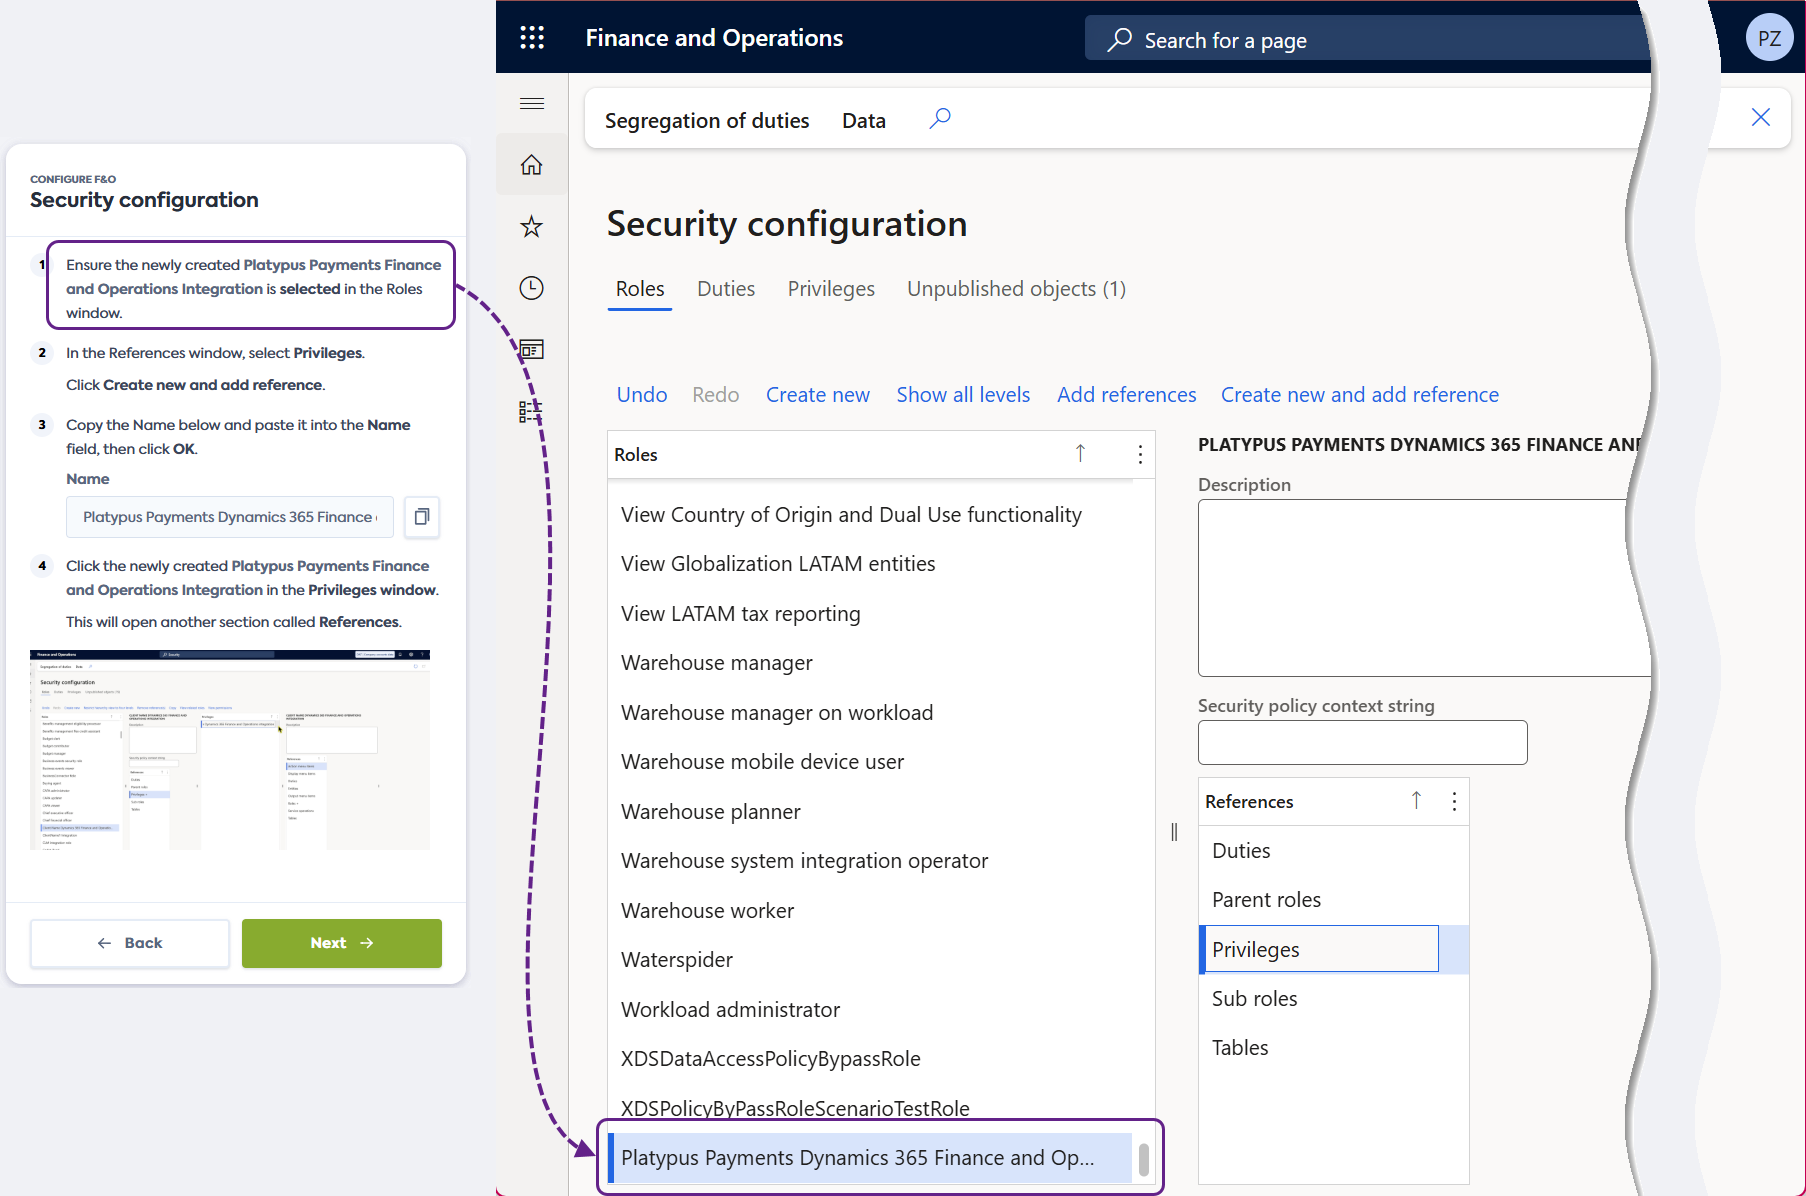
Check that the role you have just created is selected in the Roles window.
-
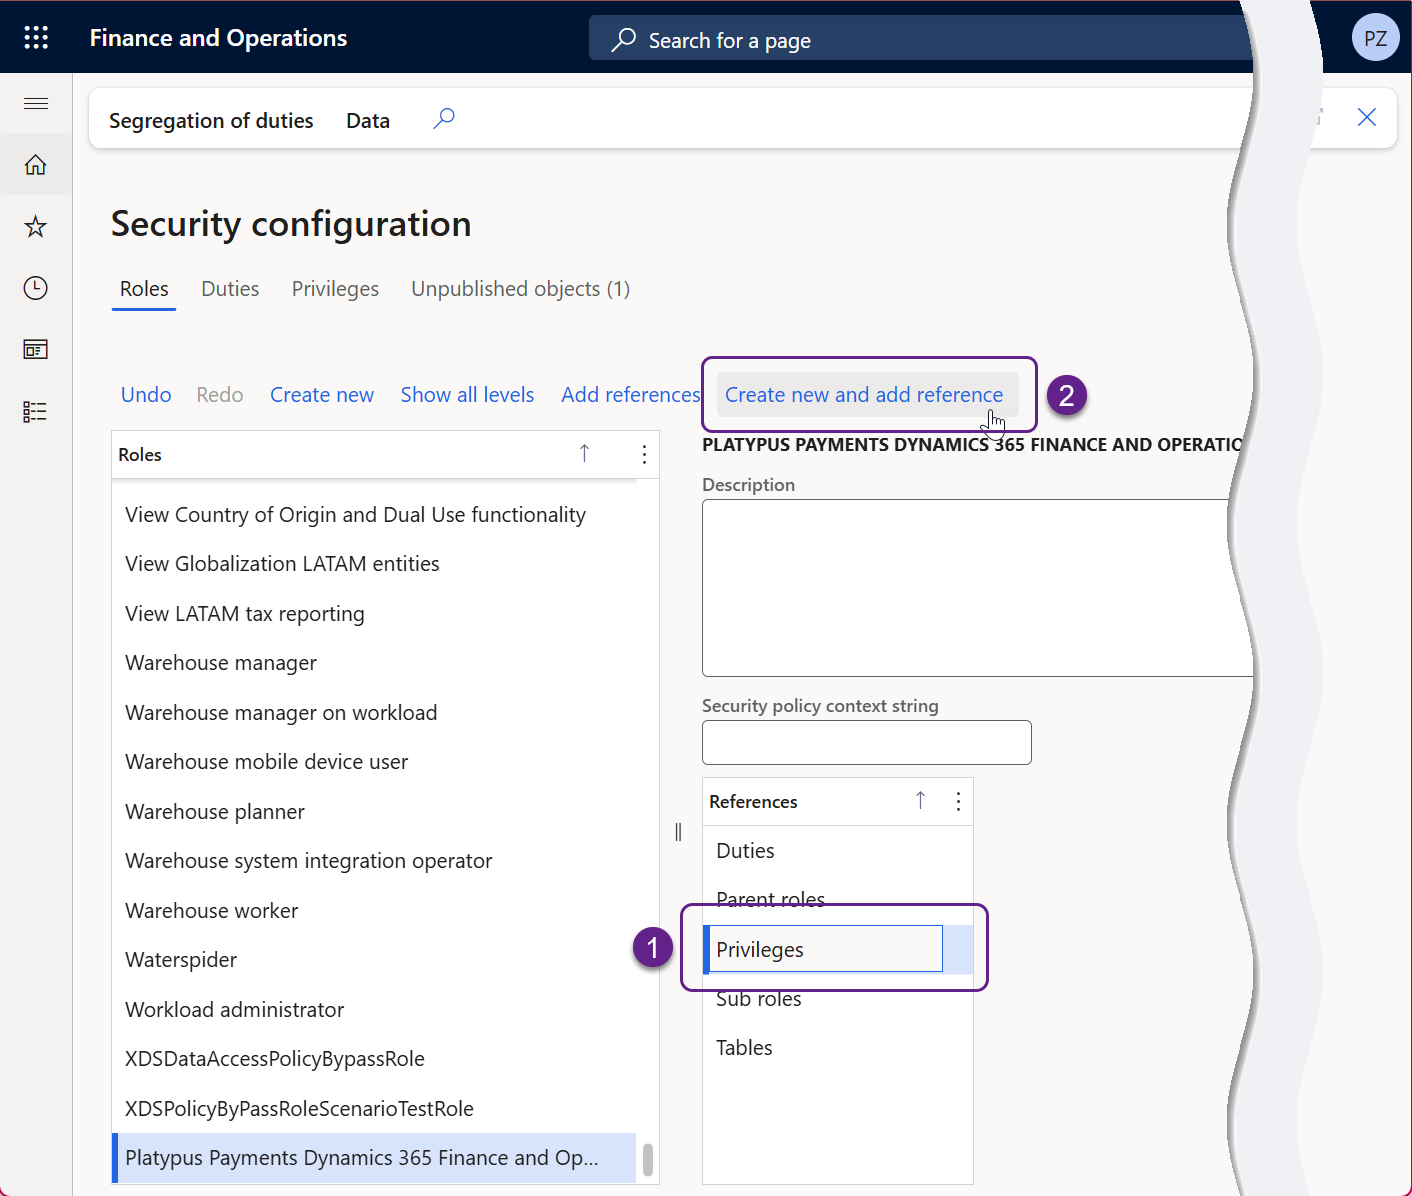
In the References section, select Privileges. Click Create new and add reference.
-
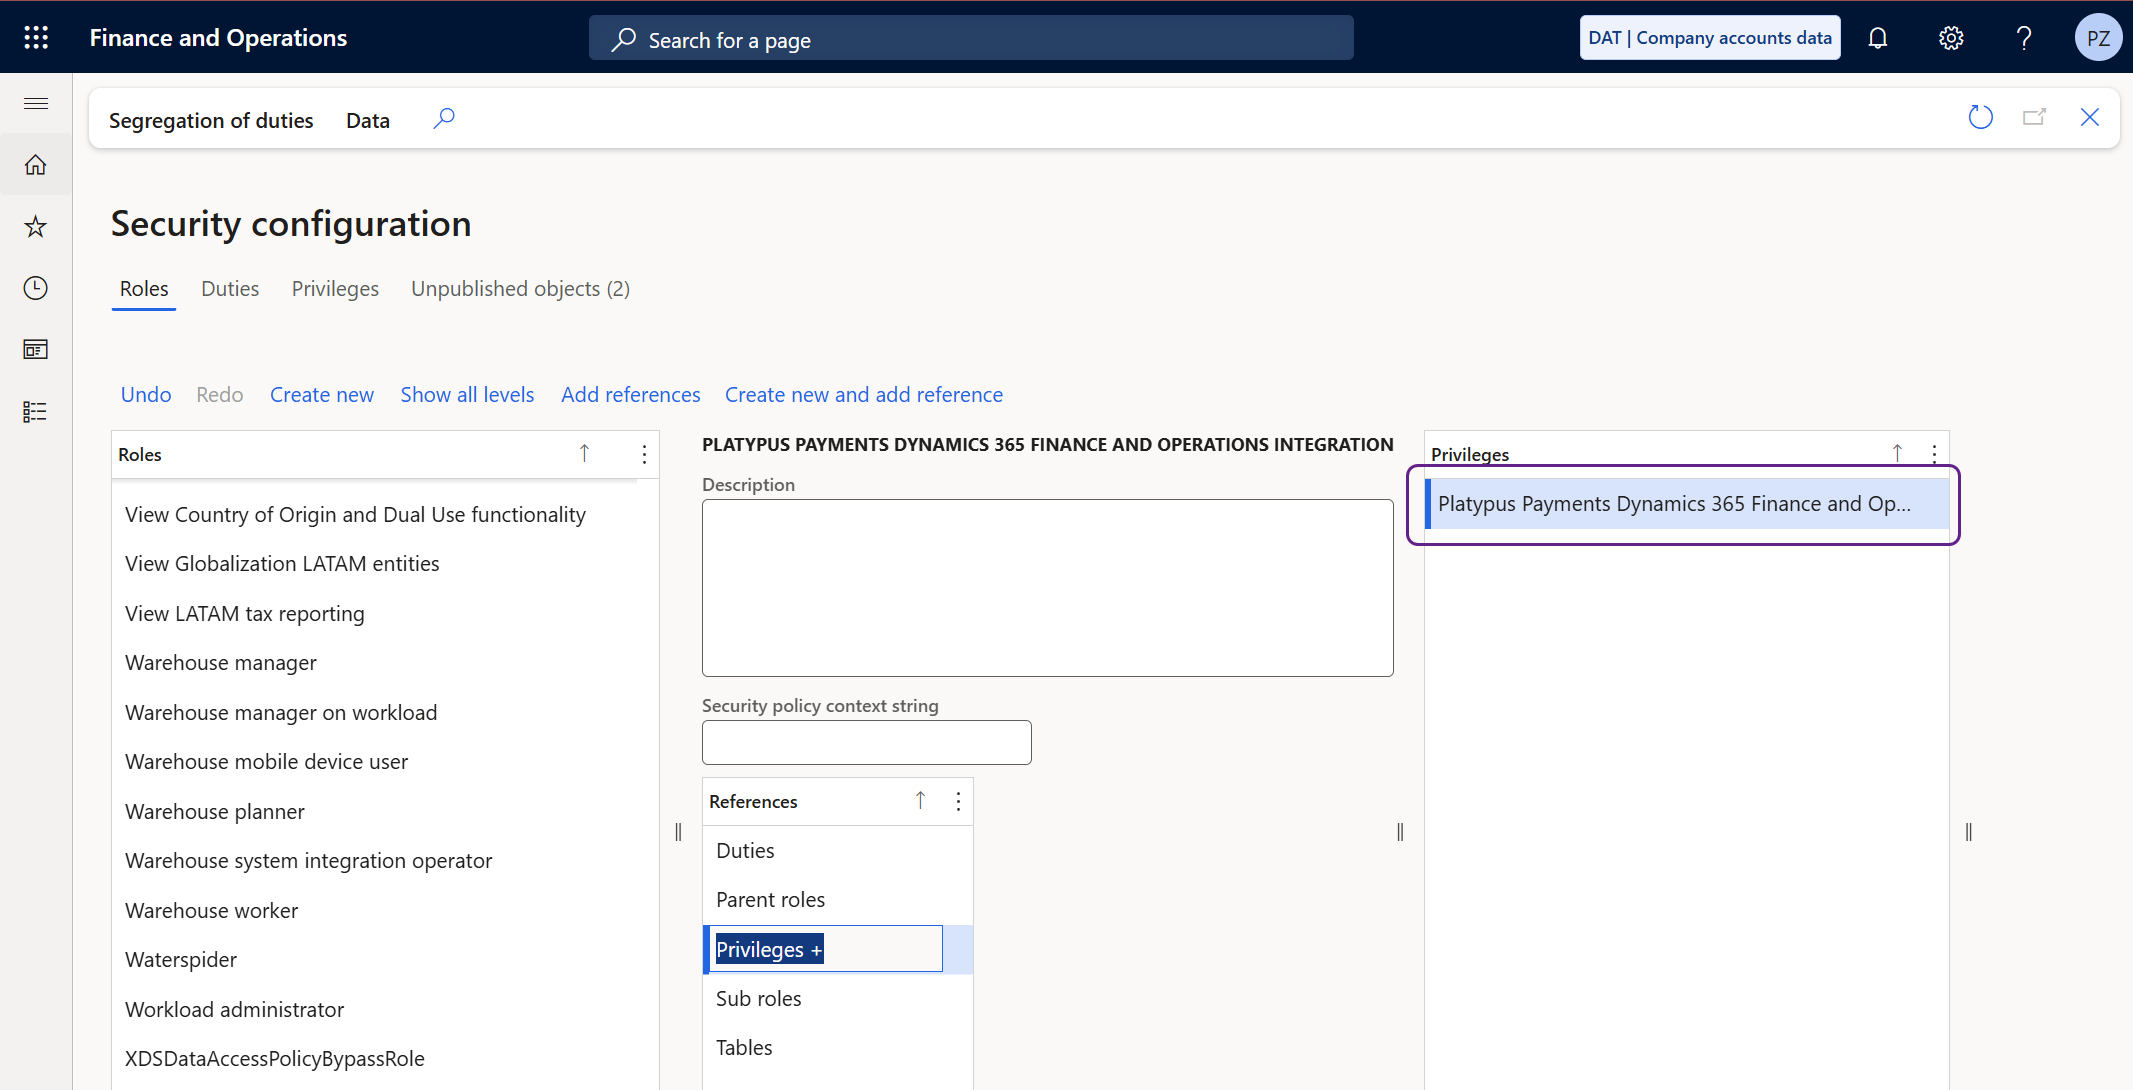
Copy the name provided in the connection flow and paste it into the Name field of the Security configuration screen, then click OK to create the privilege.

-
Click the privilege you have just created in the Privileges section. This will open another section called References.
-
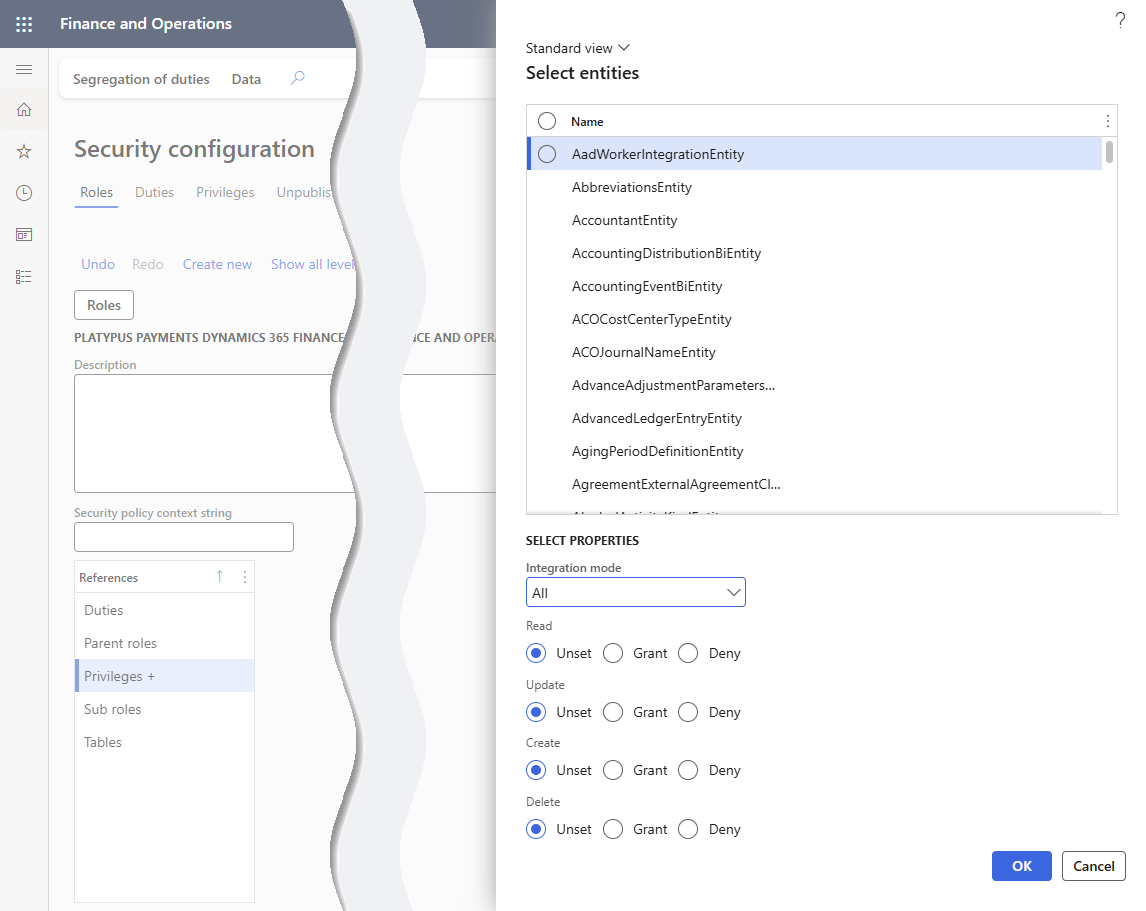
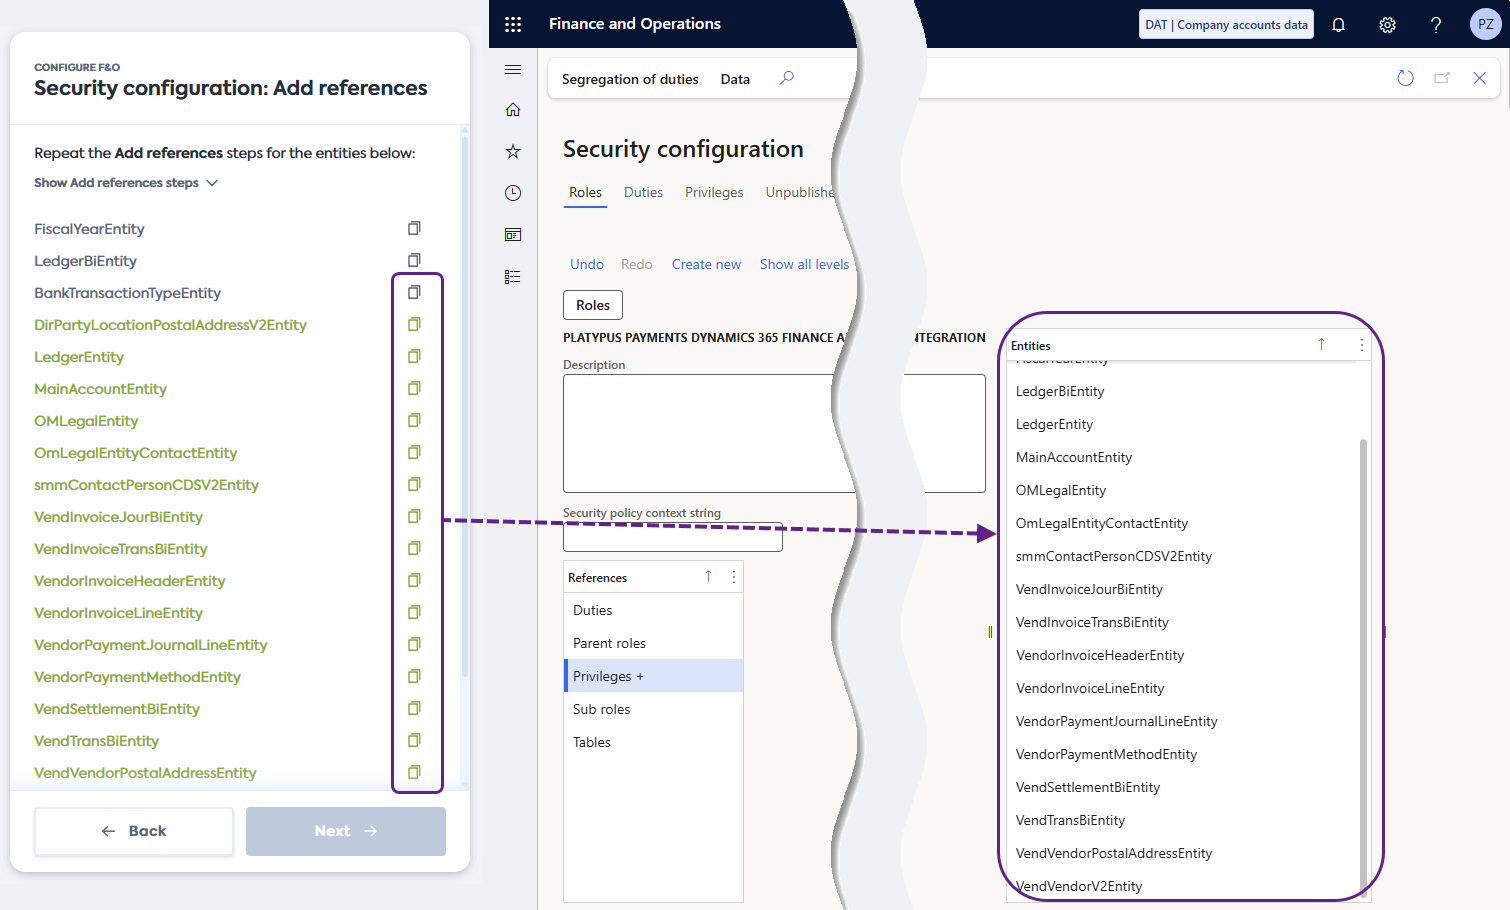
In the References section, select Entities and click Add references.
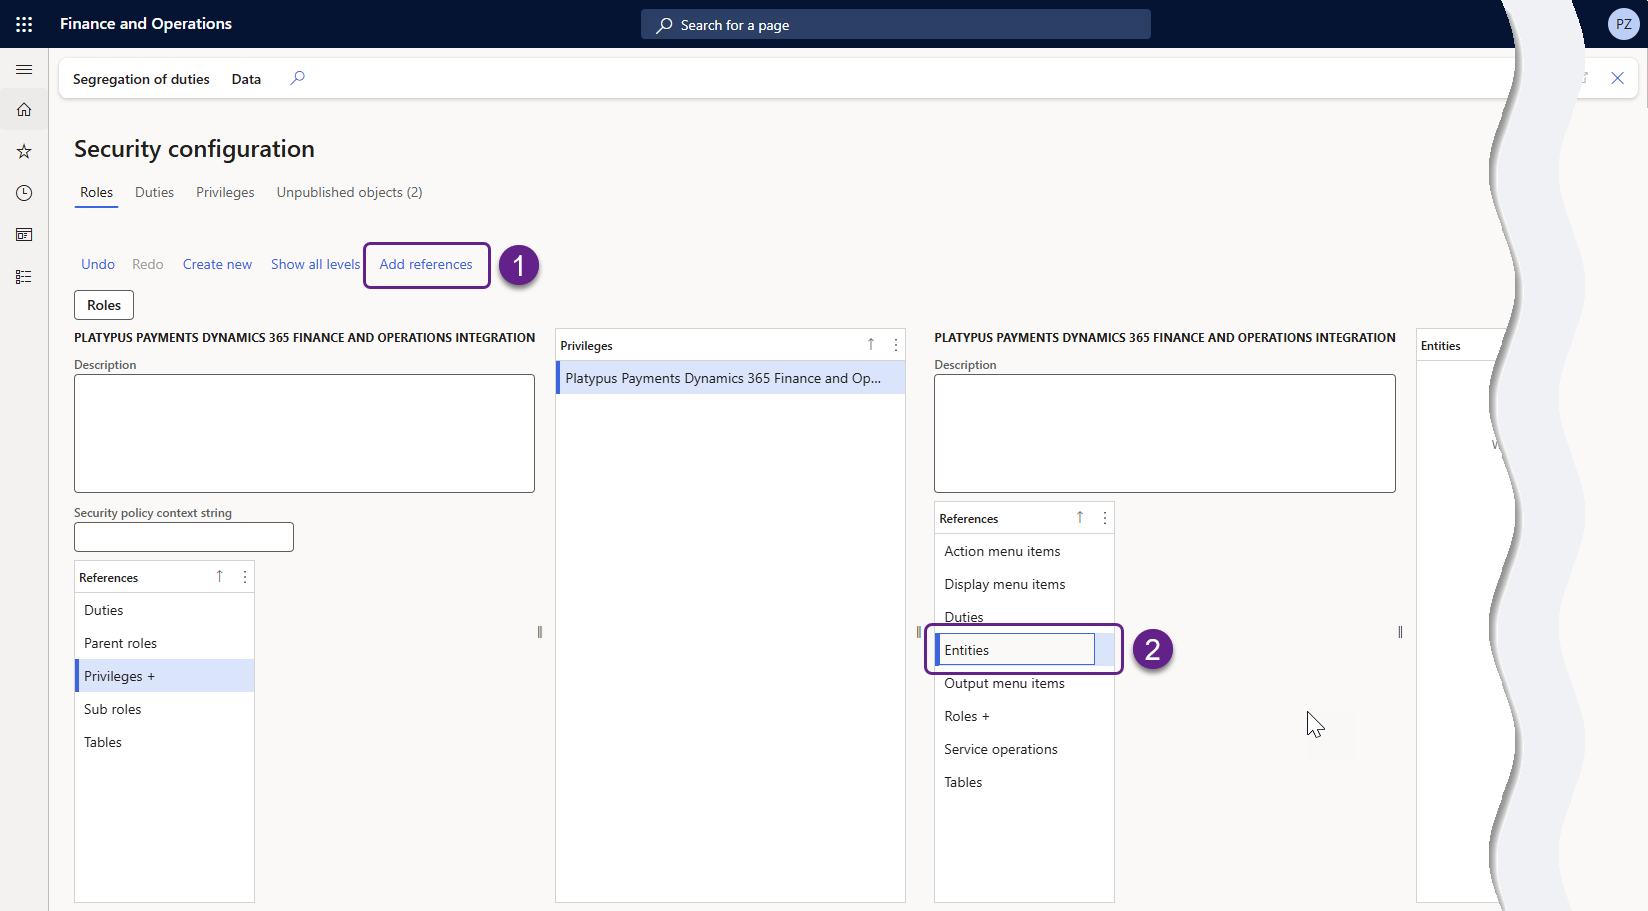
You will see the Select entities screen.
-
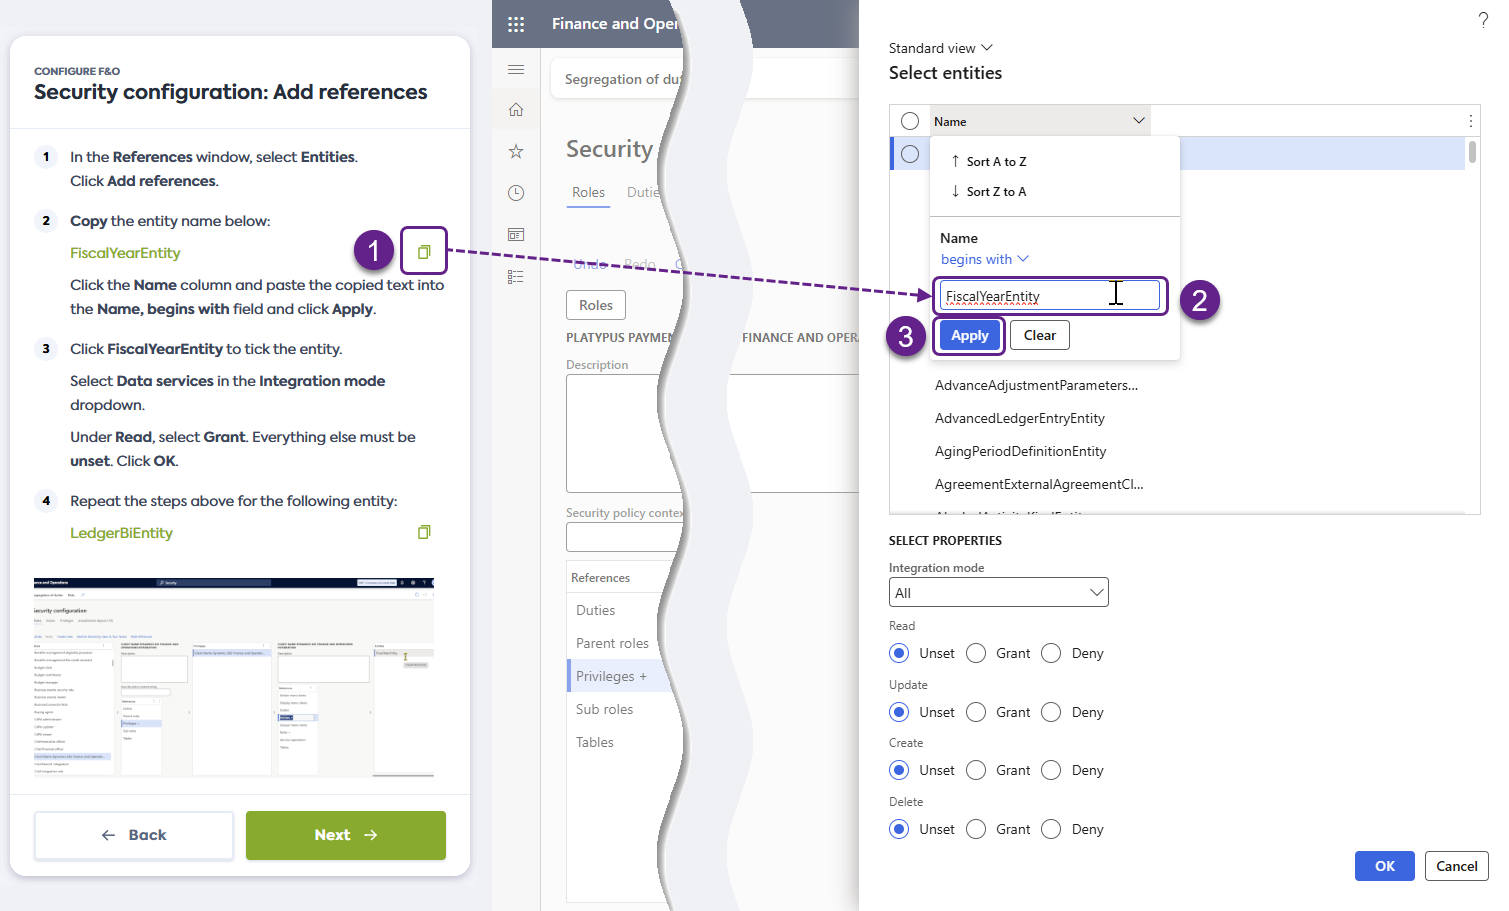
First, you will add an entity called FiscalYearEntity. Copy the entity name from the connection flow.
In the Select entities screen, click the Name column. Paste the entity name into the Name, begins with field and click Apply.
-
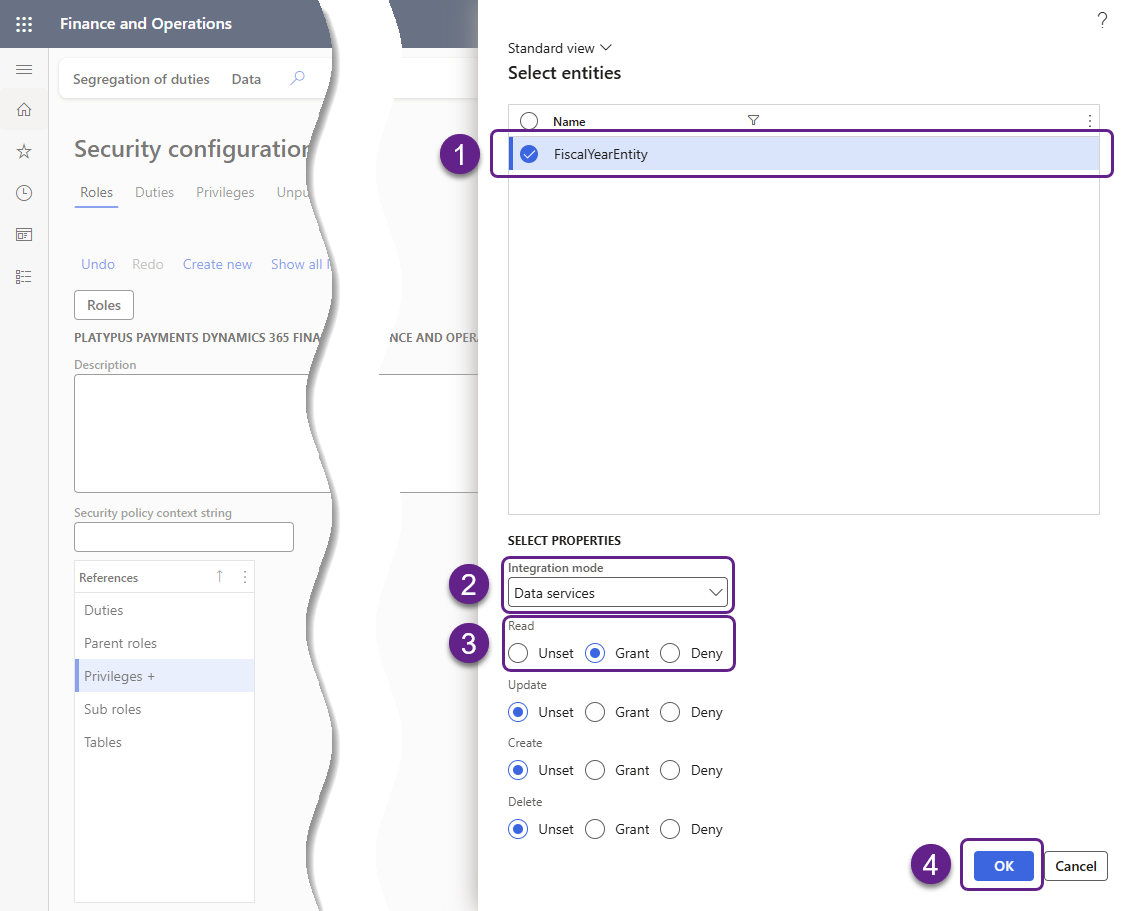
Click on FiscalYearEntity to tick the entity. In the Select properties section, select Data services in the Integration mode dropdown. Under Read, select Grant.
The remaining settings must remain unset. Click OK.
-
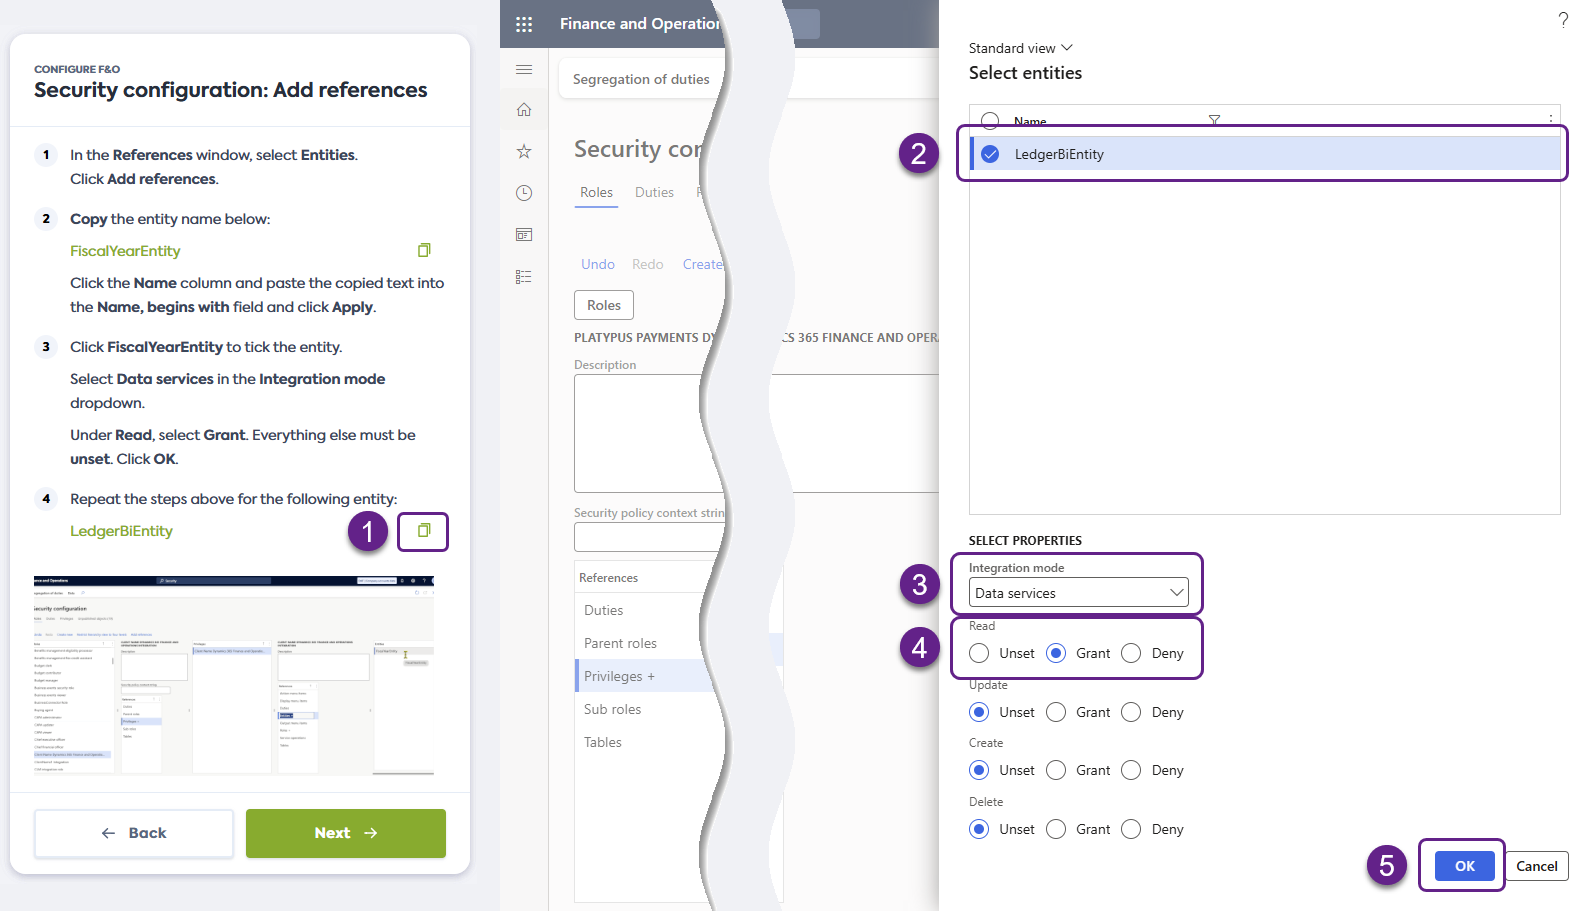
Next, you will add an entity called LedgerBiEntity. Copy the entity name from the connection flow and repeat steps 6 and 7 above.
-
Click Next in the connection flow to view the list of other entities that need to be added. Repeat steps 6 and 7 above for each of the entities.
The Copy button in the connection flow will turn grey once you copy an entity name to help with tracking.
Set up entities individuallyYou must search for and add each entity one by one. If you select multiple entities using the filter, it will reset the list of entities you have already selected.
Publish security configuration
Next, you need to publish the role you have created and its associated privilege. Complete the following steps in Microsoft Dynamics 365 F&O:
-
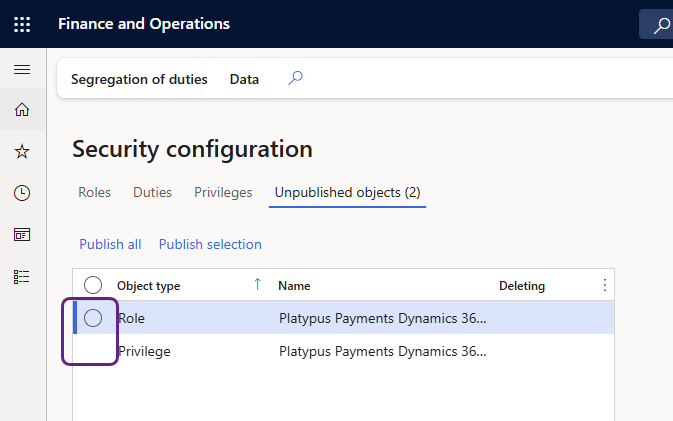
On the Security configuration screen, click the Unpublished objects tab.

-
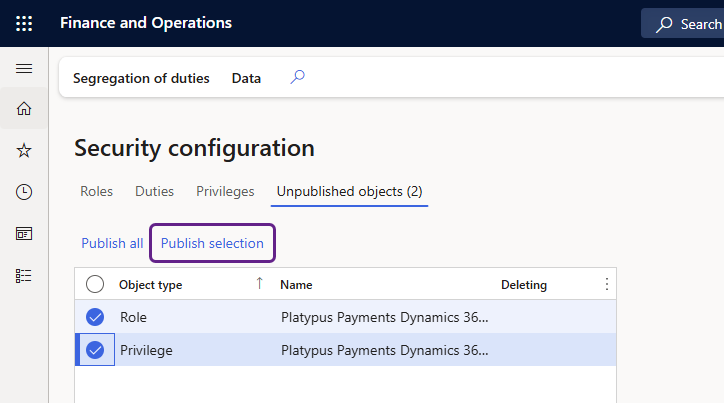
In the Unpublished objects tab, select the role and the privilege you have just created.
-
Once selected, click Publish selection.
-
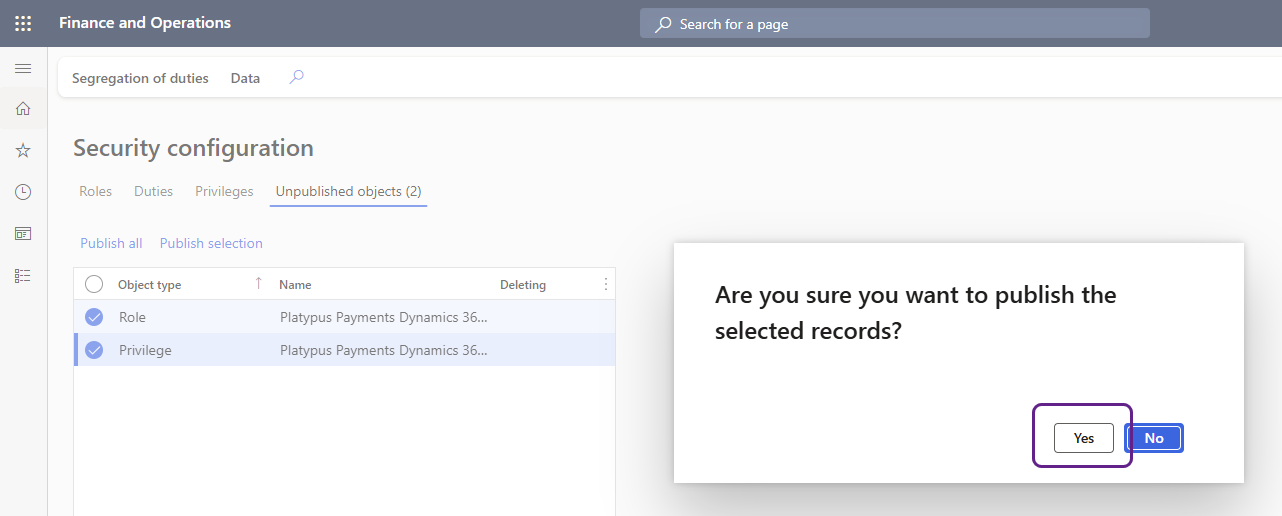
Click Yes in the pop-up window to publish the changes to the security configuration.
-
Click Next in the connection flow and proceed to the Create new user in Dynamics 365 F&O guide.
Resolve errors
Unable to verify F&O URL
You may encounter the Unable to verify F&O URL error when sharing your Dynamics 365 F&O URL in the connection flow. This error occurs when the URL was incorrectly copied from the browser address bar.
Check that you are copying the full URL from the address bar, then try again. We expect the URL to contain https:// and axcloud.dynamics.com.
If the issue persists, contact your financial institution for additional support and walkthrough.
Unable to access data
You may encounter the Unable to access error when establishing the connection to Dynamics 365 F&O. This error occurs when the role you have created doesn't have some or all of the required entity references assigned to it.
To resolve, click the Try again button on the error screen. Subsequent actions vary depending on how many references are missing:
-
If all required references are missing, you will be directed back to the Security configuration: Add references steps of the flow. Follow the instructions in the flow to add the references and review Create security configuration for detailed instructions.
-
If only some references are missing or have incorrect properties, you will be directed to additional steps of the connection flow. These steps will list the specific entity references that are missing or set up incorrectly and provide instructions to add them or correct the setup.
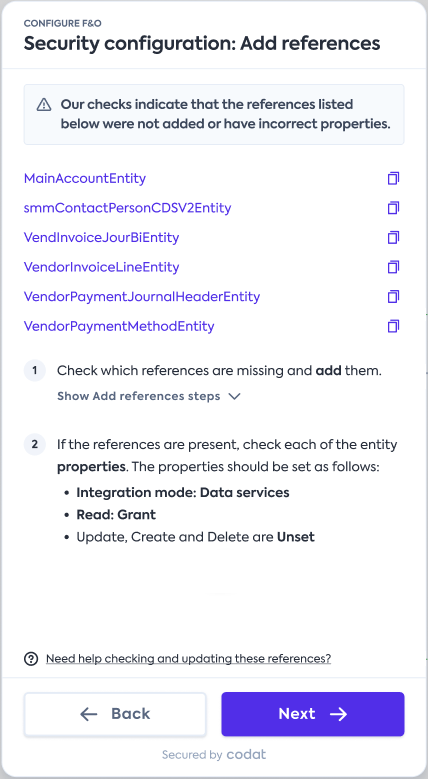
Once done, publish the changes you have made and click Next in the flow to attempt the connection again. Review Publish security configuration for detailed instructions.