Troubleshooting and issue resolution
Get help if you experience errors or issues when connecting to Workday
Verify your Workday REST API endpoint
If you encountered a validation error when sharing your Workday REST API endpoint URL with us, follow these steps to resolve:
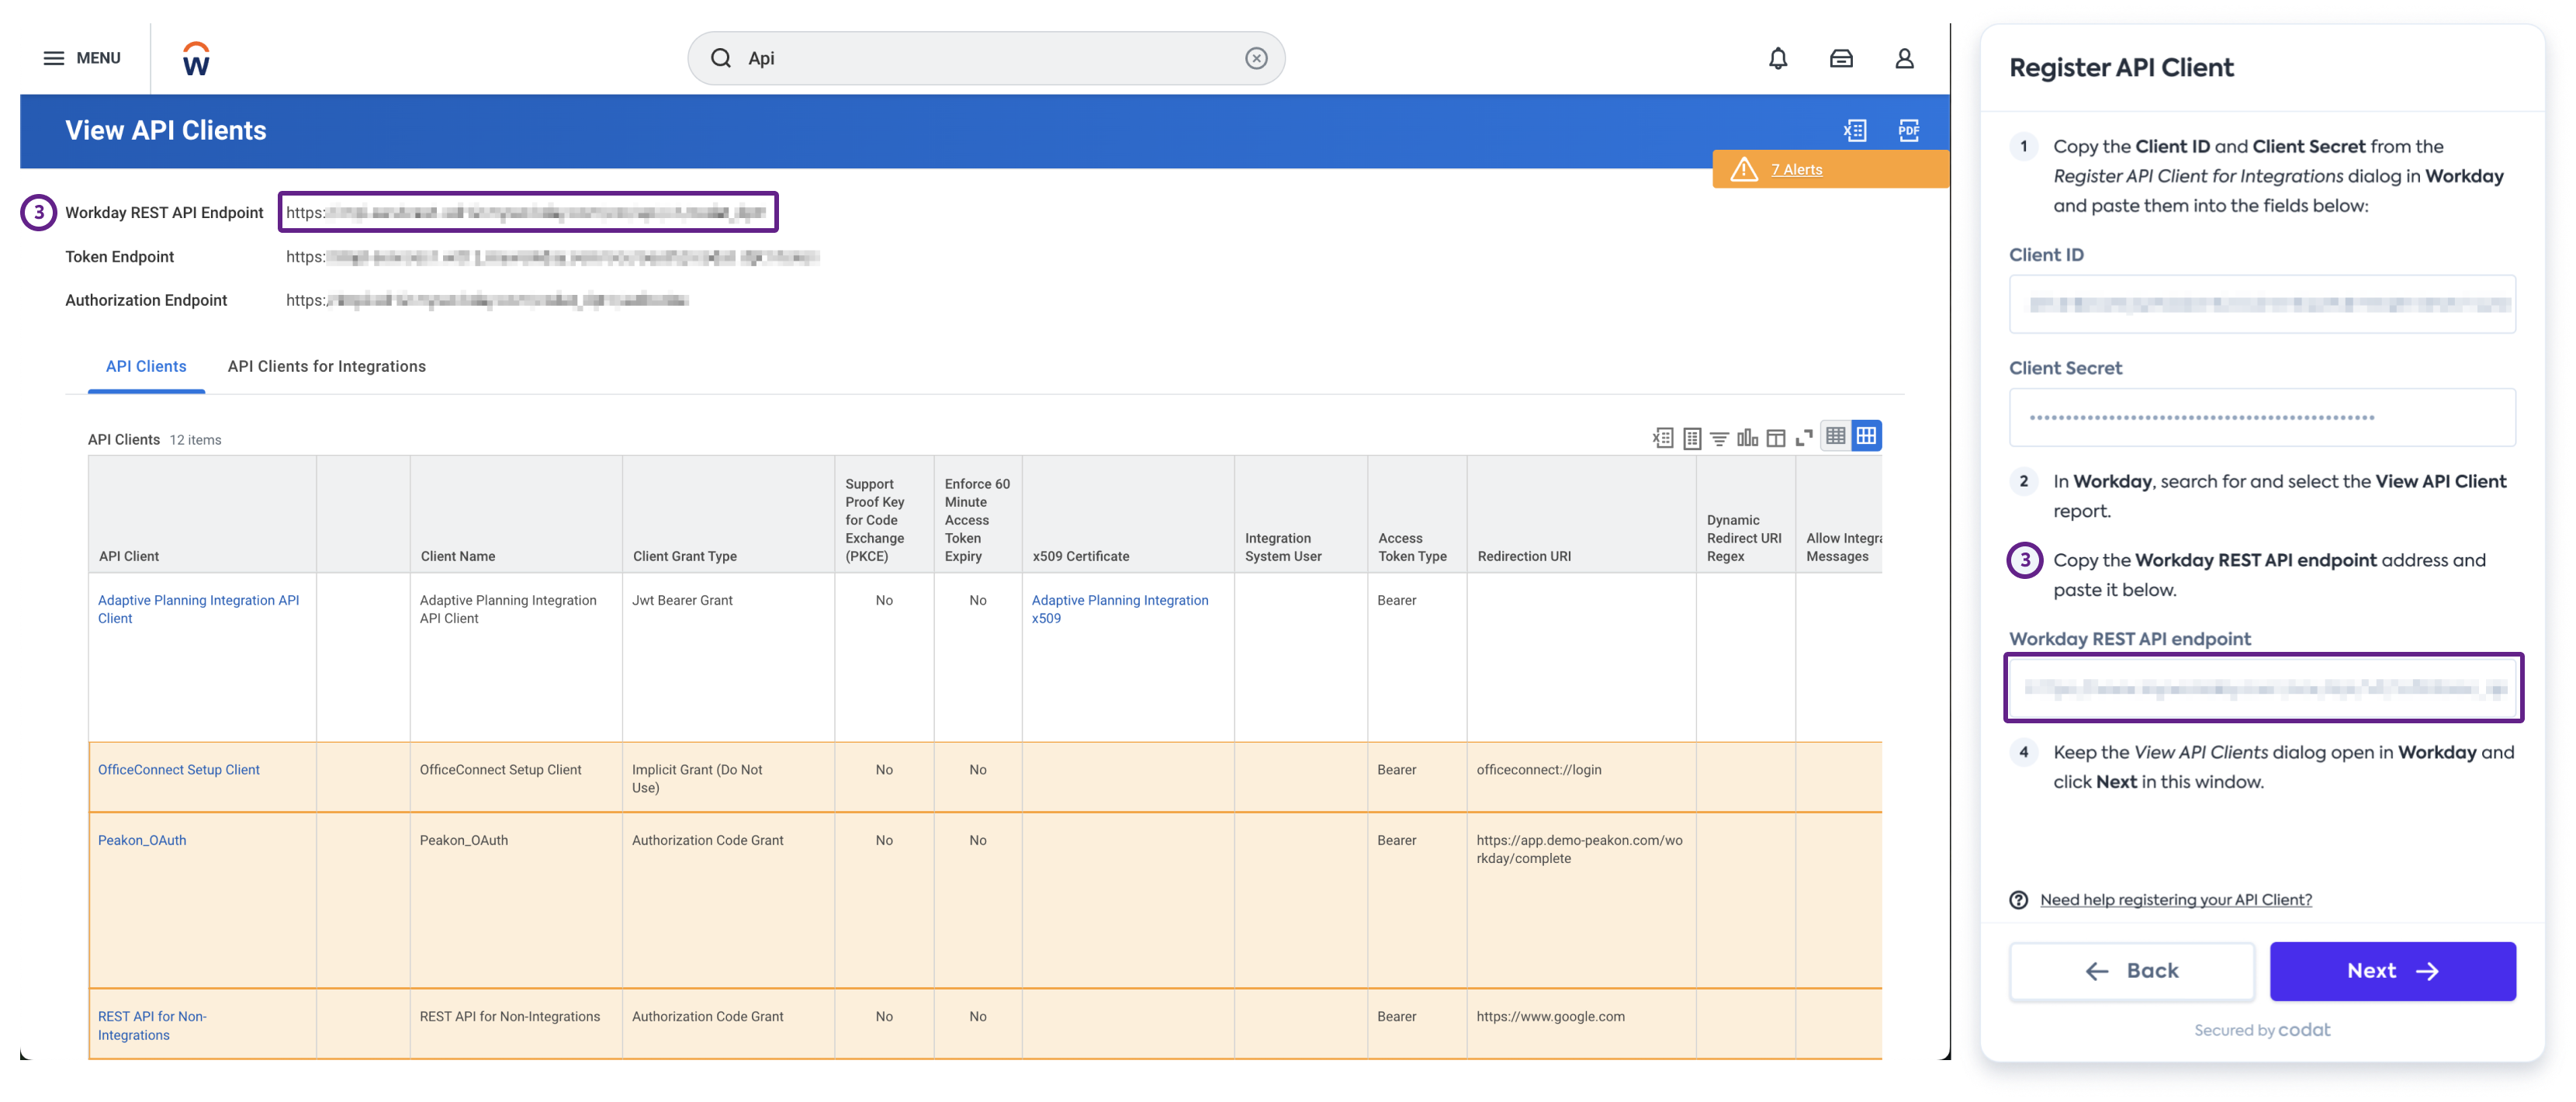
To locate and share the REST API endpoint URL with us, complete the following steps:
-
In Workday, search for and select the View API Clients report.
-
Copy the Workday REST API endpoint address and paste it in the Workday REST API endpoint field of our connection flow.
Extra text in the copied URLWhen copying the endpoint URL, check that the selection doesn't include the Workday REST API Endpoint label. Remove any extra text after pasting the URL in the connection flow, if needed.
Find your credentials
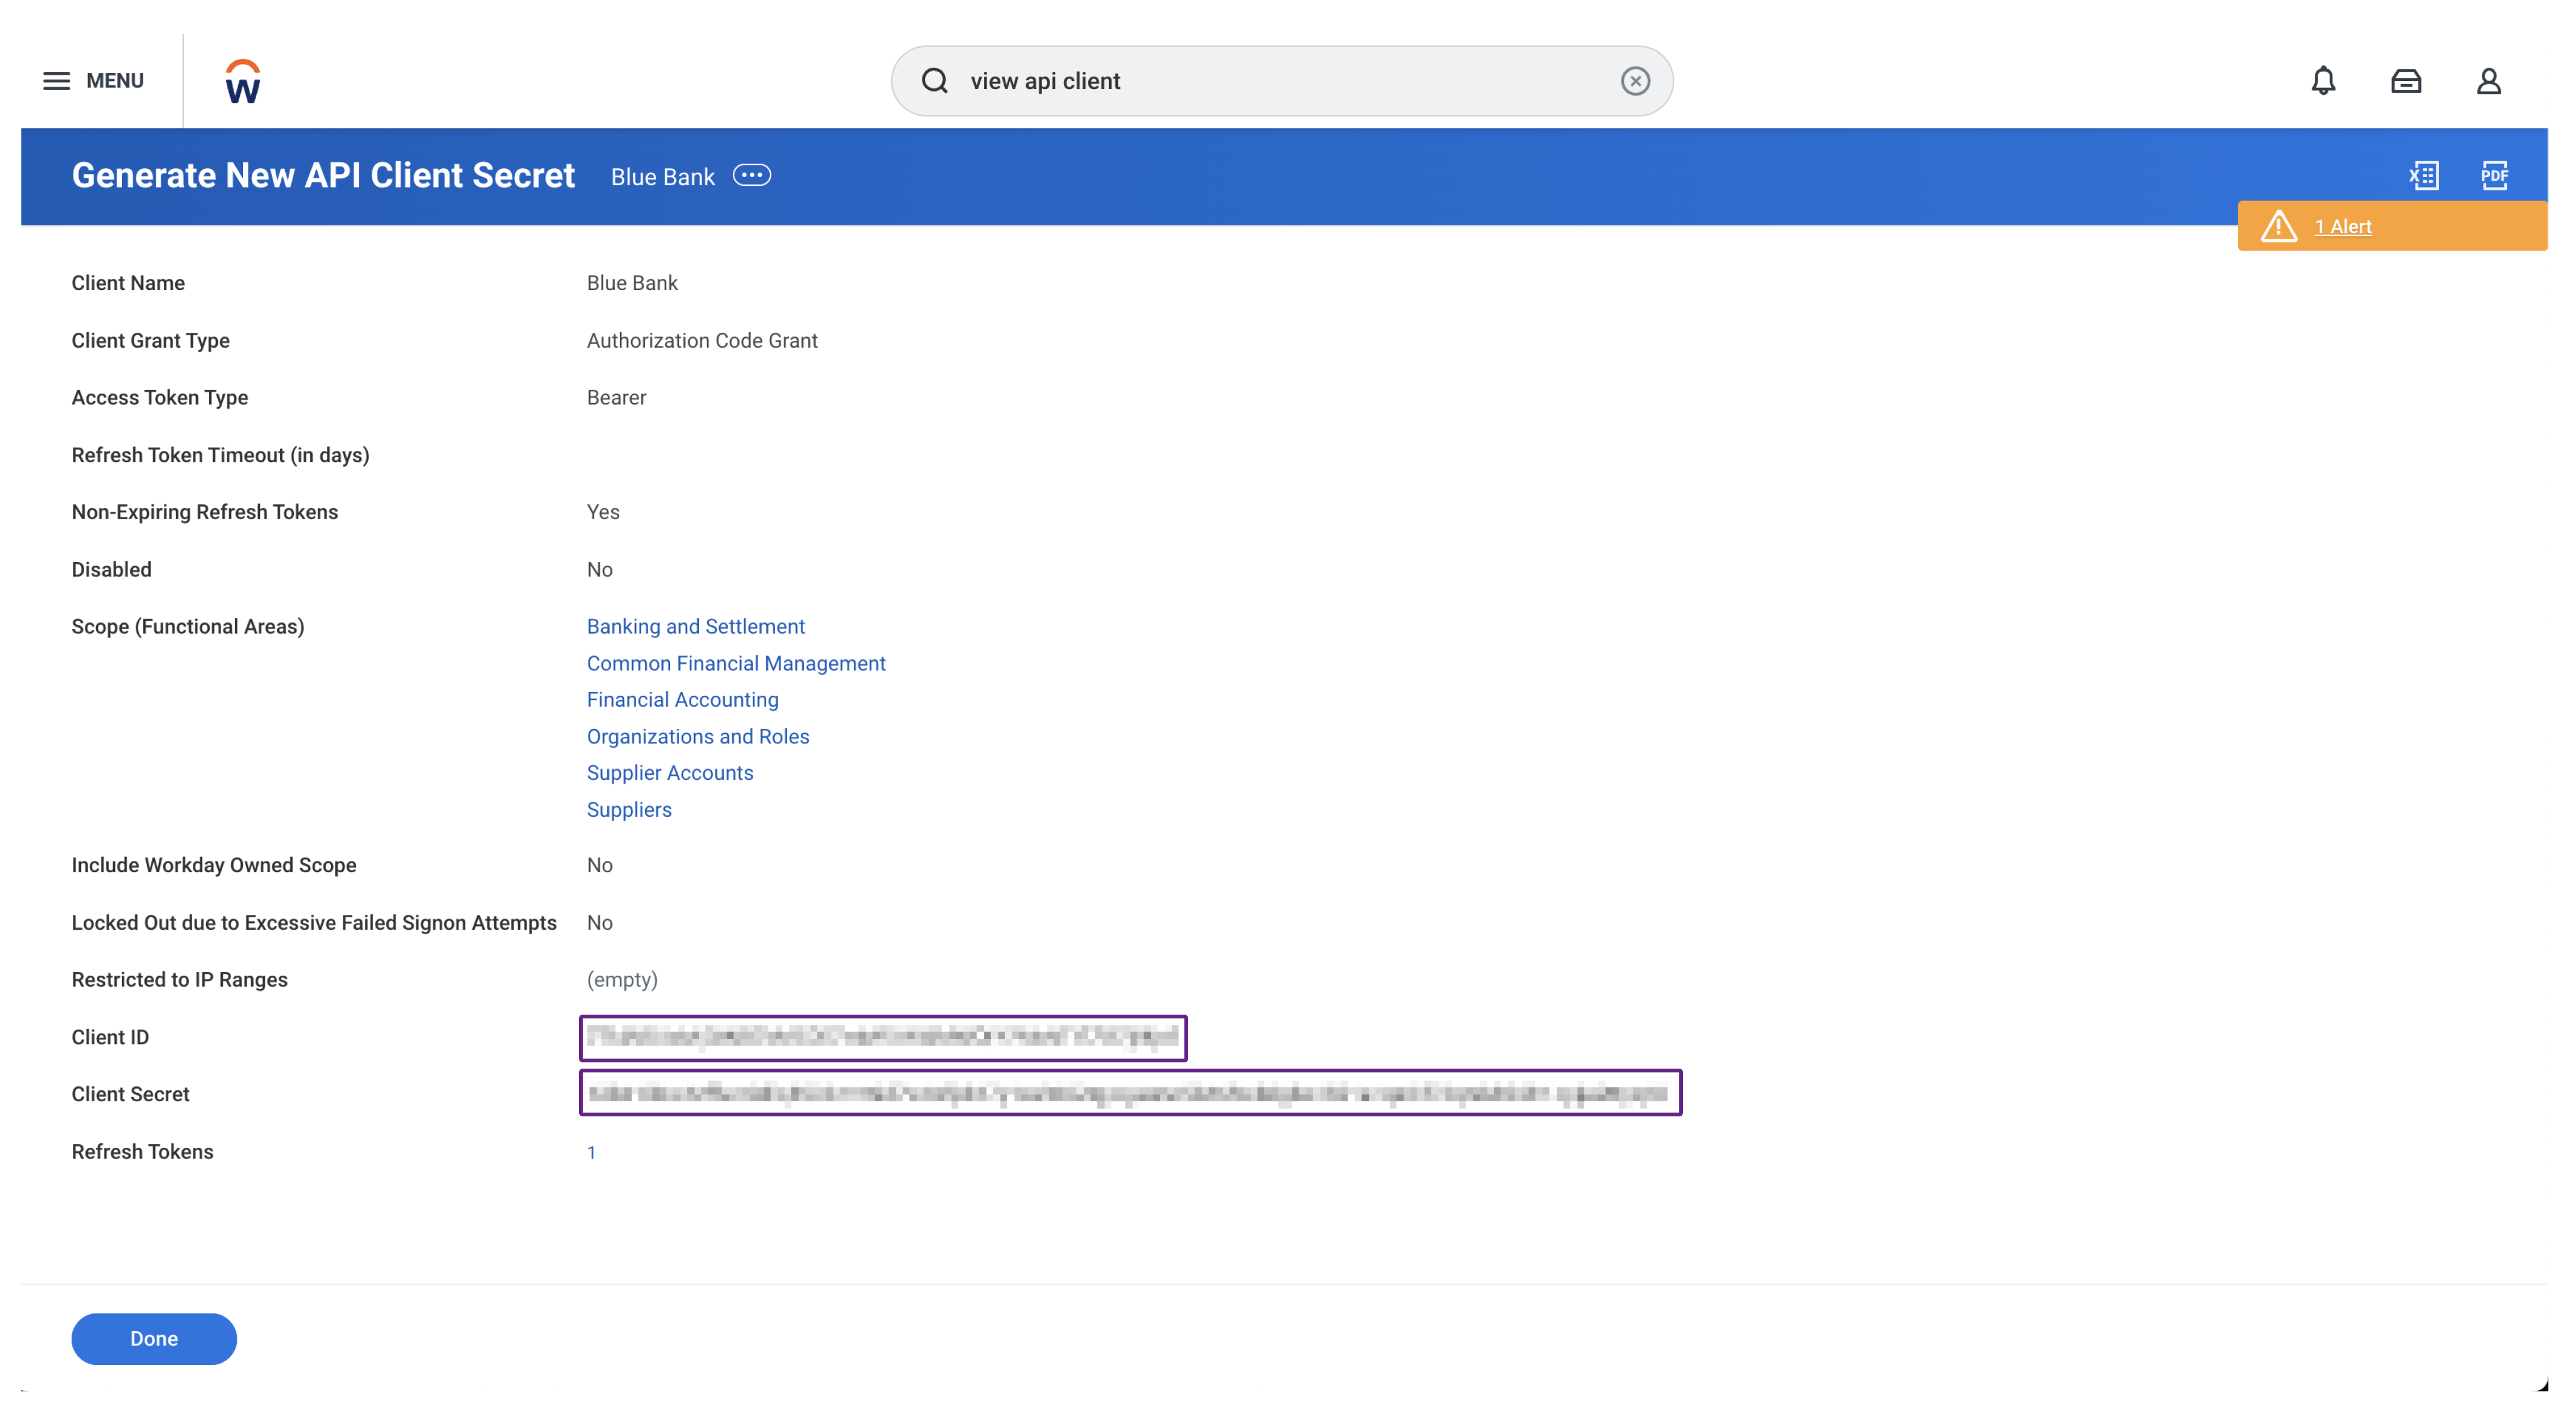
If you need to locate the Client Secret for an existing API client, follow the steps below. You also need to share the Refresh Token with us during this process.
-
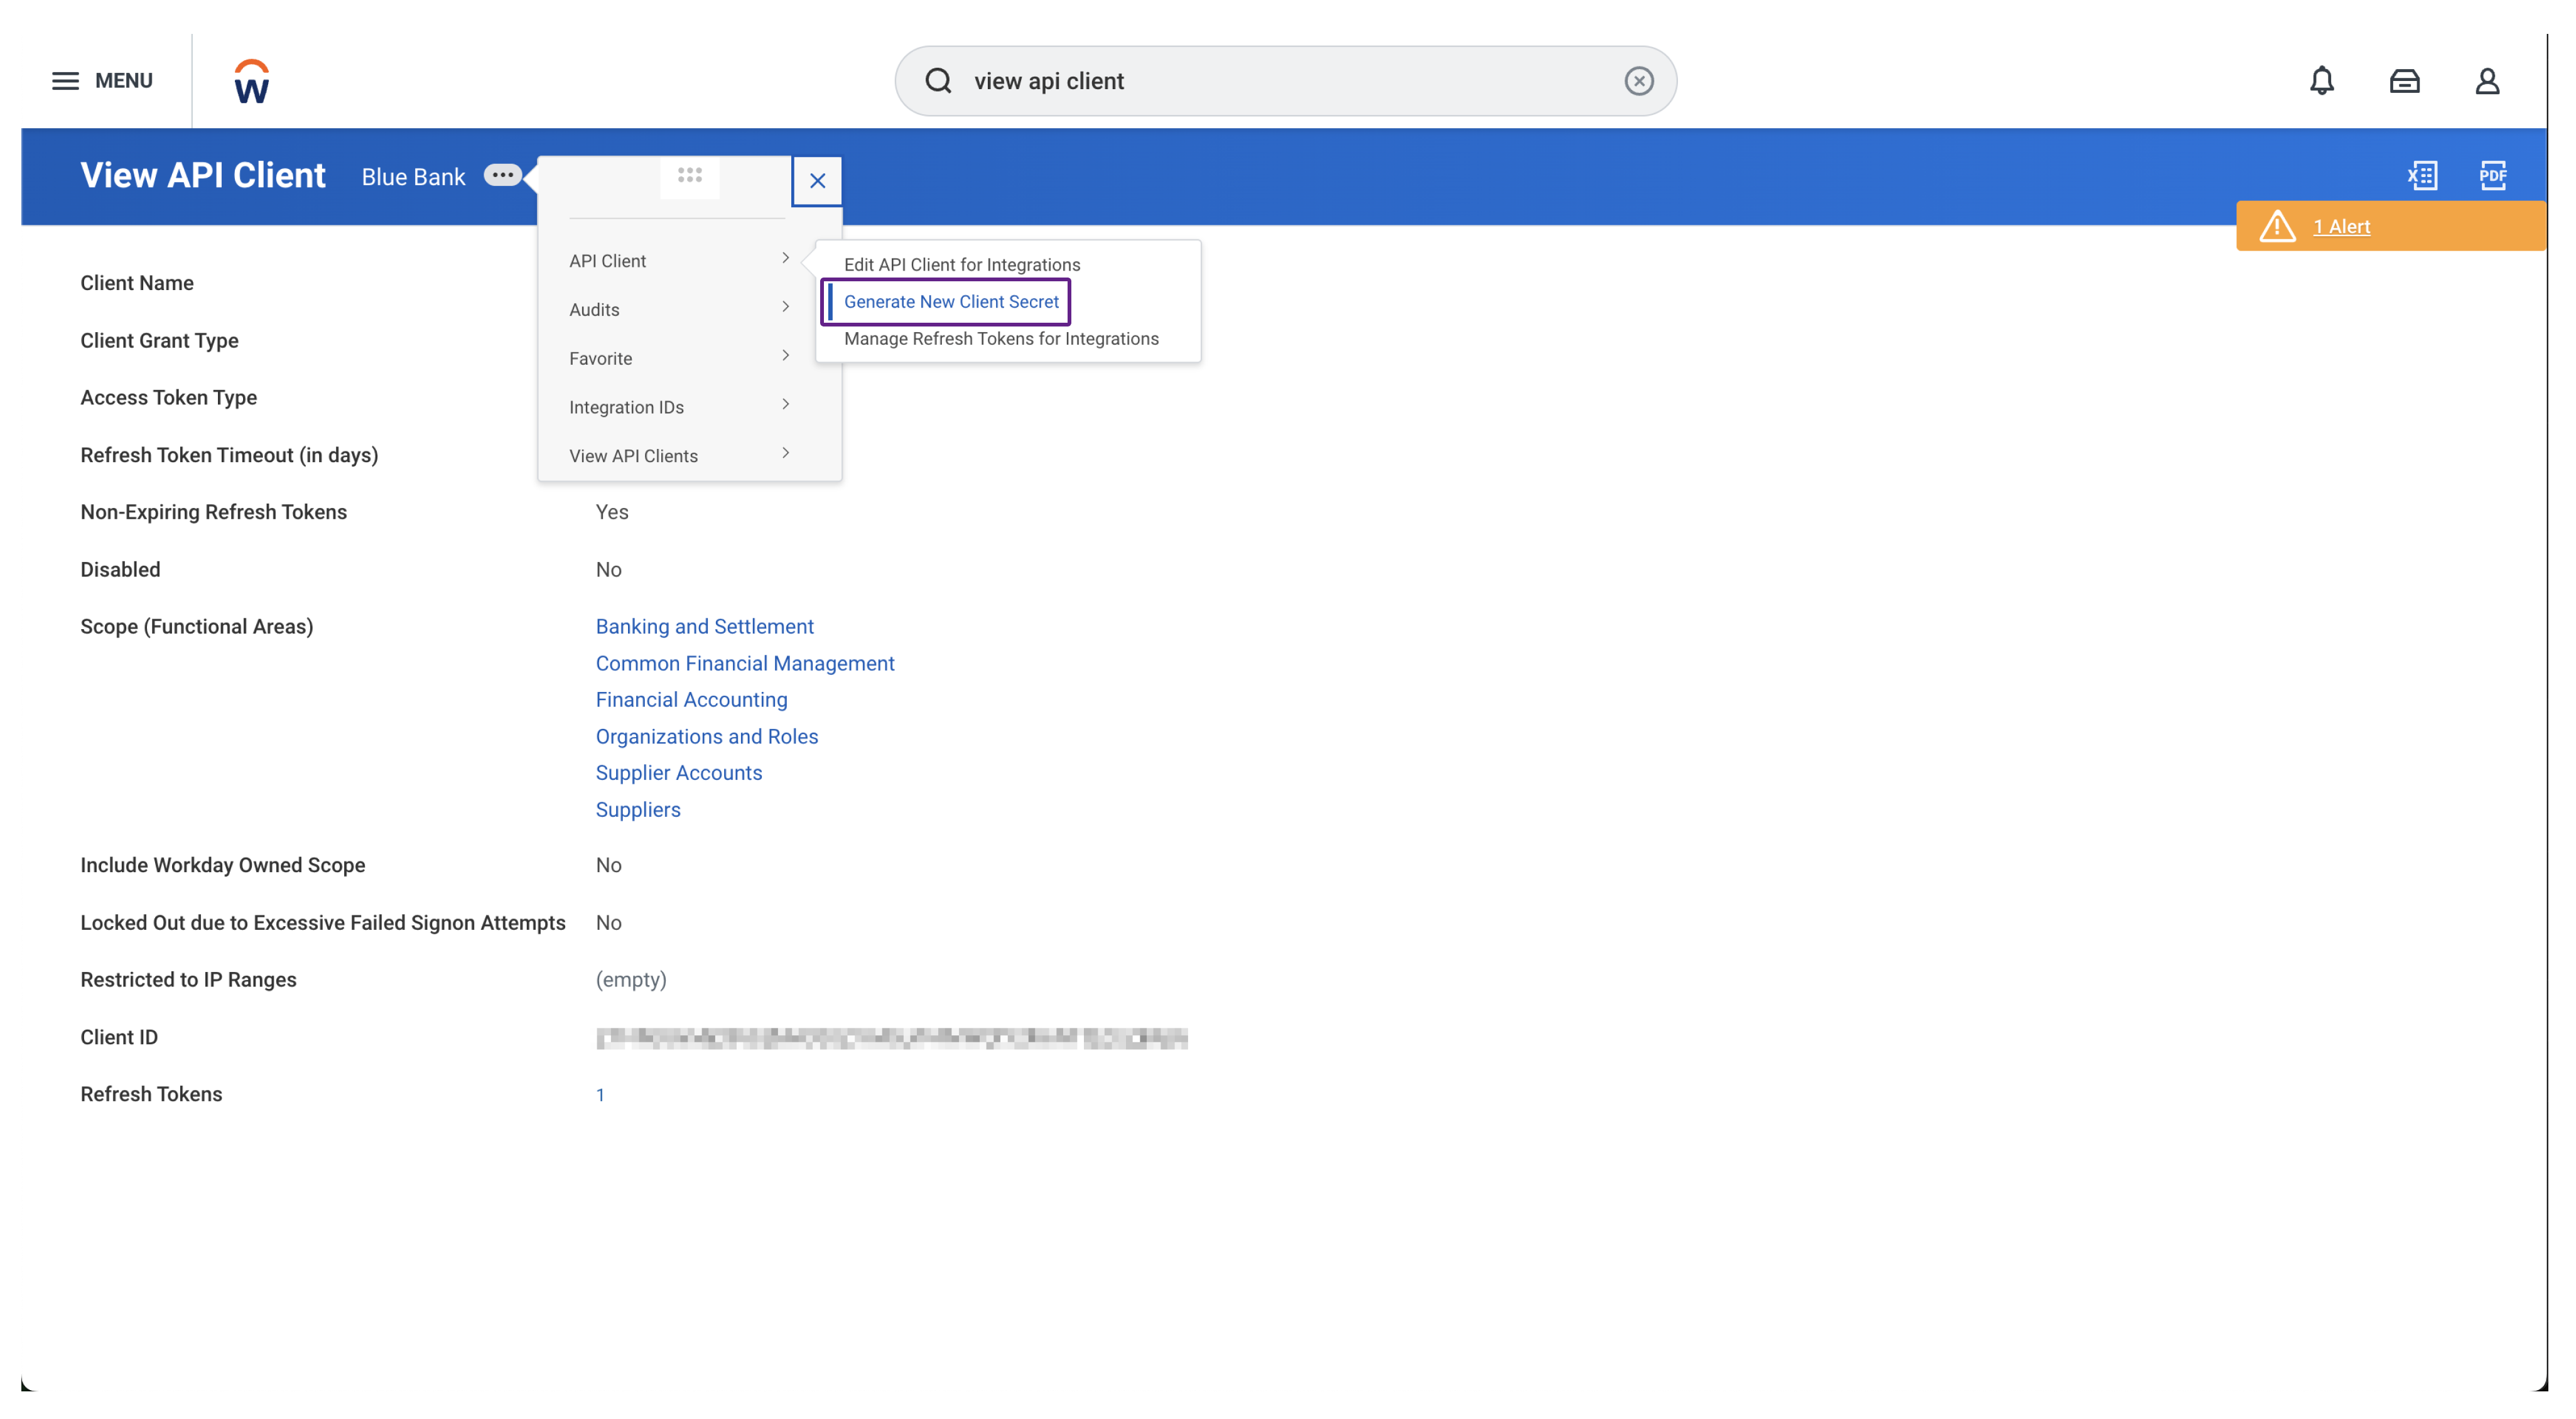
In Workday, search for and select the View API Clients report.
-
In the View API Clients dialog, navigate to the API Clients for Integrations tab.
-
Find and select the API Client you previously created.
-
In the View API Client dialog for your APAI Client, go to Related Actions > API Client > Generate New Client Secret.
-
Check the Confirm checkbox, then click OK.
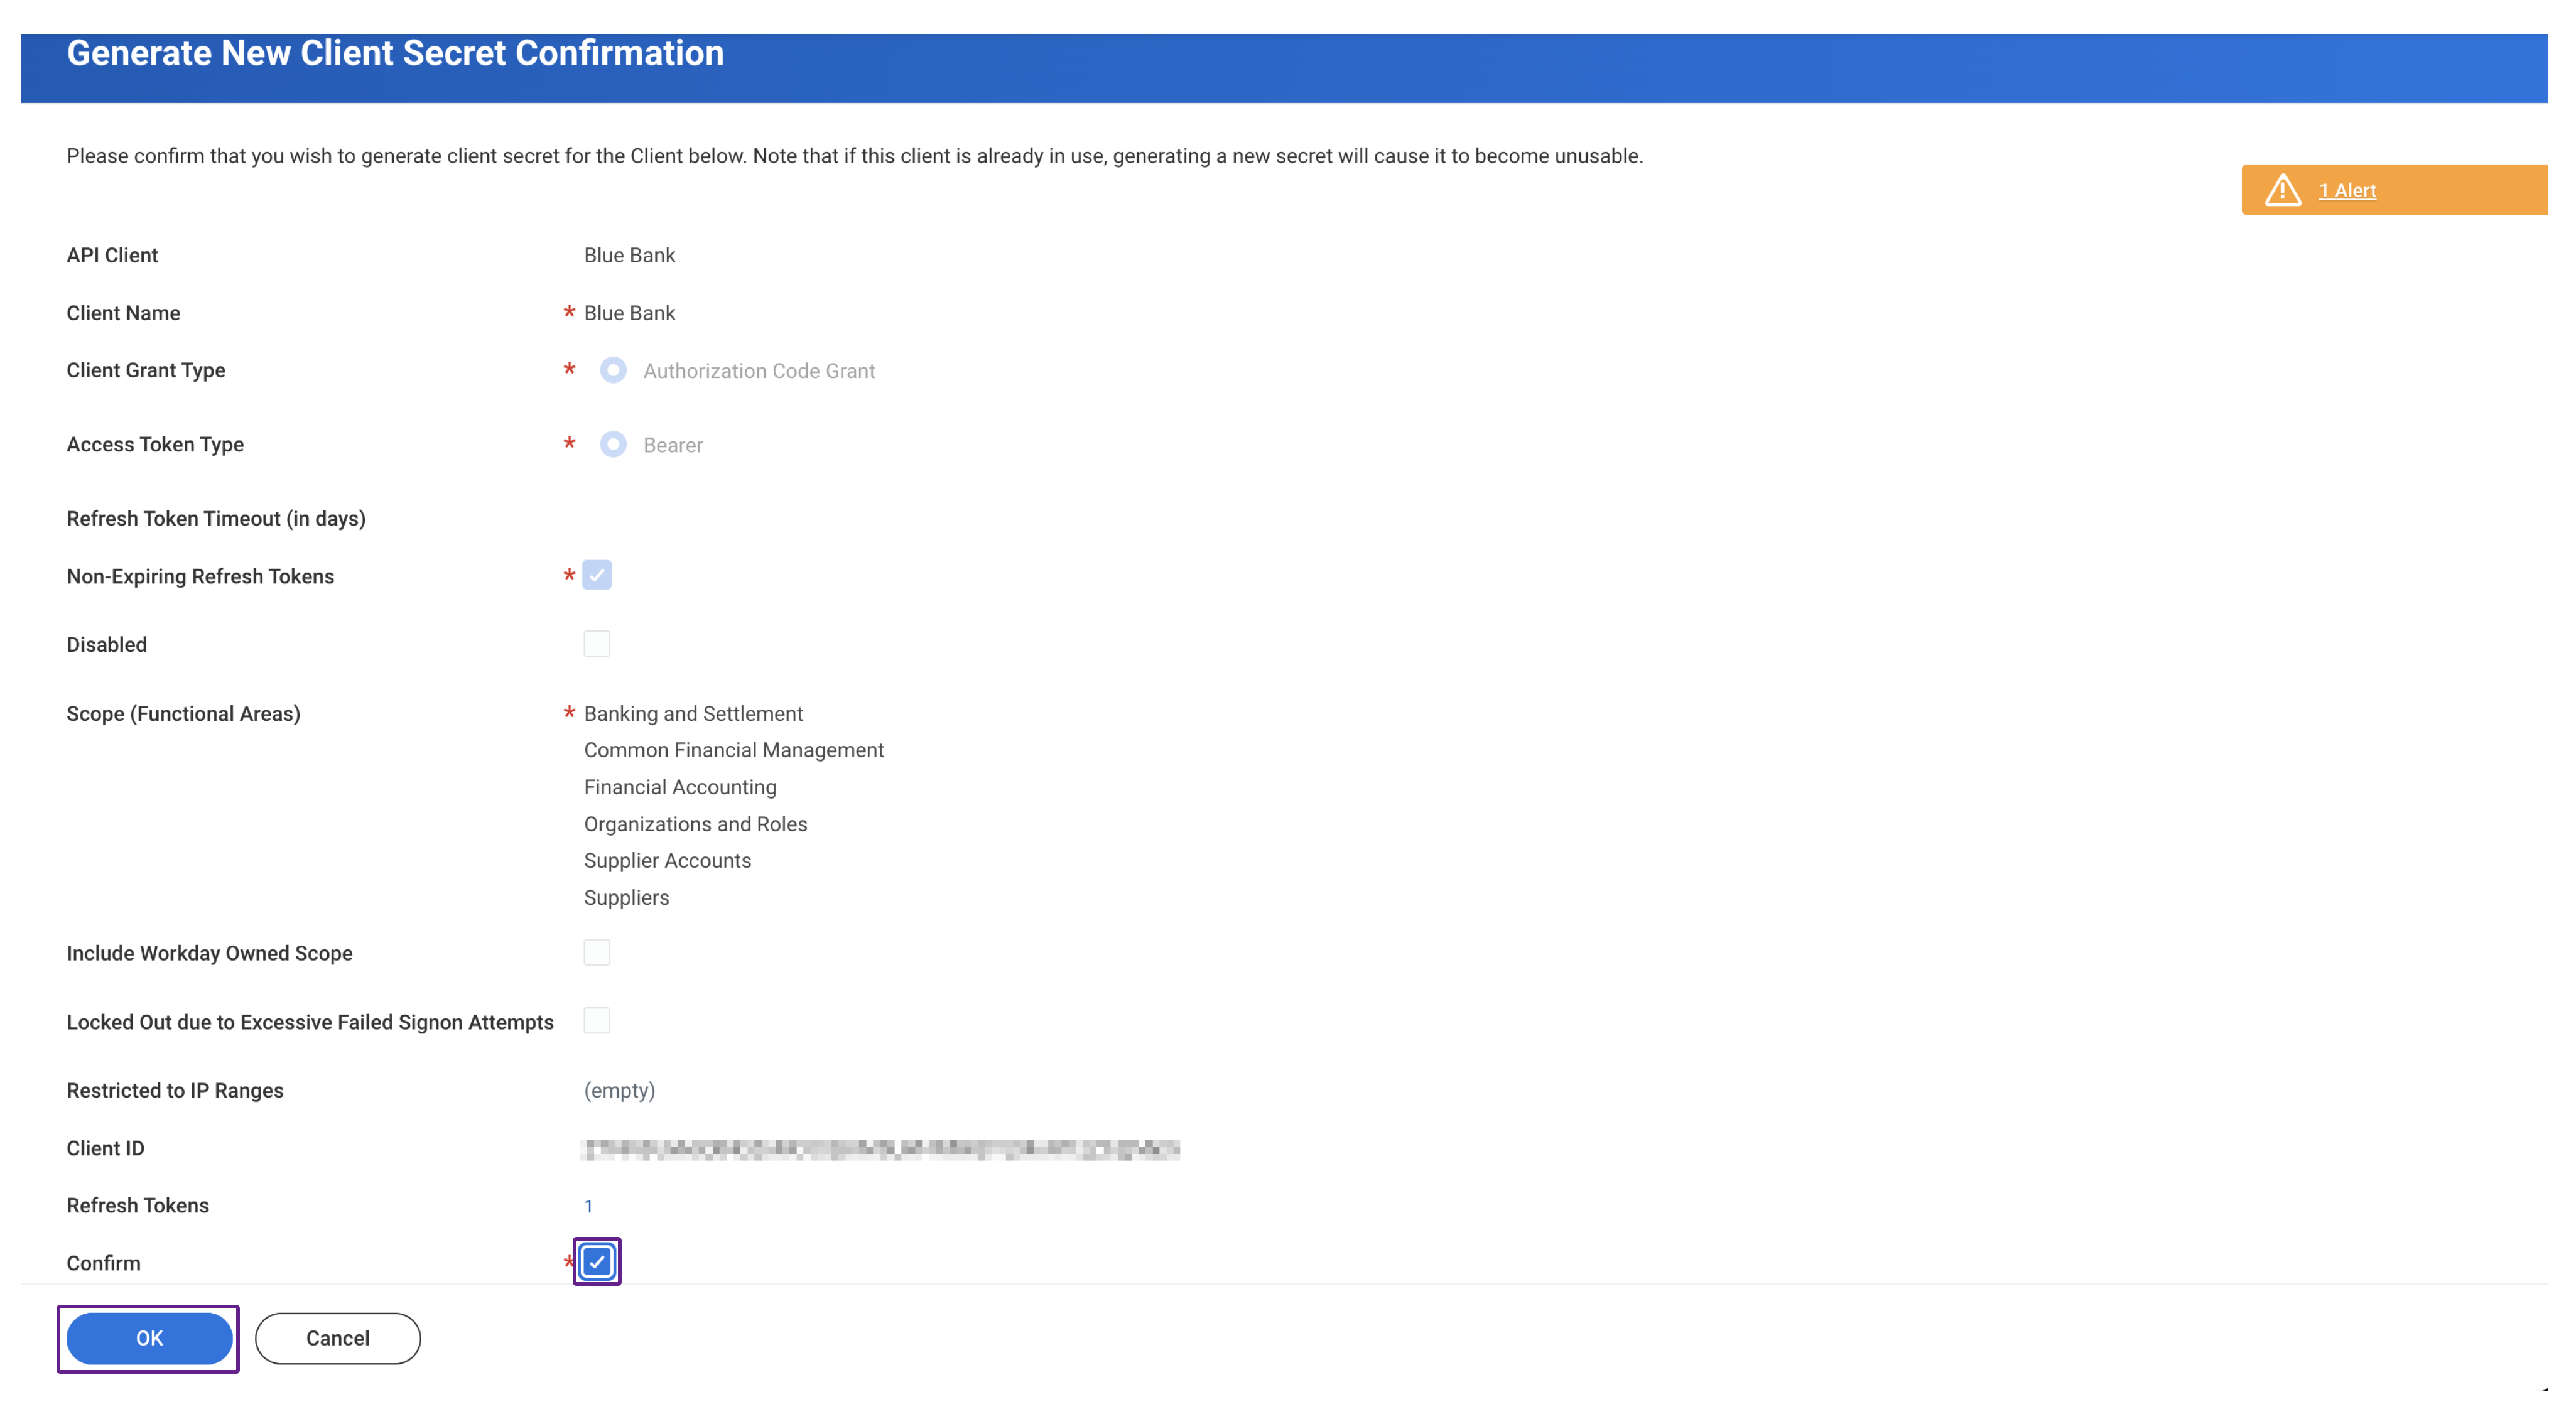
-
In the Generate New API Client Secret dialog, copy the Client ID and Client Secret from Workday and paste them into the Client ID and Client Secret fields of the connection flow.
-
Click Next in the connection flow.
-
Click on the number displayed on the Refresh Tokens line. This will display the Refresh Tokens dialog for your API Client.
Copy the Refresh Token value for the existing API Client and paste it into the Refresh Token field in the connection flow.
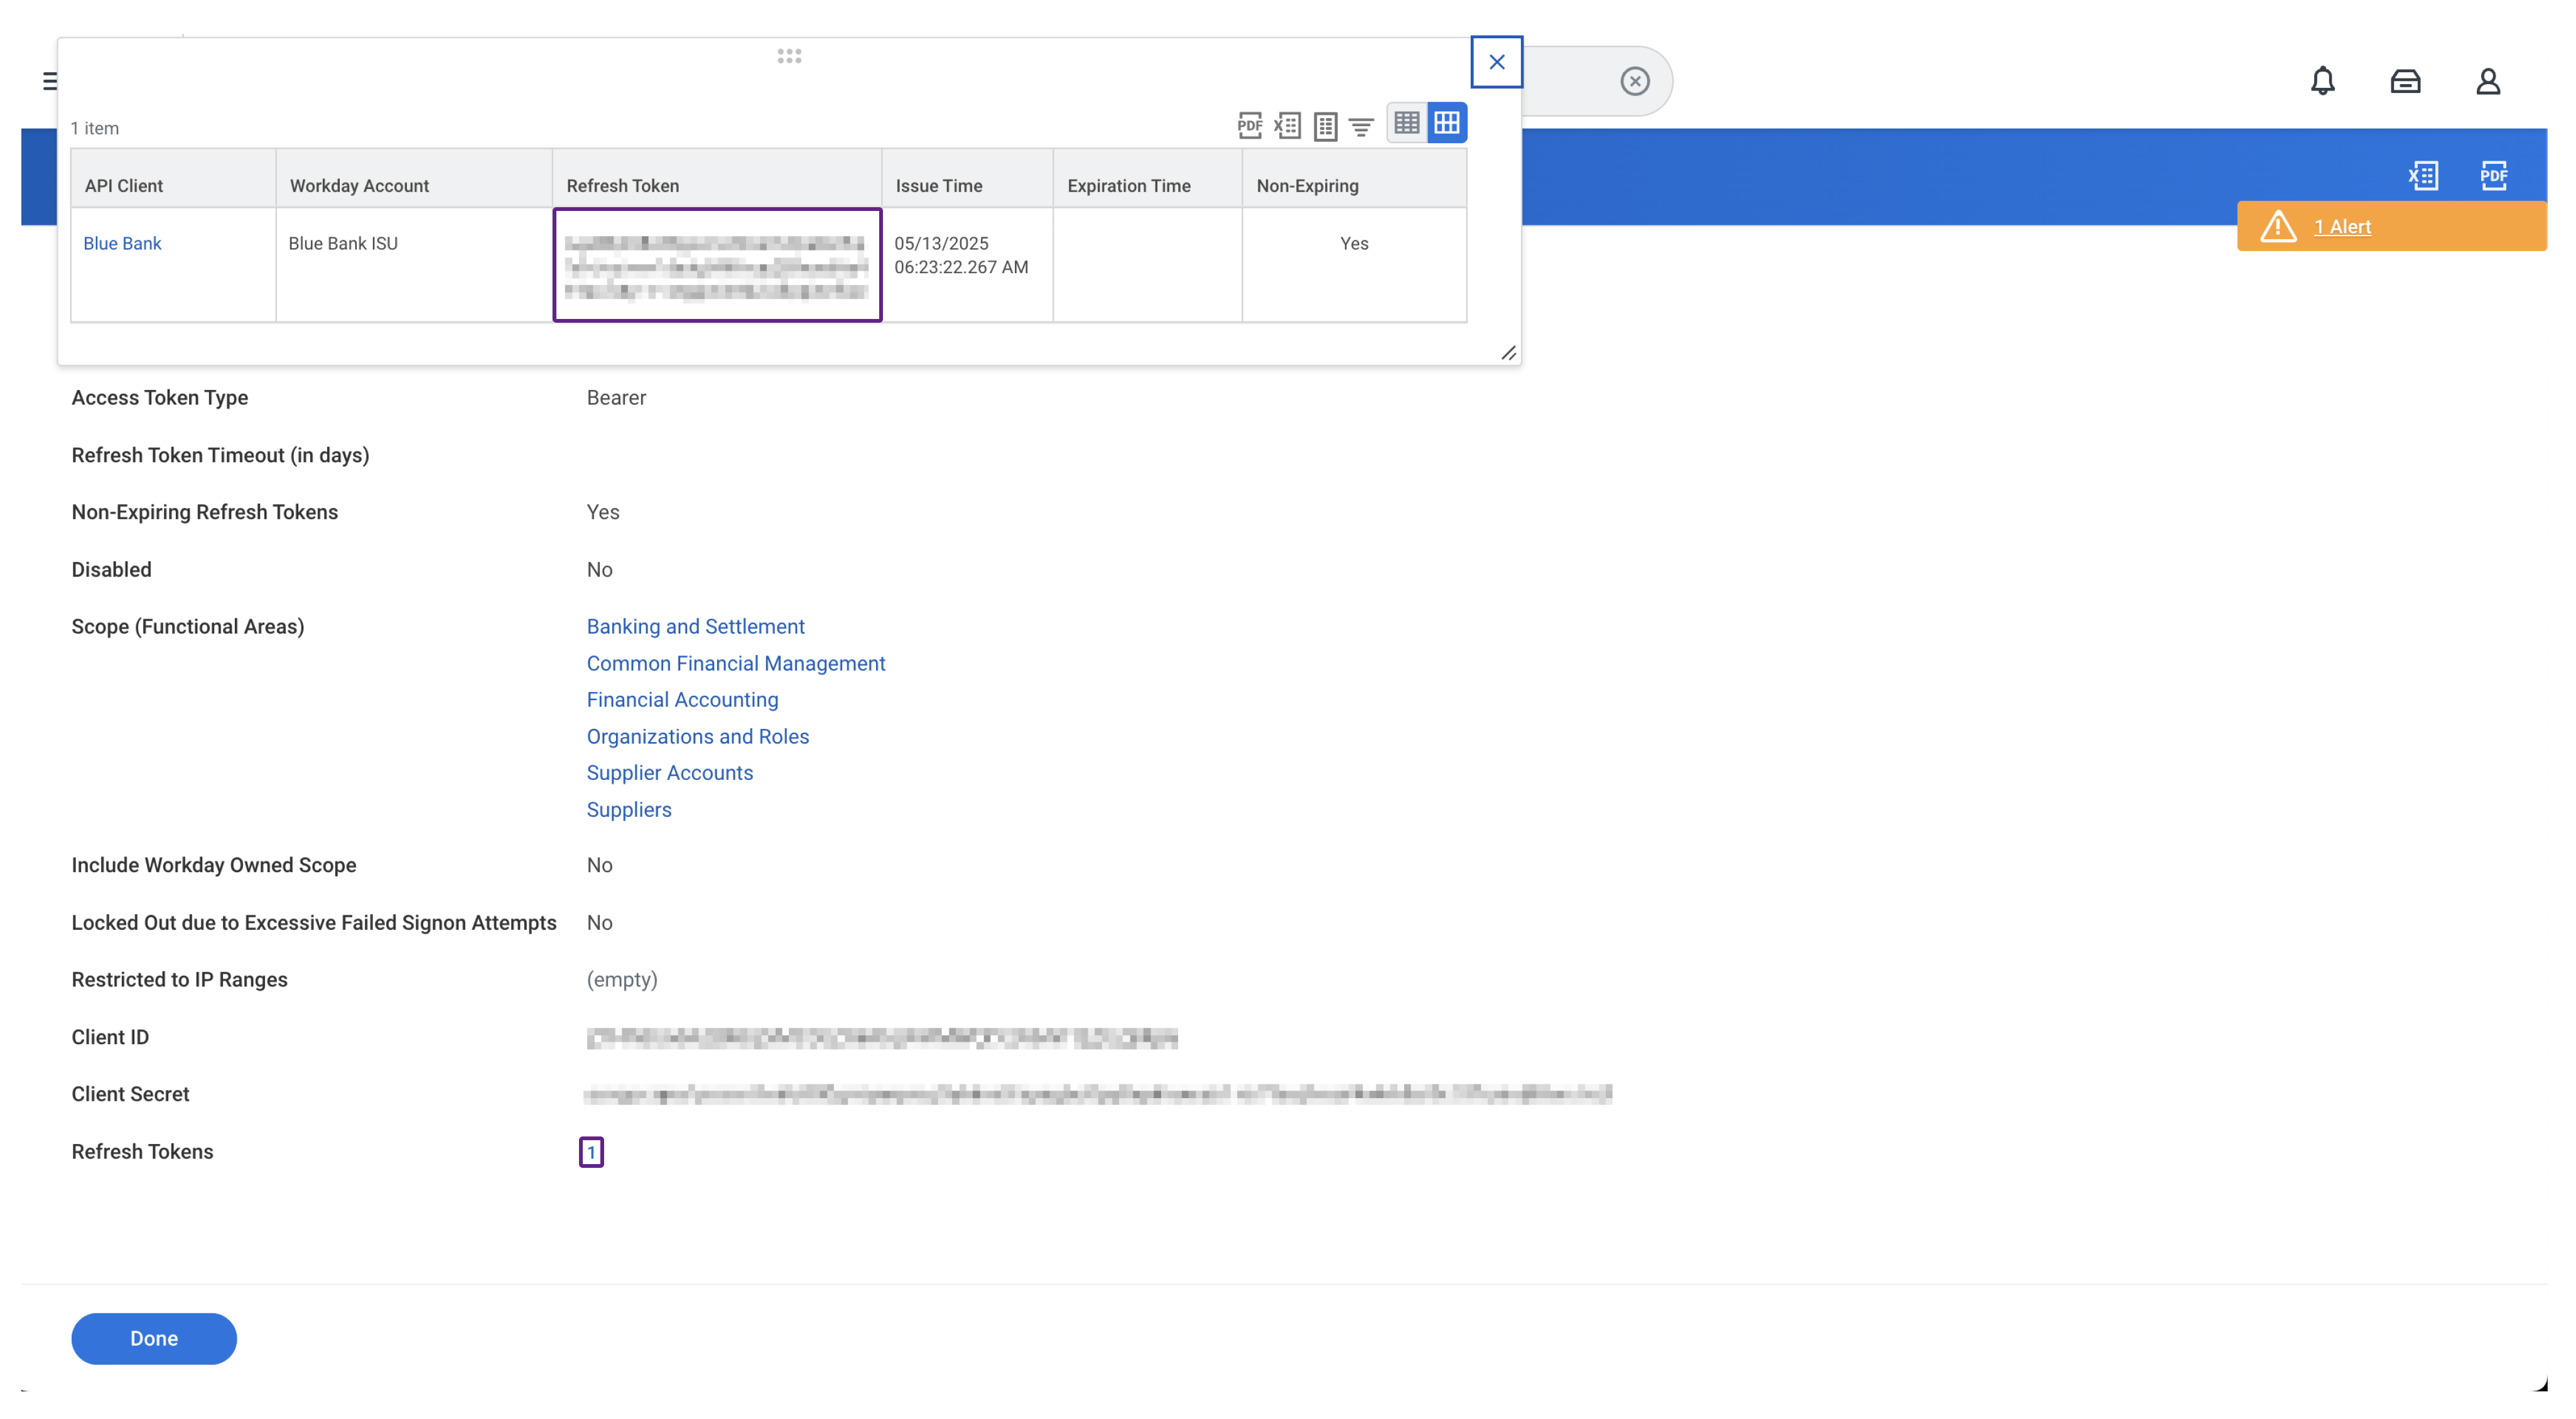
-
Click Next in the connection flow.
Check Domain Security Policies
If you encounter an error when connecting to Workday, check that the Security Group you created for the Integration System User has the correct policies. To do so, review our Configure and activate Security Group Policies guide.
If the Security Group is configured correctly, the error likely occurs because these policies are disabled in Workday. To resolve this, follow steps:
-
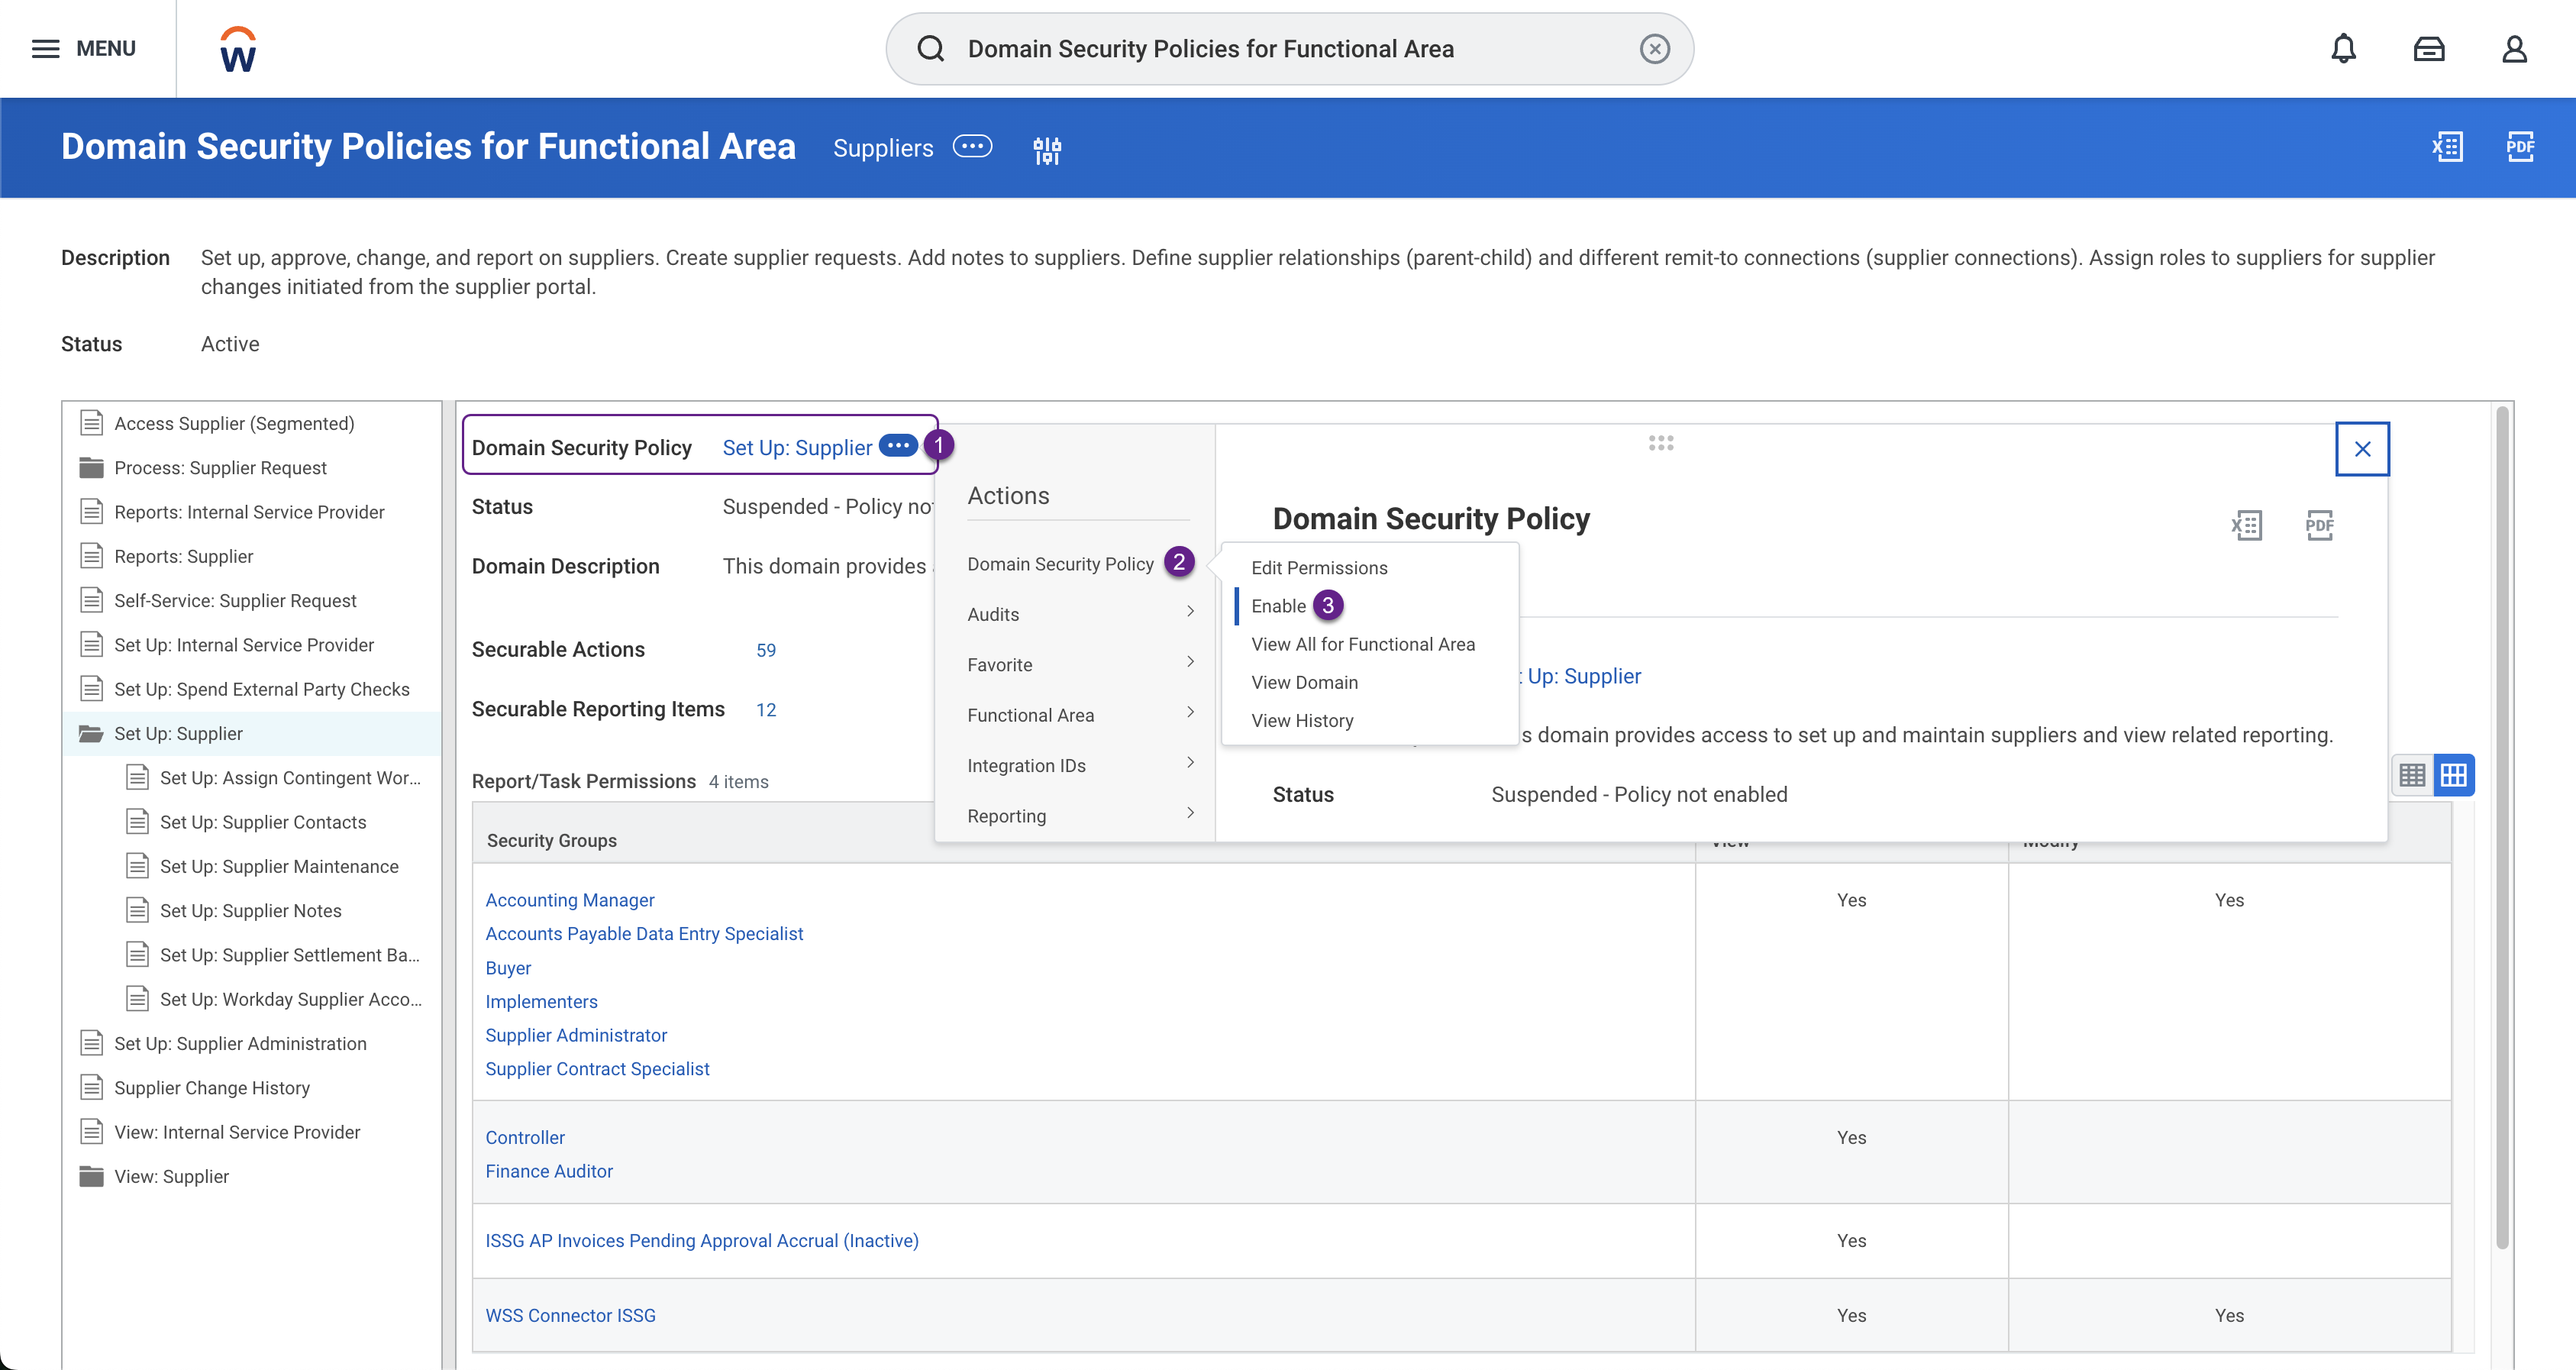
In Workday, search for and select the Domain Security Policies for Functional Area report.
-
For every combination listed below, select each required Functional Area in the navigation bar, then the Security Group Policy, and check that its status is either
ActiveorActive - Inheriting parent permissions.Functional area Security policies Banking and Settlement - Set Up: Settlement
- Process: Ad Hoc Payment (NEW)
Common Financial Management - Set Up: Company Accounting
- Set Up: Company General
- Set Up: Accounts
- Set Up: Tax
Financial Accounting - View: Organization Journals
- Process: Journals - View
Organizations and Roles - Manage: Organization Integration
Supplier Accounts - View: Supplier Invoice Request
- Process: Supplier Invoice
- Reports: Supplier Payment
- Process: Supplier Invoice
- Process: Supplier Invoice Payment/Settlement
- Set Up: Supplier Accounts
Suppliers - View: Supplier
- Reports: Supplier
-
If a policy is disabled, use the triple-dot menu next to the policy name and navigate to Domain Security Policy > Enable to enable it.
-
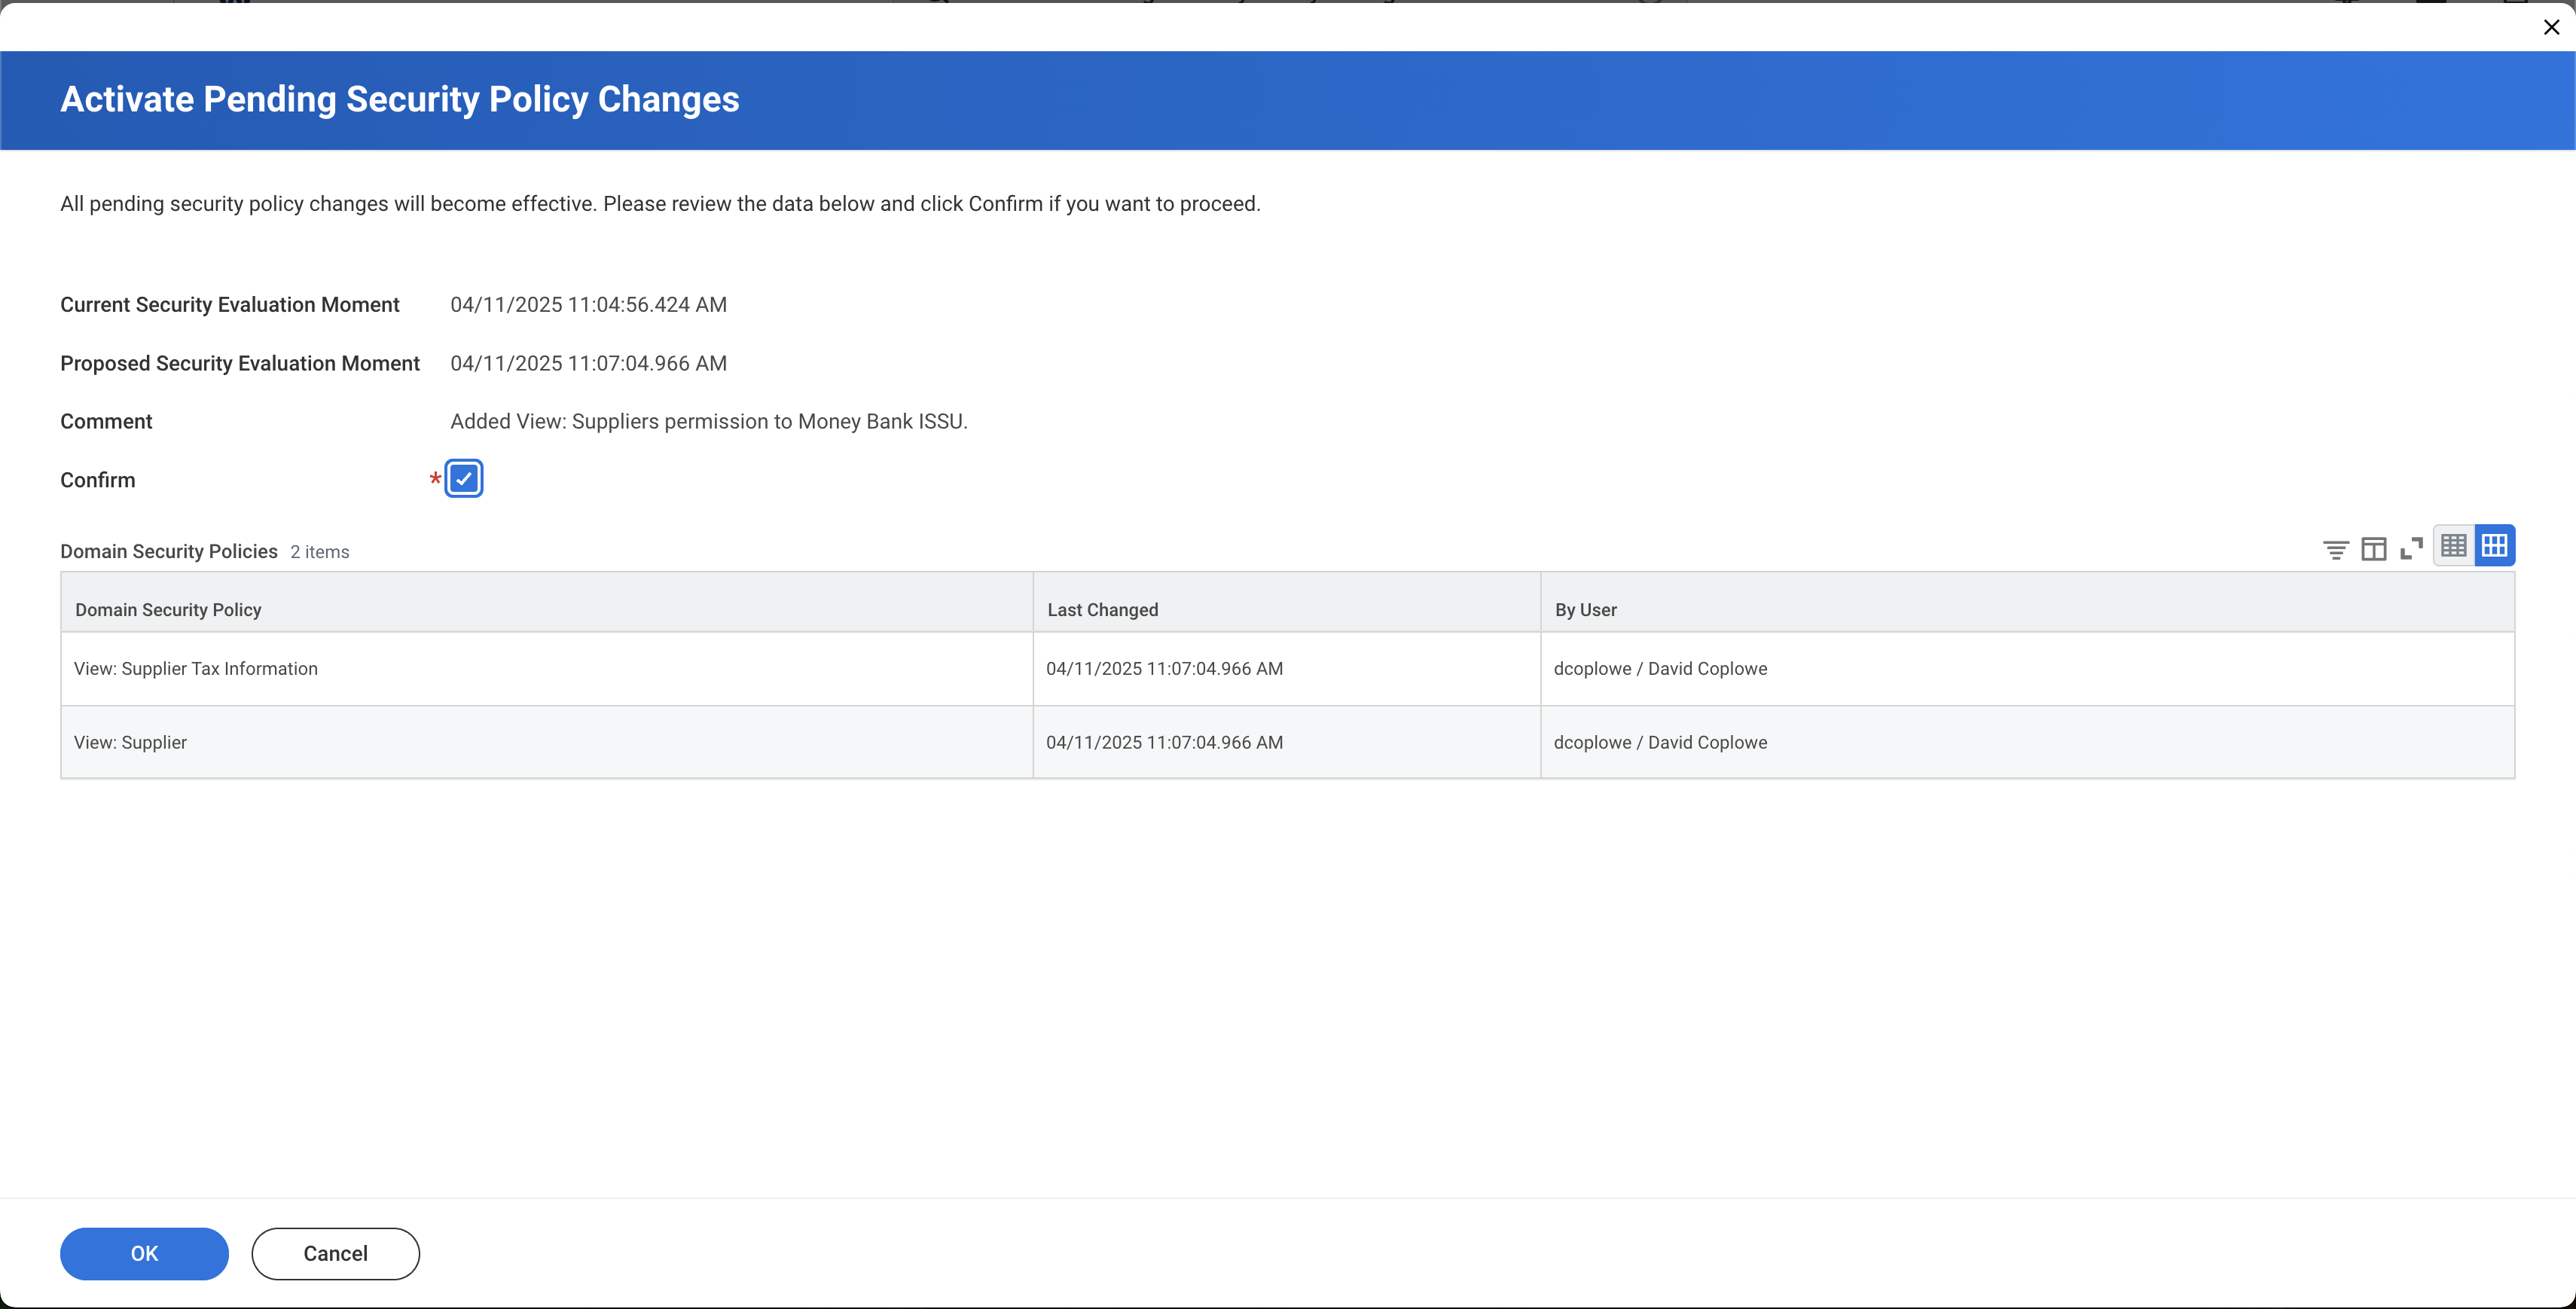
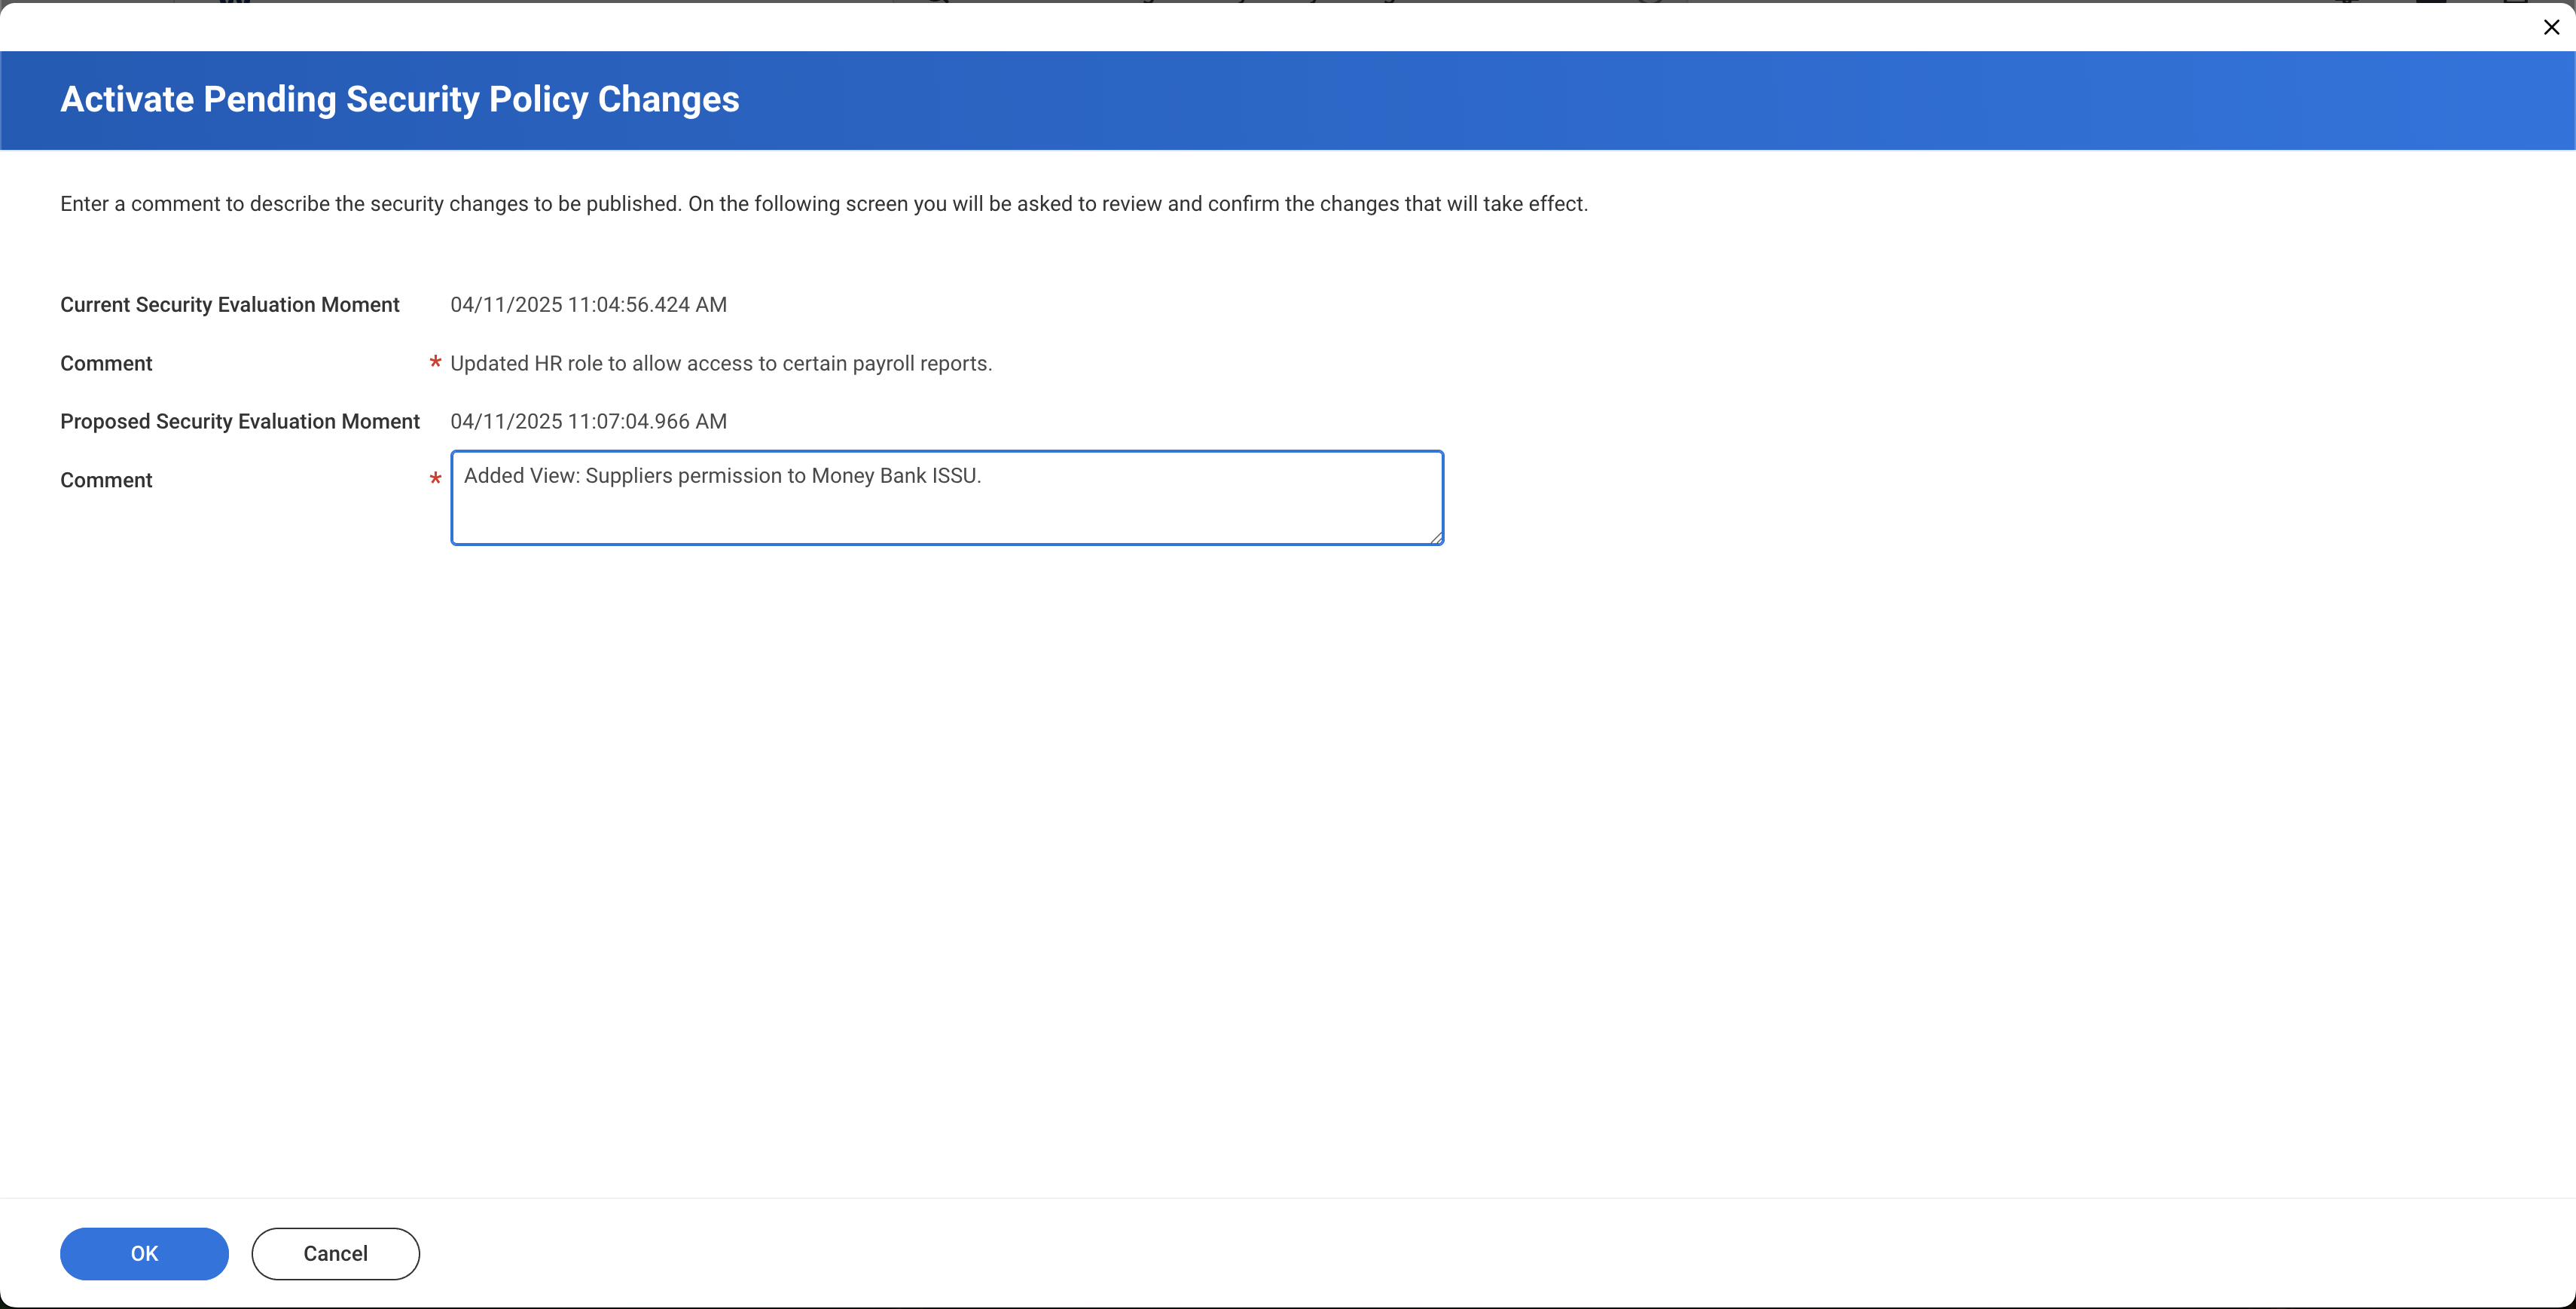
Search for and select the Activate Pending Security Policy Changes task.
-
In the Activate Pending Security Policy Changes dialog, enter a Comment, then click OK.
-
Check the Confirm checkbox, then click OK to activate the policy changes.