Create Security Group
Get help if you have questions or experience issues when creating your Security Group and associated Security Policies in Workday
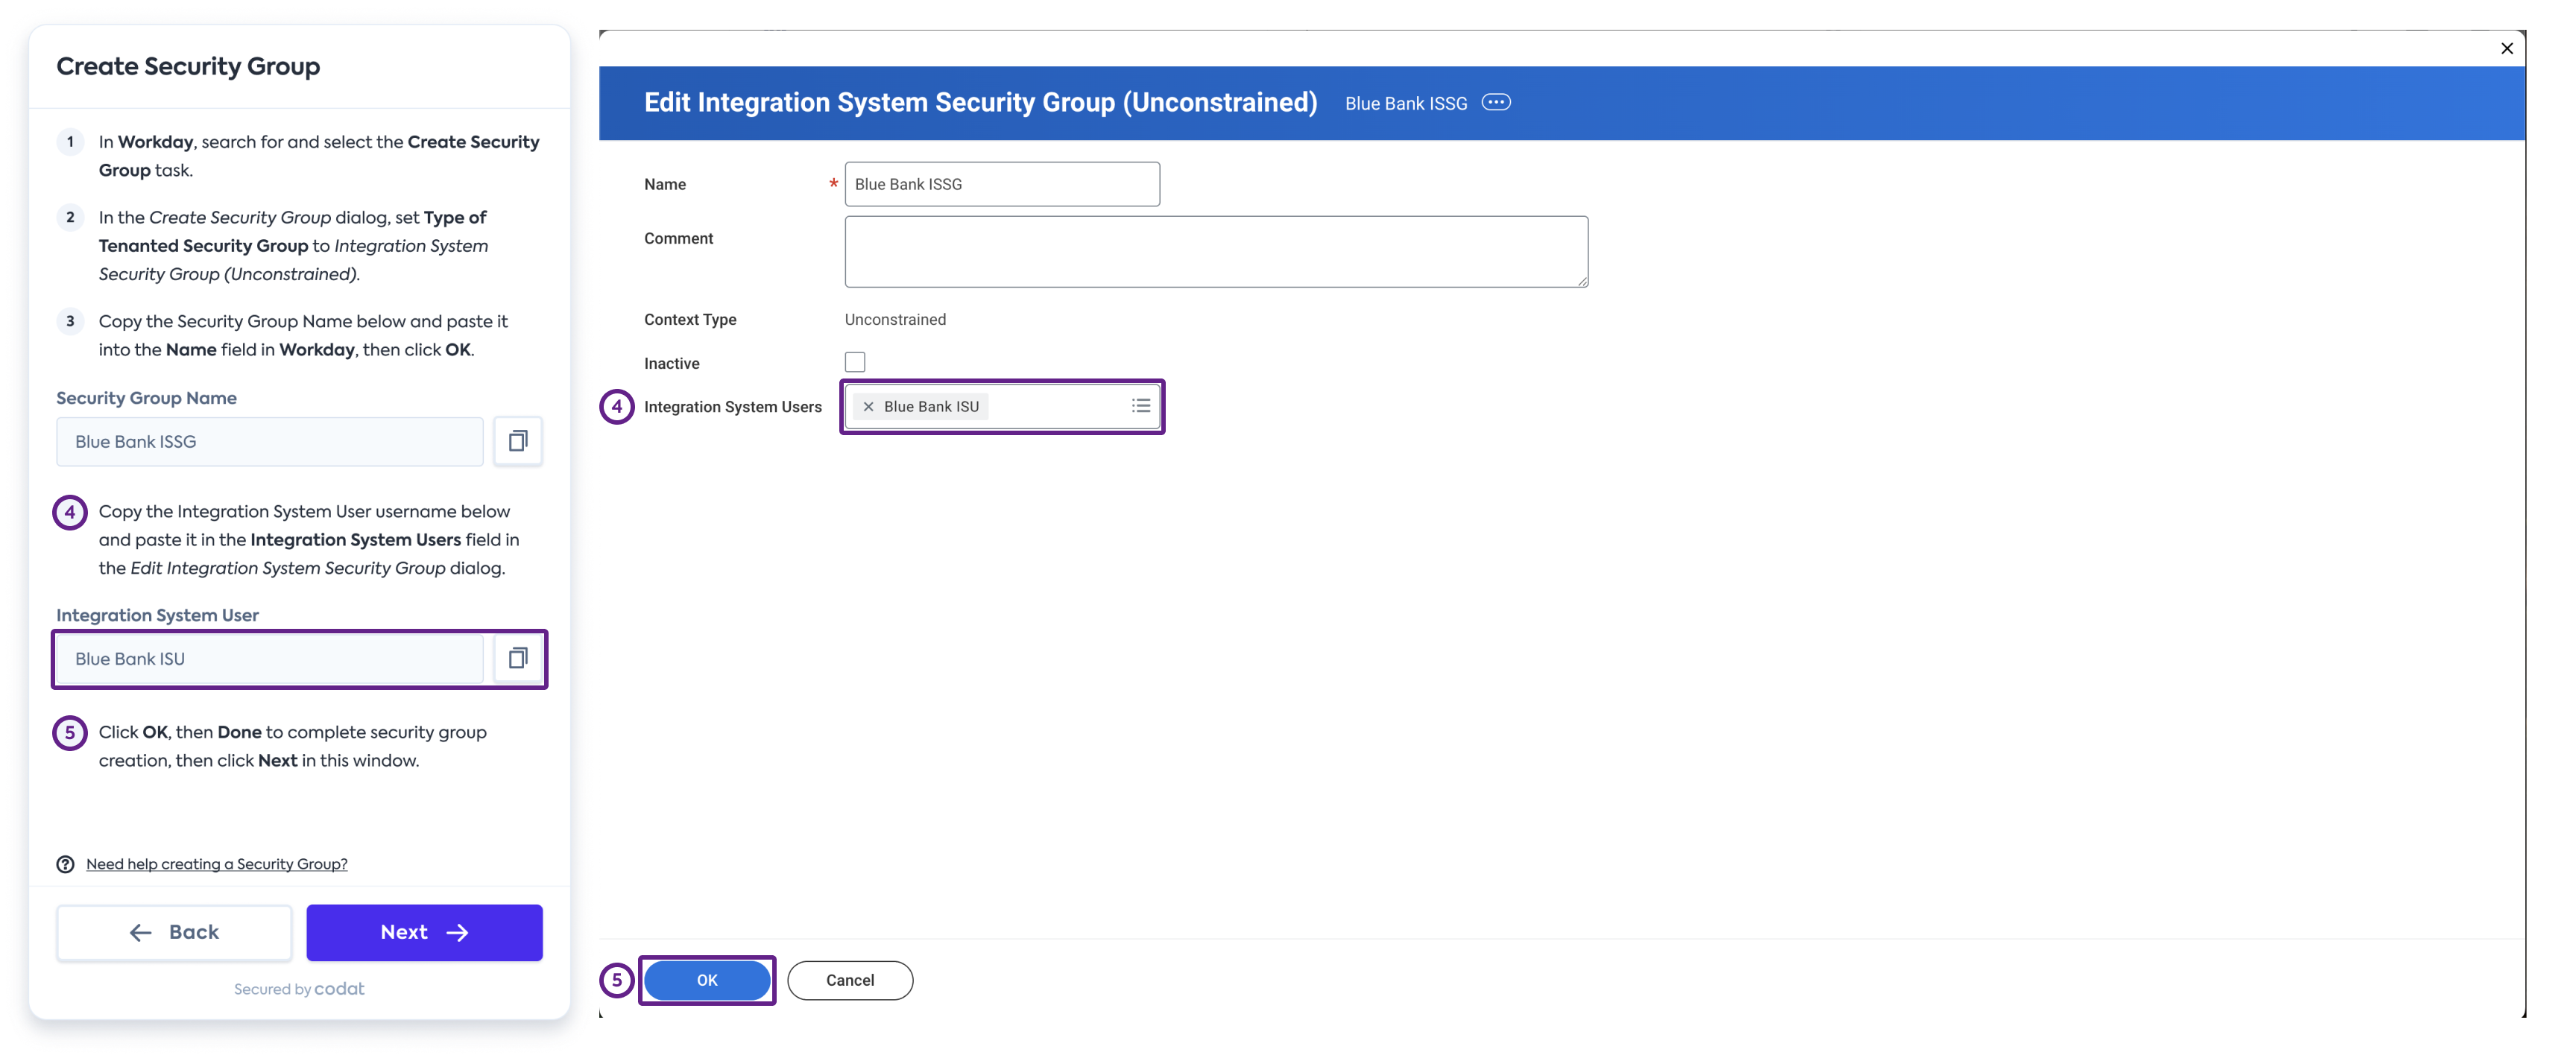
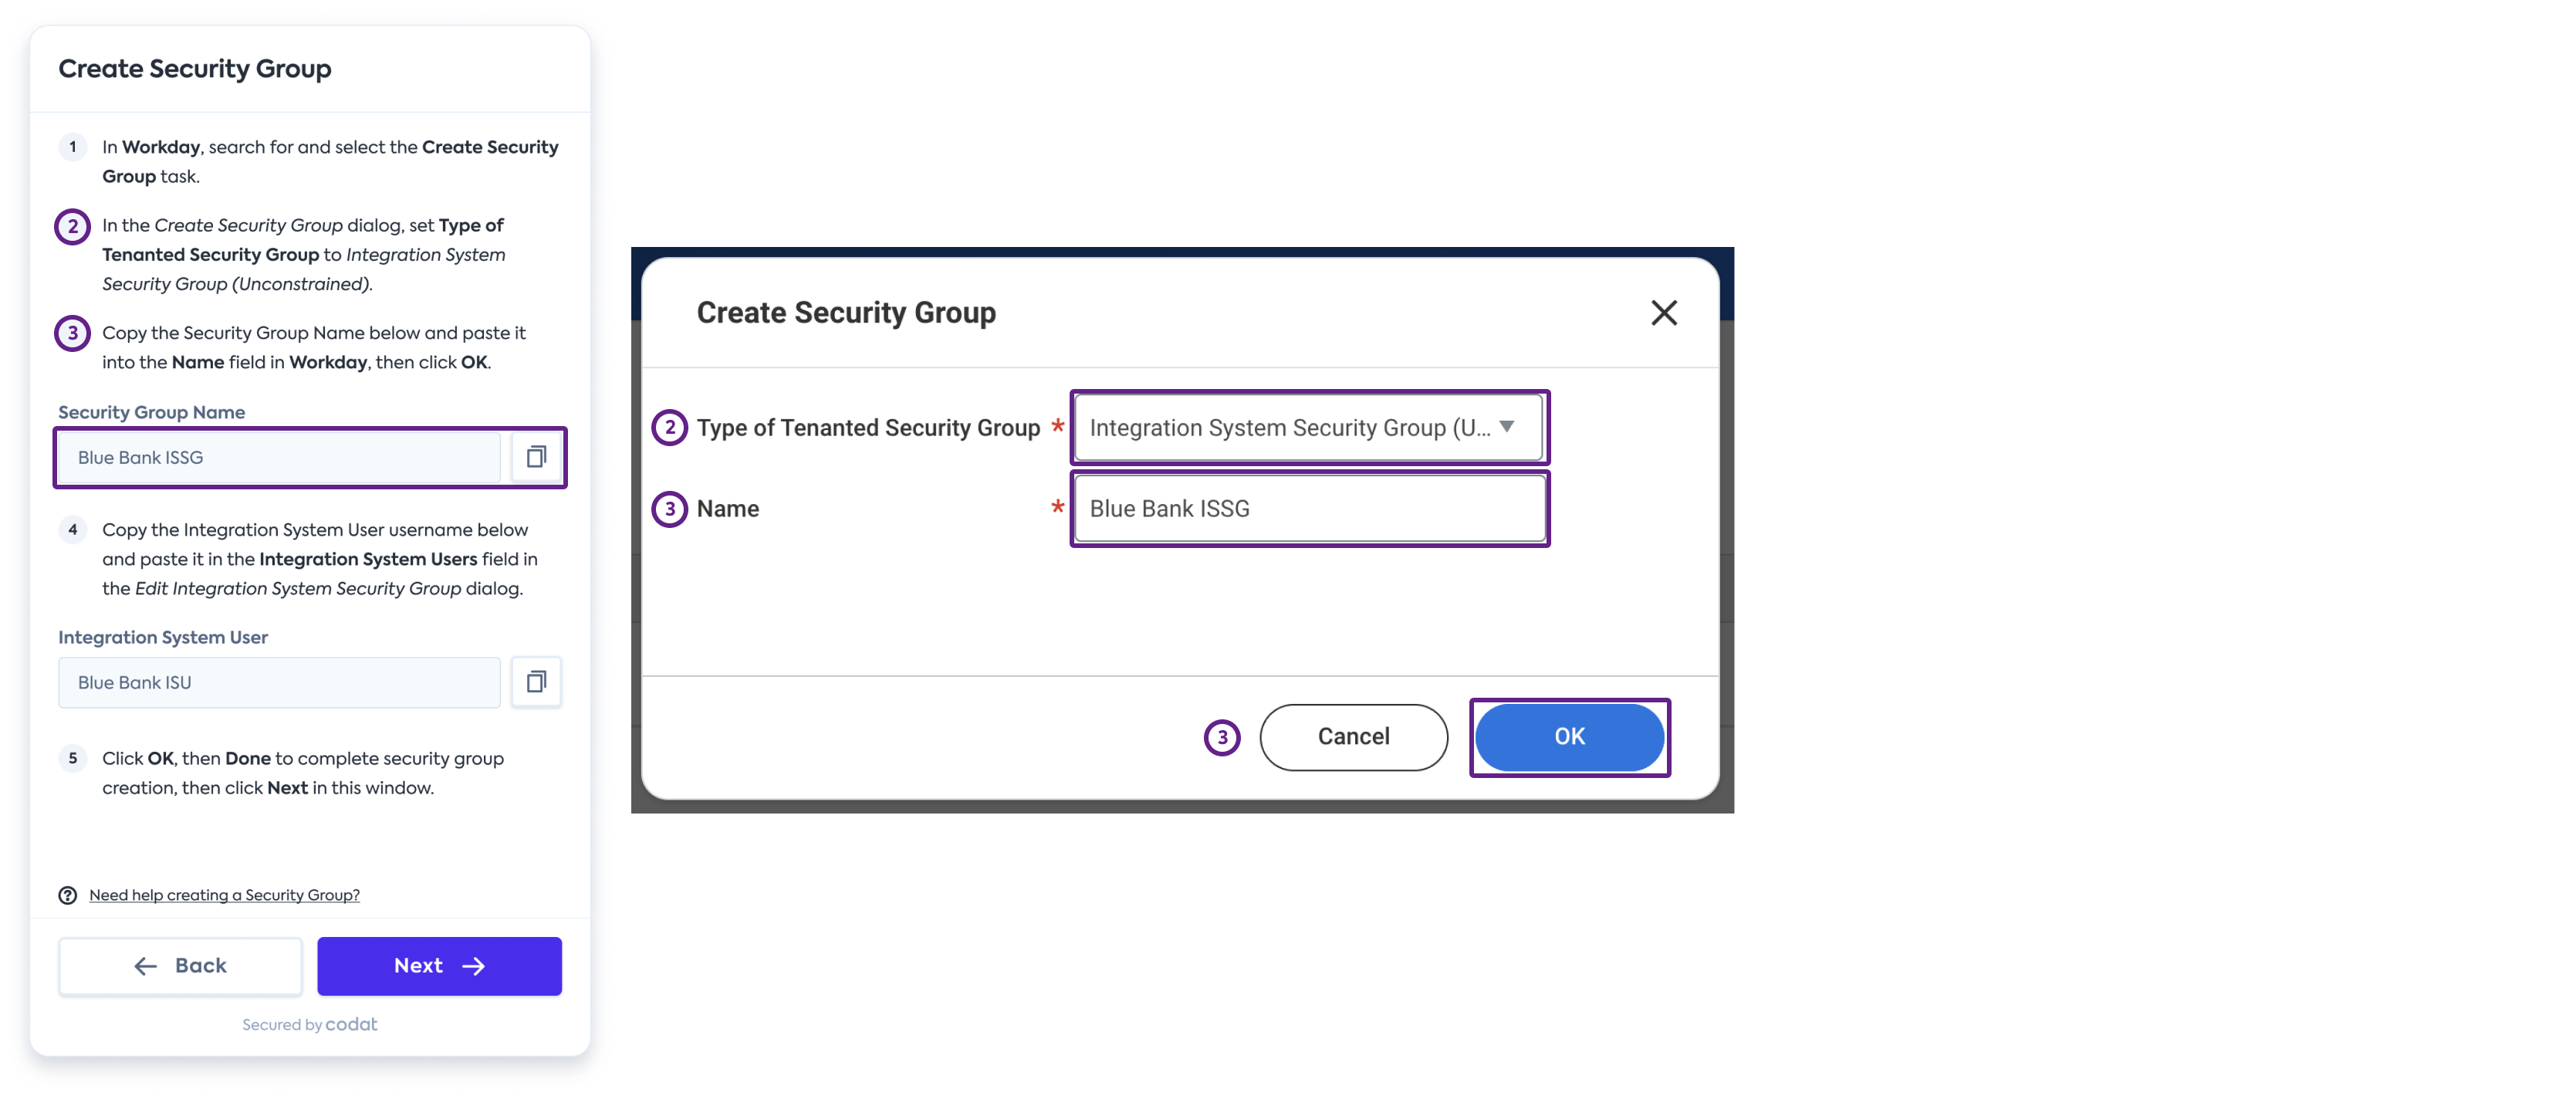
A dedicated Security Group allows you to manage specific access permissions assigned to the Integration System User. To create a Security Group, complete these steps in Workday:
-
Search for and select the Create Security Group task.
-
In the Create Security Group dialog window, set Type of Tenanted Security Group to Integration System Security Group (Unconstrained).
-
Copy the Security Group Name from the connection flow and paste it into the Name field in Workday, then click OK.
-
Copy the Integration System User username from the connection flow and paste it in the Integration System Users field in the Edit Integration System Security Group dialog.
-
Click OK, then Done to complete Security Group creation, and click Next in the connection flow.