Configure and activate Security Group Policies
Get help if you have questions or experience issues when configuring your Security Group and associated Security Policies in Workday
The Integration System User you created needs to have specific permissions to perform necessary actions in Workday, such as retrieving supplier information or processing invoices. To ensure this, you will configure and activate Security Group Policies for this user.
Configure Security Group Policies
To configure Security Group Policies, complete these steps in Workday:
-
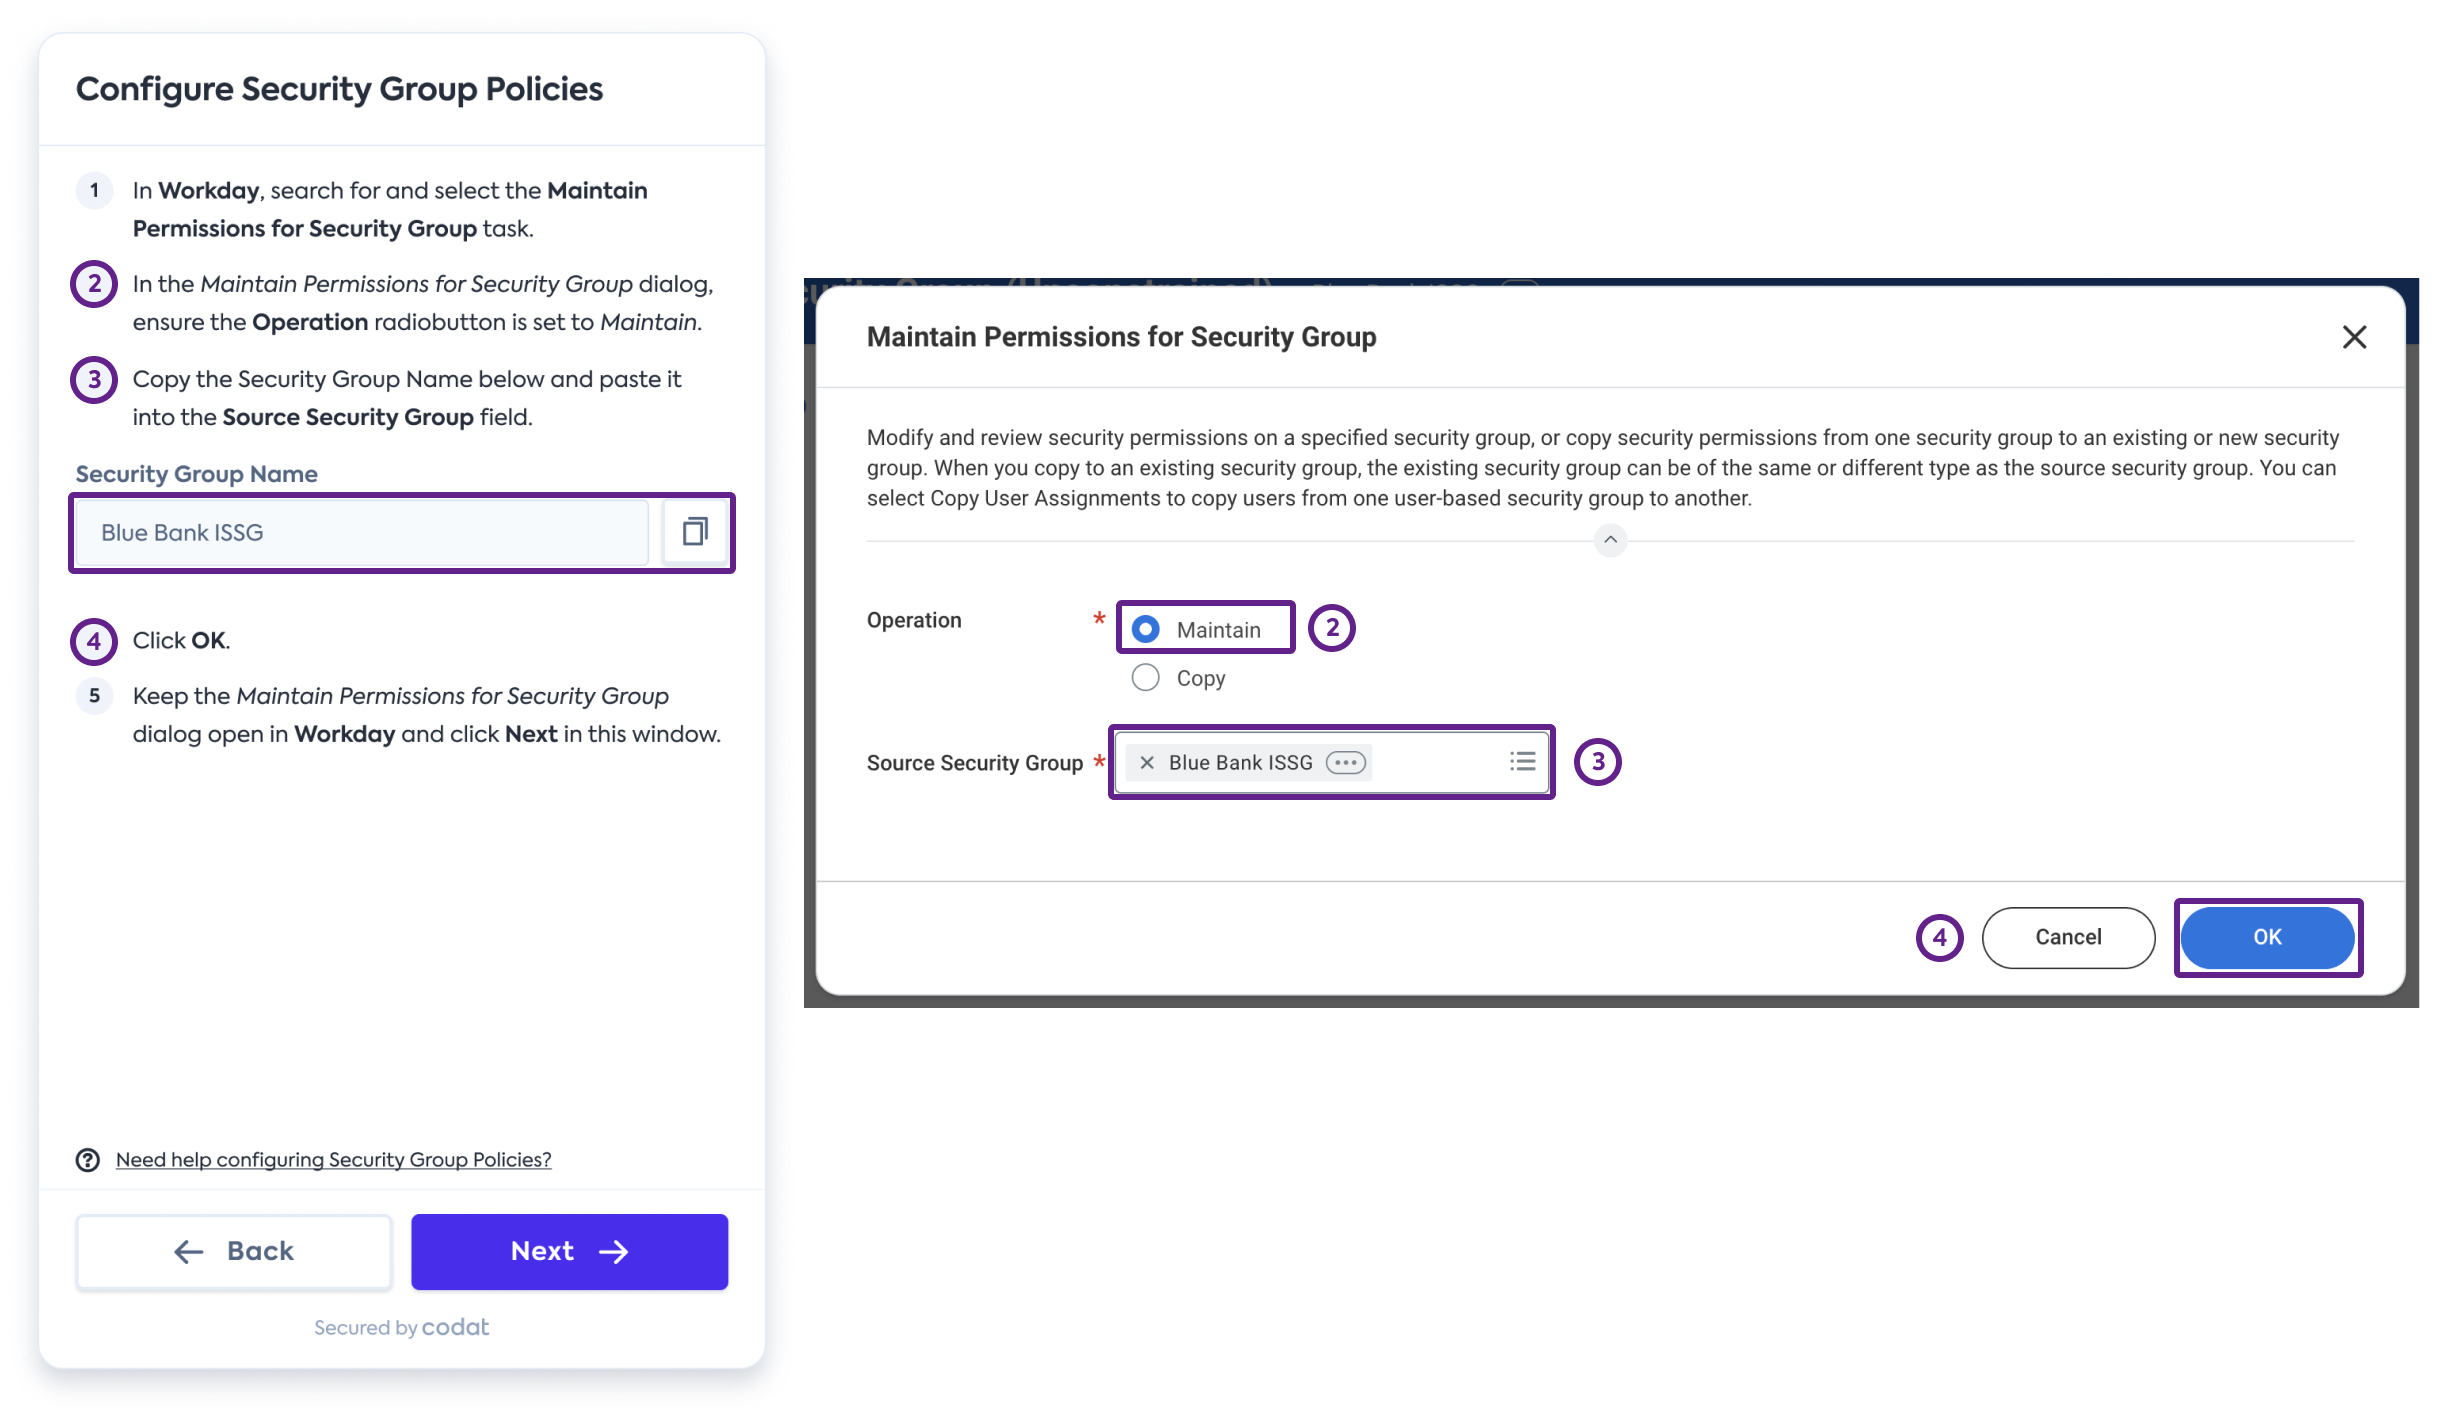
Search for and select the Maintain Permissions for Security Group task.
-
In the Maintain Permissions for Security Group dialog, ensure the Operation radiobutton is set to Maintain.
-
Copy the Security Group Name from the connection flow and paste it into the Source Security Group field.
-
Click OK.
-
Keep the Maintain Permissions for Security Group dialog open in Workday and click Next in the connection flow.
-
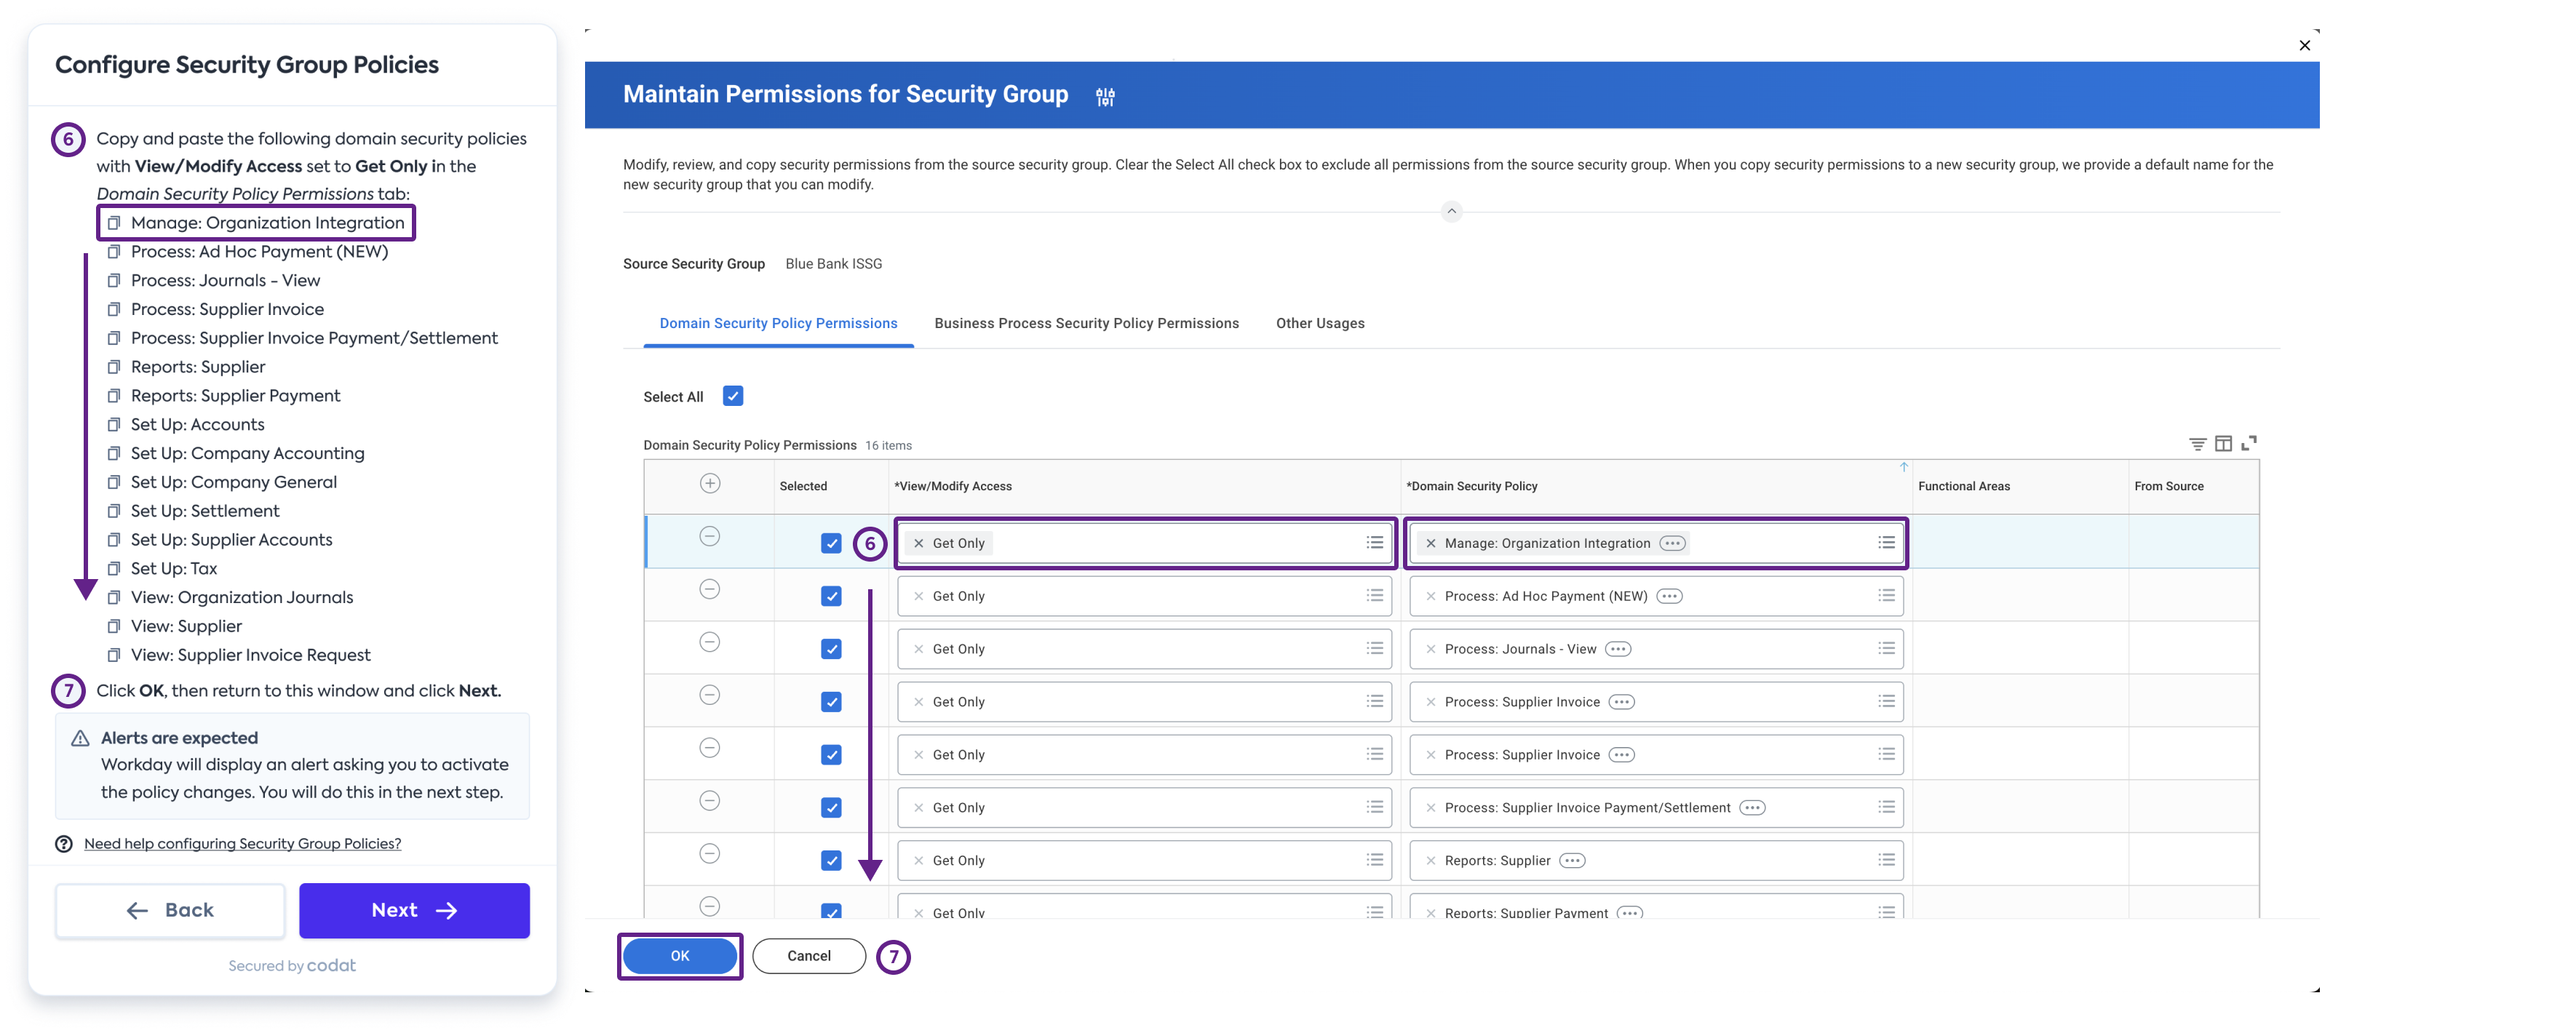
Copy and paste the following domain security policies with View/Modify Access set to Get Only in the Domain Security Policy Permissions tab:
- Manage: Organization Integration
- Process: Ad Hoc Payment (NEW)
- Process: Journals - View
- Process: Supplier Invoice
- Process: Supplier Invoice Payment/Settlement
- Reports: Supplier
- Reports: Supplier Payment
- Set Up: Accounts
- Set Up: Company Accounting
- Set Up: Company General
- Set Up: Settlement
- Set Up: Supplier Accounts
- Set Up: Tax
- View: Organization Journals
- View: Supplier
- View: Supplier Invoice Request
-
Ignore any errors or alerts, click OK, then click Done.
-
Click Next in the connection flow to move to the next step.
Activate Security Policies
Next, you need to activate the changes you made to the Security Group Policies. To do so, follow these steps in Workday:
-
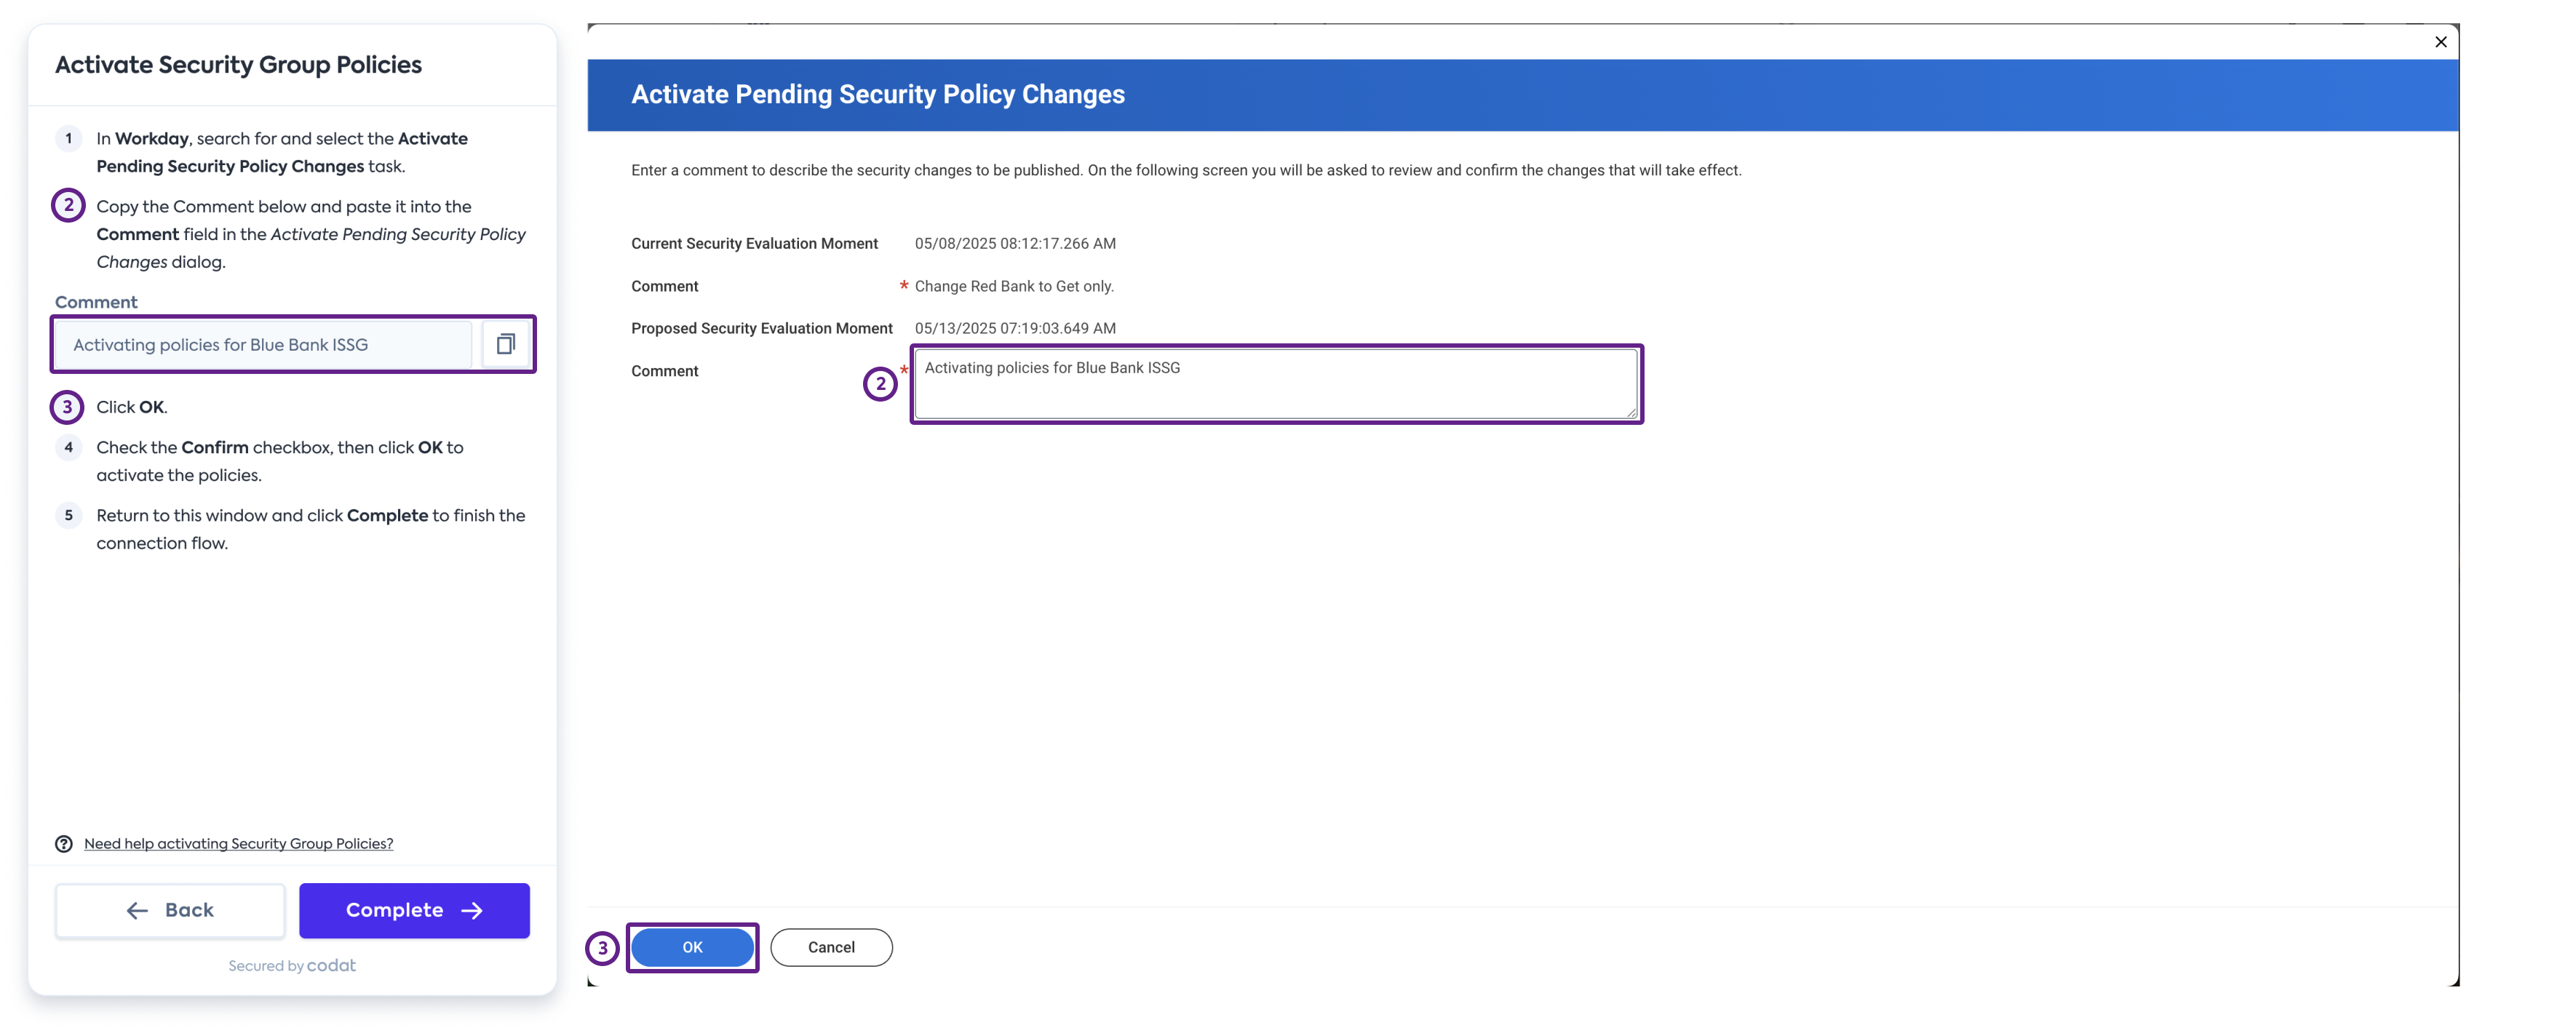
Search for and select the Activate Pending Security Policy Changes task.
-
Copy the Comment from the connection and paste it into the Comment field in the Activate Pending Security Policy Changes dialog, then click OK.
-
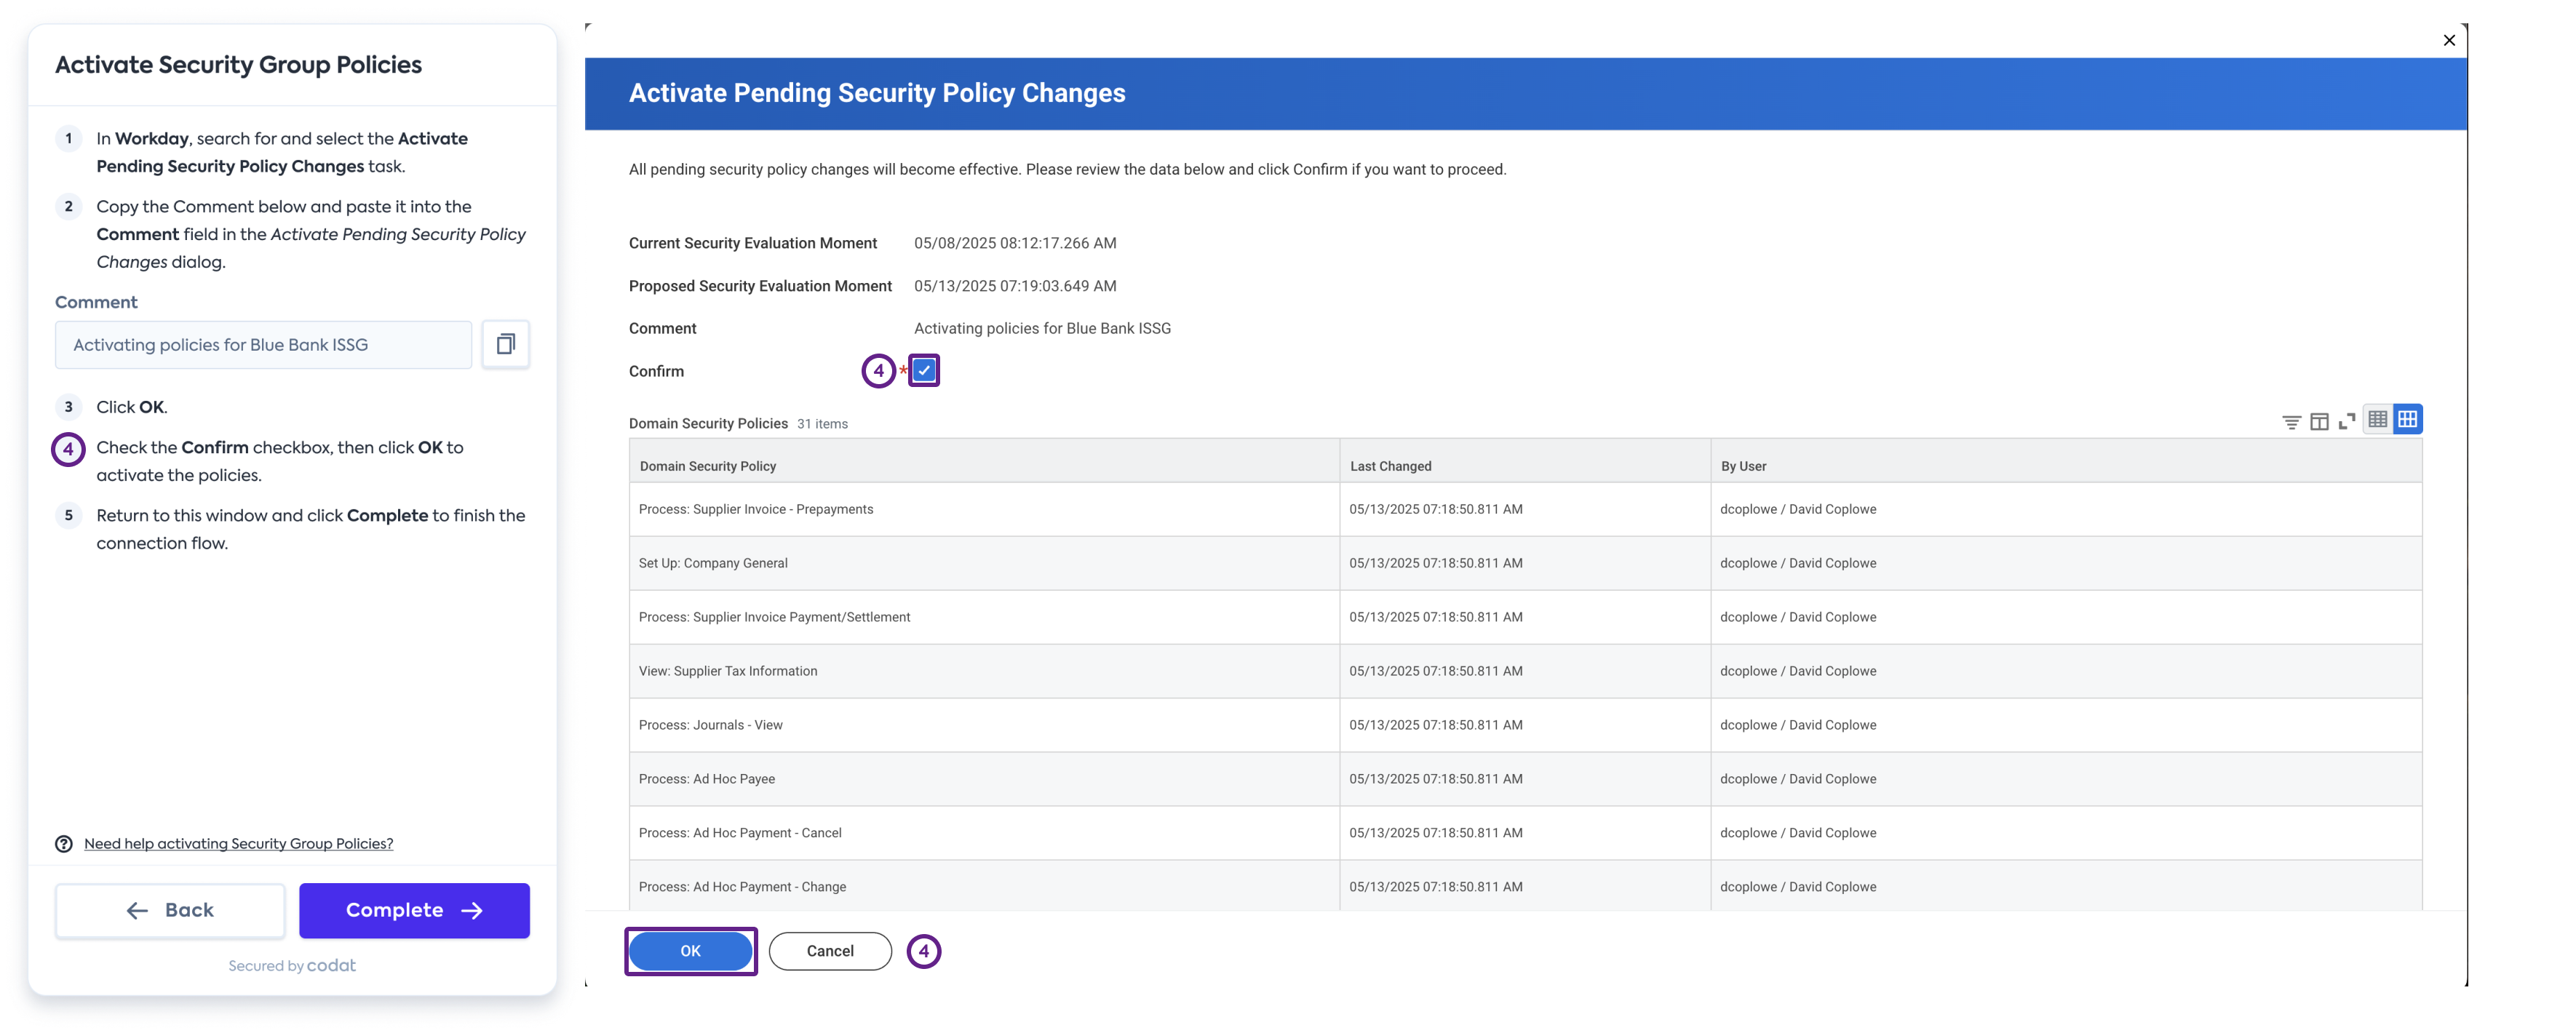
Check the Confirm checkbox, then click OK to activate the policies.
-
Return to the connection flow and click Complete to finish the process. The flow should display a message confirming Workday was successfully connected.
If you see a connection error or experience issues connecting to Workday, check that the required domain security policies are active. To do so, follow our Check Domain Security Policies guide.